Why doesn't the microphone work in Skype?
 Constant improvement of technology makes it possible to provide communication between people living anywhere in the world. Usually the Internet is used for this. There are many different programs for video conferencing, but Skype remains the most popular to this day. Often, many people experience various kinds of problems when setting up this program. In particular, the connected microphone does not work. There are several main reasons why it is not possible to organize communication through this program. This article will discuss the most common ones.
The content of the article
Why doesn't the microphone work on Skype?
Among the most common reasons why Skype “does not see” the microphone are:
- Malfunction of the sound device itself.
- Connection error.
- Incorrect port/socket configuration
- Incorrect system setting.
- Skype setup is incorrect.
Most of these problems can be diagnosed and resolved by the user themselves. To do this, just follow the short instructions for identifying and correcting problems.
Malfunction of the microphone itself
It is possible that the sound device itself may be faulty. To check its performance there are two main ways:
- Open the Sound Recorder program (Start - Accessories) and start recording voices or other sounds. If the recorded sounds are not displayed in the received file, then the equipment is faulty.
- Connect it to another PC. If the same problem is found on it, then the microphone is not working and should be replaced.
Connection error
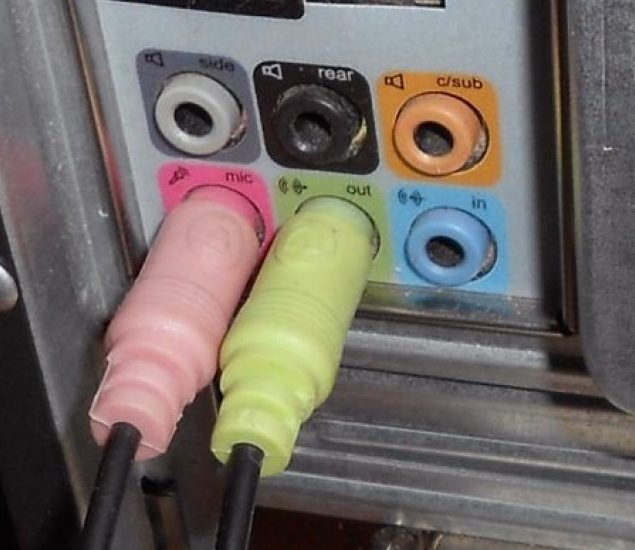
Computers have special 3.5 mm connectors on the back or front panel. There are three of them in total and they are located nearby, so many users risk confusing them when connecting. To avoid mistakes when connecting a microphone, you need to pay attention that the required connector is marked in pink. It is to this that you need to connect the cable from the audio recording device.
Configuring ports/sockets
Sometimes changing the default settings of a sound card can lead to reassignment of sound connectors. To correct this problem, manual adjustment must be made. To do this, the user needs to go to a special menu through “Start” - “Control Panel” - “Sound” - “Hardware” - “Realtek HD”.
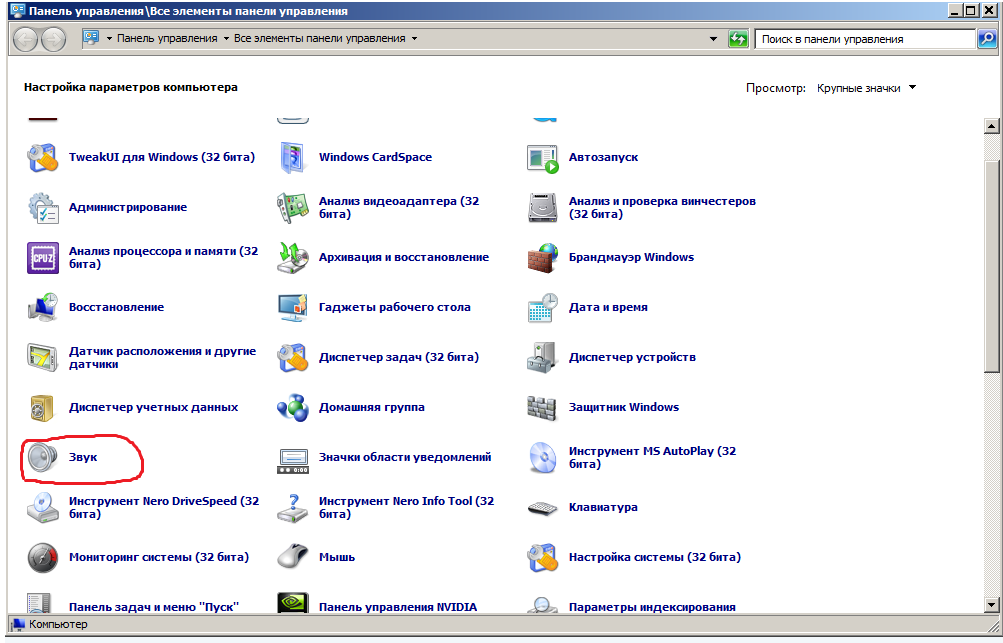
ATTENTION! If another sound card is installed on the PC, then Realtek HD will be replaced by the brand name of the connected component.
In the menu that opens, you need to select the sub-destination of analog inputs. And, having selected the required one, assign it to the microphone.
Incorrect system settings of your computer or laptop
Before you start checking this item, you need to make sure that the microphone is working properly and all connectors are working as they should.
To configure the connected audio device, you need to go to the corresponding menu. This can be done by right-clicking on the speaker image on the quick access panel.Then you need to select the “Playback devices” sub-item. You can also open a similar menu through “Start” - “Control Panel” - “Sound”.
In the window that opens, select the “Record” submenu. All connected recording equipment is displayed here. A working microphone should appear in this list. If the device does not appear, you need to right-click on the empty field and select the sub-item “Show disconnected devices” and “Show disconnected devices”.
On the selected device, you need to right-click and open “Properties”.
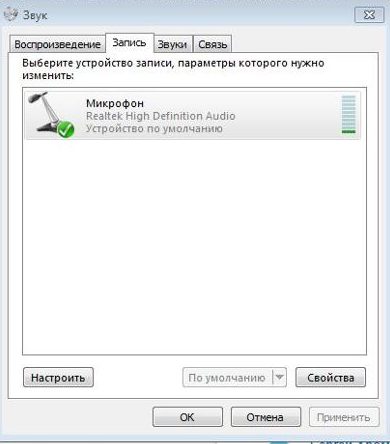
ATTENTION! The serviceability of the connected microphone is indicated by a green check mark next to the device image. If there is a different symbol instead of a checkmark, the device is disconnected or connected incorrectly. If there is no checkmark, you should check it.
In the open menu, you should adjust the volume and gain (maybe this is the problem). You can do this by opening the “Levels” tab.
If these steps do not help, the problem may be related to the drivers.. The user needs to find out the model of the connected device and download the latest updates from the manufacturer’s official website.
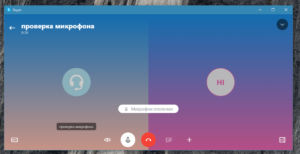
How to set up a microphone in Skype
When the device is working properly and successfully records sound, but the interlocutor cannot hear the user in the Skype application, the problem lies in incorrect program settings on the PC or phone.
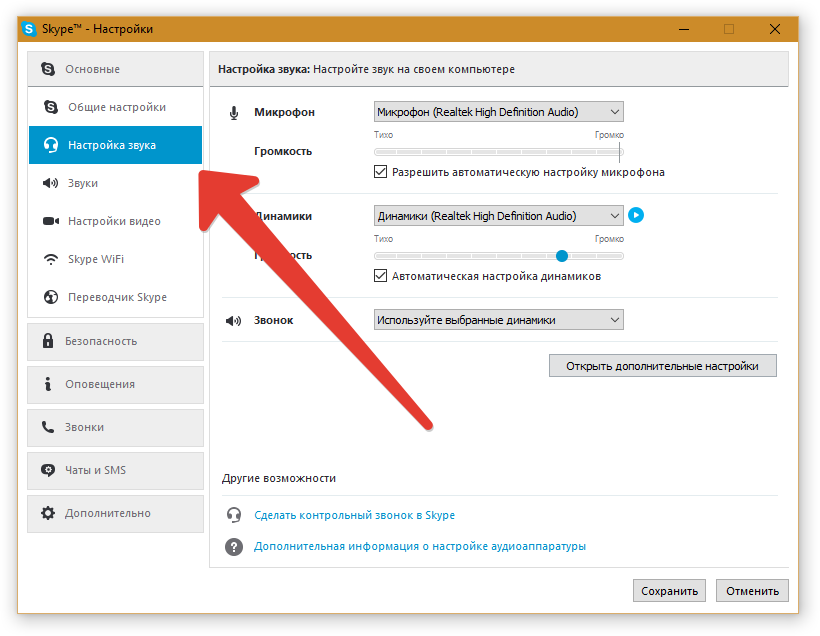
You need to open the application and go to the “Settings” menu, then select the “Sound Settings” sub-item. In the window you need to compare the “Microphone” column. The specified device must match the model of the connected one. By clicking on the name of the microphone, you can open a list that will contain a list of all devices available for connection.Among them, you need to select the necessary equipment and allow access. This way you can turn the microphone on and off.
If the problem is not solved, then with a high degree of probability the problem lies in the computer’s sound card. To check this, just connect another microphone and do the same steps. If the same fault occurs with another device, the problem is hardware in nature.