DIY laminator
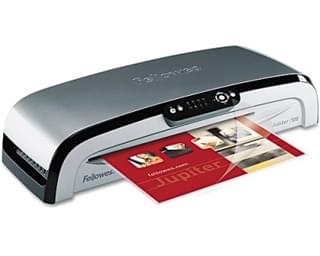
 In everyday life, there is a need to laminate paper from time to time. Very often these can be documents, children's educational tasks, board games, business cards, etc. With frequent use, sheets of paper with important information become unusable. Let's try to figure out how to laminate this or that paper at home, what is required for this and how labor-intensive the process will be.
The content of the article
Materials and tools for making a laminator
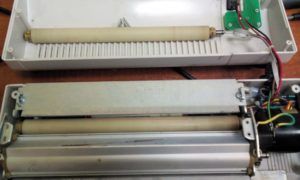
 Making a flatbed or roll laminator with your own hands is a labor-intensive and rather lengthy process. To start it, you need to purchase all the necessary tools and materials. To work you will need the following.
- Profile guides: rails, building profile or square metal pipe.
- The pneumatic system is top.
- Shaft with a diameter of 80 mm.
- Pressure regulator.
- Glass 12 mm thick.
- Static air ionizer (to prevent dust from being attracted to the film).
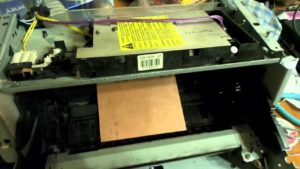
Advice! A faulty printer can be a good basis for making a laminator.
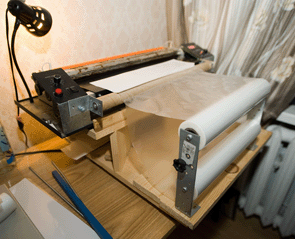
How to make a flatbed laminator
 Let's get started.
- We cut 40 m of pipe, twist it using furniture corners, measure it, and carry out an inspection. Significant load occurs between the shaft, drive and tabletop.
- As a guide We weld a square pipe to the table, and the carriage must ride on bearings. The pressure is regulated by a reducer.
- We choose a tabletop from laminated chipboard or glass, which is much more reliable.
Advice! Due to its heavy weight and high density, glass can be placed on the frame without screwing, while insulating the metal.
- We assemble the frame from a pipe 3000x1300. We twist it into corners; you can use an old table as a stand. For greater reliability, it is best to boil all pipes with argon.
- We make the portal from 80 mm channel, this way it is easier to attach the cylinders.
- We screw the rails under the frame; stoppers should be placed at the ends.
- We fix the shaft. If your shaft is even and smooth (like polished), you can press 3–5 kg/cm². And when there are small irregularities in the material or on the shaft, you can press down up to 8 kg/cm2.
How to turn an iron into a “laminator”
 In cases where the laminator is not needed so often, you can use an iron.
- Let's buy lamination film, A4 format sets are most suitable. A film with a thickness of 75–80 microns is quite suitable.
- Heat the iron to medium temperature, not higher. Since there is a risk that the entire film will bubble.
- We put a sheet of paper in the pocket.
- Slowly, starting from the junction of the film, iron it, expelling the air.
- We repeat the movements on one side, then on the other.
Iron Lamination Tips
The cooled film becomes transparent and gives documents additional strength. To protect yourself and the product, You can put a sheet of white paper between the iron and the film. We cut out the product on a specially designed stationery lining. For this we need a utility knife and a metal ruler. Rounded corners can be trimmed with nail scissors.
Is there an air bubble? If the film is still hot, you can try to gently rub a soft piece of cloth over it, and it will stick. If this method does not help, all that remains is to pierce the bubble with a needle and run the iron over this area again.