How to clean a mouse
 In the modern world, a lot depends on the level of technological development. For the normal functioning of the system and ensuring high performance, it is necessary to acquire advanced developments and technologies. It is perhaps difficult to imagine a person who would not use a computer in his life. If you are roughly familiar with its structure, then you roughly know some of the main components.
One of the indispensable devices is the mouse. It provides fast interaction between the user and the running program. Often, during prolonged use, dirt, dust and various foreign objects accumulate inside the case. In our article we will talk about the proper care of this type of equipment and how to clean it.
The content of the article
How can you clean a computer mouse?
Thanks to the emergence of new developments, manufacturers are improving their products, creating a huge range. Therefore, different models and versions of devices appear. Depending on which option you use, the tools needed for a complete clean will vary. In general, you can use the following materials.
- Cotton wool or gauze swab.
- Toothpicks or pointed matches.
- Special cleaning products.
- Napkins.
- Toothbrush for heavily soiled areas.
- Soap solution for washing individual parts.
All this can be easily found at home, the process will not take much time and money. If you have everything prepared, you can start cleaning the mouse body.
IMPORTANT! If you want to do a deep cleaning, you should disassemble the case. You can do without disassembling, but in this case you will need very thin sticks to get inside under the lid.
How to disassemble a computer mouse?
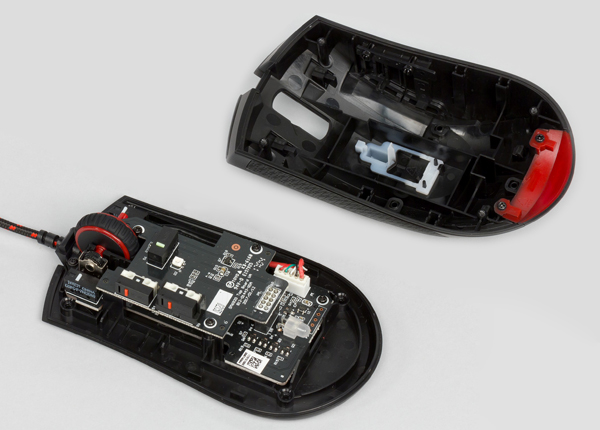
 First, you should read the instructions and assembly diagram of the device (if available), and also stock up on the necessary tools. To do this we need a screwdriver and a small mat for laying the parts. The action plan will look like this:
- Disconnect the equipment from power. Unplug the cord or remove the batteries (in the case of a wireless system).
- Turn the mouse upside down.
- Unscrew all the screws one by one.
- After this, divide the structure by disconnecting the bottom.
- Inside, among the many elements, disconnect the wheel and microcircuits. Be careful not to damage them or compromise their integrity.
IMPORTANT! There are many small parts outside and inside the mouse design. Place them carefully on the mat during disassembly. It is best to count the number of constituent elements, and also remember the order of assembly.
What to do if water gets inside?
 Sometimes it happens that liquid gets inside the case. This is dangerous because it can damage the electronics and circuit boards located there. This will have a detrimental effect on operation and may lead to equipment failure. If you accidentally spill water on your mouse or drop it into liquid, follow the instructions below:
- First, turn off the power to the equipment. Don't shake out the water, it will only make it worse.
- Disassemble the housing as described above.
- Lay out all the elements on the stage.
- Remove moisture with dry cotton wool, a napkin or a soft cloth.
- You can gently dry it with a hairdryer. It is important to completely remove any trapped water.
- Reassemble the device and try connecting it. Everything should work.
ADVICE! If you notice a burning smell or an electrical flash, the wires are most likely burnt out. If the mouse is expensive, you can try to have it repaired by a specialist. In the case of a budget option, it will be more profitable to purchase a new model.
How to properly clean a computer mouse
 If you want to remove accumulated dust, you can use one of the possible methods. If cleaning was carried out recently, it will be enough to simply go through the main connectors with a brush without disassembling the structure.
- Disconnect the mouse from the power source.
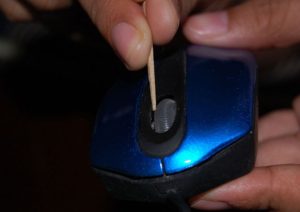
- Clean the body of the product with a brush and cotton wool with alcohol.
- Make some toothpicks with cotton wool.
- Use them to clean all recesses and connectors.
If a deep clean is needed, you will need to look inside for a thorough diagnosis and cleaning. This is quite easy to do.
- Disassemble the structure as described in the article.
- First, remove coarse dust and dirt particles.
- Wash the parts with a cotton swab treated with alcohol.
- Use a brush and toothpicks to remove stubborn dirt.
- After this, dry all the elements and assemble the device.
IMPORTANT! It is much easier to carry out preventive treatment without starting the equipment. However, it is worth periodically carrying out comprehensive cleaning.

