How to tape a speaker on a column
The appearance of rattling or wheezing in the column may indicate damage to the suspension, diffuser, centering washer or leads. Today you can find both supporters of repairing a deformed speaker, and opponents who would prefer to buy a new speaker.
The content of the article
Is it possible to glue a speaker onto a column?
You can make repairs yourself if you have the time and desire to do something with your own hands, without going to a workshop. An undemanding listener will not notice a difference in the sound before and after speaker repair if it is carried out carefully and carefully.
How to glue the speaker
For repairs, you can use different types of modern glue, which are produced for specific work.
Colorless one-component SL adhesive is suitable for gluing the diffuser. Initial setting occurs within 10-20 minutes, complete drying within a day. Features high adhesive strength. Available in 100 ml plastic bottles.
Partially damaged rubber, fabric or polypropylene suspension can be restored using silicone sealant. Initial setting occurs within 30 minutes, final drying - 24 hours. Silicone maintains the elasticity of the suspensions, allowing the diffuser to move freely.
The voice coil turns are glued well with DKD epoxy glue.The time for complete polymerization is 3 hours, provided that you use a hair dryer and heat the air stream to 120°C. The adhesive is suitable for working with organic materials used to make voice coils. Available in plastic bottles of 50 ml.
Akfix705 glue was developed for speaker assembly. Available complete with an aerosol activator. Bonding strength is achieved in a few minutes. Recommended for gluing rubber and plastic. Available in a set: 200 ml activator + 50 g glue.
Reference! Adhesives with an aerosol activator have good viscosity. When working, they do not spread or drip.
Interbond adhesive is also suitable for assembling speaker components, especially bonding the coil and flexible leads. Available as a kit: 100 ml activator + 25 g glue.
How to glue a speaker on a column: step by step
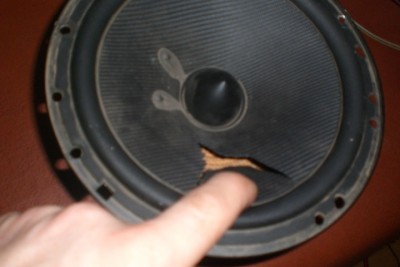
Most often, partial or complete damage to the suspension occurs. Repairing a speaker with replacing a damaged suspension with a new one in 6 steps:
- Remove the damaged suspension. It can be easily removed using a flat screwdriver if the gluing areas with the diffuser are preheated with hot air.
- Clean the diffuser and body from any adhesive residue using a solvent. The operation can be repeated twice. Contact of solvent with skin may cause irritation. Work must be carried out wearing rubber gloves.
- Install the diffuser in the center so that it does not come into contact with the coil.
- Apply SL glue with a brush in a thin layer (no more than 3 mm) along the contour of the diffuser and suspension.
- Attach the new suspension to the diffuser, press the surfaces to be glued, wait 10-20 minutes until initial setting.
- After 24 hours, assemble the speaker and test it.
Repairing a partially damaged hanger without excavation in 6 steps:
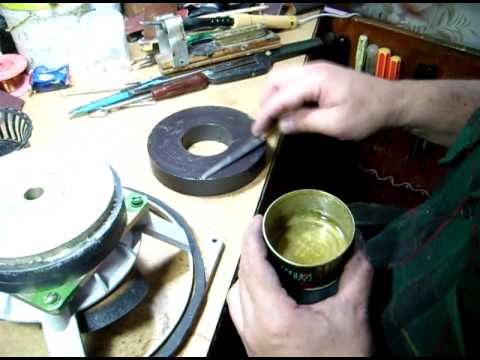
- Remove the speaker from the housing.
- Clean from dust and dirt.
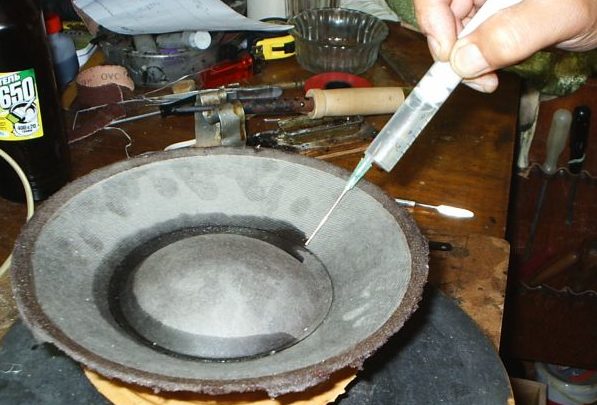
- Using a brush, carefully apply silicone sealant with light movements to the remaining part of the rubber suspension, supporting from below those places where the rubber has burst. Leave for 30 minutes to set.
- Cut pieces from thick tarpaulin fabric in the form of small squares, which will be used to seal the areas with the crumbled pendant. Apply silicone to the squares and gluing points on the diffuser and diffuser holder where they will be glued. Apply a layer of silicone on top of the glued squares. Leave for 30 minutes.
- Apply another layer of silicone in a dense layer along the contour of the restored suspension and leave for 24 hours.
- Put the speaker in place in the case and test it.
You can seal the speaker yourself, however, in this case, you must follow all the recommendations.