How to make a speaker with your own hands
Many people want to listen to music on quality devices. But, as a rule, such devices are accompanied by a high price and not everyone can purchase them. Therefore, an excellent option may be to create a wireless speaker with your own hands using improvised materials. This article discusses instructions and tips for creating this product.
The content of the article
We select materials and tools to create a speaker with your own hands
 To complete it, you need to decide what it will be made of. You can make a case from the following materials:
- Tree;
- Plastic;
- Metal;
- Cardboard.
Once you have decided on the base of the product, you need to select the necessary tools, such as:
- regular jigsaw or jigsaw,
- nails or glue for fastening,
- sandpaper,
- amplifier,
- switch,
- wires,
- speakers,
- soldering iron,
- solder.
Don't forget about the internal components. You will need:
- amplifier,
- switch,
- USB power port,
- connecting wires,
- soldering iron,
- Bluetooth board with instructions.
Making a drawing for the column
 Drawing a drawing is one of the main steps in creating an audio device. It shows the components of the column and indicates the process of connecting them. It also indicates the dimensions of the elements and marks the holes for the cutouts.
Make a list of the necessary parts that make up the device. This will help you in orientation and in the clear implementation of the project.
After completing these steps, you should draw a drawing on paper that will clearly and clearly understand the process of assembling the column at home. On the drawing, draw the main sides with the dimensions of each side, mark the place for the cutout for the speaker and power connector, indicating their immediate dimensions. Mark the hole for the cutout for the switch. Next, draw a diagram with the connection of the internal elements of the device.
Step-by-step instructions for assembling the column

- Before you start assembling a homemade floor-standing speaker, carefully study the drawing and calculations you made. Pay attention to all the nuances and keep them in mind so that you constantly remember them. Then put the drawing in a visible place, but so that it does not bother you.
- Next, select a flat and smooth surface. Remove all unnecessary items from it. Before starting work, follow basic safety rules. Prepare all protective equipment so that you have them at hand. Use a pencil to draw the sides of the speaker cabinet on a piece of plywood.
- Before cutting material, wear special safety glasses and gloves. Be extremely careful not to suffer mechanical damage. Using a jigsaw or regular jigsaw, cut out the top, bottom, and sides of the device.
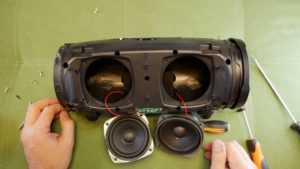
- Sand the ends of the resulting elements with sandpaper so that they are smooth and free of irregularities. Then mark the hole for the speaker, USB connector and switch on the front side. Cut it out using a jigsaw. Next, insert the speaker into the hole and secure it with glue.
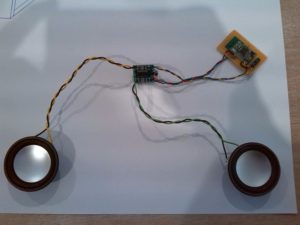
- Install the chip on the back wall of the speaker using glue. Then, according to the instructions on the board, solder the speaker and amplifier wires to the chip. After this, you should install the switch and USB connector into the pre-prepared holes and secure them with an adhesive gun.
- Connect the switch and power connector wires to the chip using the instructions. It is worth noting that when working with electricity you need to be extremely careful. Wear rubber gloves to protect yourself from electric shock. After that, connect all sides of the body using nails or a glue gun. Leave for a while to allow the glue to strengthen.
Testing the resulting column
Once all the assembly elements are completed, it is necessary to test the resulting result.
- To begin, connect the active device to power using a connector and a standard cable with an adapter. Switch the switch slider to the active position.
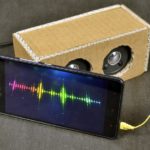
- The speaker should turn on and activate the Bluetooth module. Turn on Bluetooth on your smartphone and search for devices. After the smartphone has found the device, connect it.
- Your speaker and phone must complete the synchronization process. Next, go to the music application on your phone and turn on any audio recording. If you did everything correctly, the speaker should play the required song.
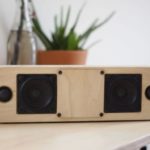
- Once you have the finished result, you can decorate your homemade device in various ways. Paint the body in different colors. This will make the design more vibrant and colorful. You can also use an LED strip, which will give the speaker a special bright look.This design is especially good to use in a room with dim light. There the column will sparkle with new colors and will look quite impressive.
Follow the advice in this article to get high-quality results for your project. Please pay attention to following safety rules to protect yourself from various damages. It is worth noting that after manufacturing it is necessary to maintain the good condition of the speaker and handle this device carefully.