How to set up a keyboard on a Windows 7 computer
Before customizing the keyboard “for yourself,” the user should carefully study the techniques used for this purpose. Only after this he has the right to count on full use of all its functionality and increased typing speed.
The content of the article
What are the configuration methods?
After the device for inputting printed characters is connected, you should configure it in such a way that working with a computer or laptop is as convenient as possible.

Among the well-known variants of this procedure are the following:
- Configure basic parameters of the connected device.
- Setting language standards.
- Select a keyboard shortcut to switch the language layout.
Let's look at each of these components in more detail.
Basic setup
Basic settings for Windows 7 involve setting the basic parameters of the keyboard as an input device. The procedure is as follows:
- First, the “Control Panel” is called up.
- Once in it, you should install “Large icons”, and then go to the “Keyboard” section.
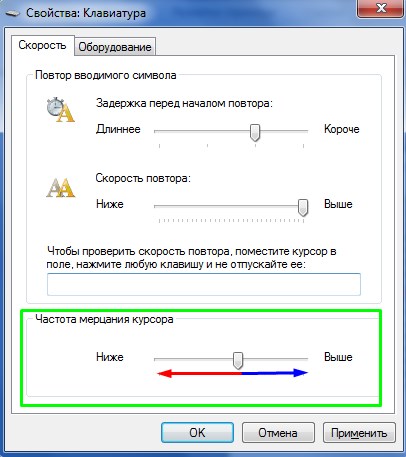
- After clicking the button with the mouse, the “Properties” window should open with the “Speed” tabs and next to it – “Hardware” (photo on the left).
- When you switch to the first of them, several slider positions will appear, one of which is responsible for the delay before repetition, and the second for the permissible speed of entering repeated characters.
With their help, the most suitable parameter values for operation are selected. You can check the correctness of their adjustment in the line below.
Note! An acceptable frequency of cursor flickering is also set here.
The “Hardware” tab displays all devices of this type. By clicking on the “Properties” insert, you can get comprehensive information about each of them, namely (photo on the right):
- View its status (what and how it works).
- Get the necessary information about the driver and decide whether it is worth removing it for the purpose of updating.
- Select power settings, that is, indicate that you can wake the PC from sleep mode using the keyboard.
The last option is present only in some versions of Windows 7, but it is not decisive for the operation of the peripheral device.
Regions and Languages
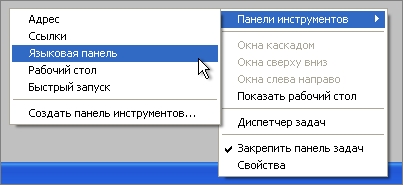
To correctly interpret the characters entered from the keyboard, it is important to correctly configure its layout, the selection icons of which are displayed in the notification panel. To access the corresponding menu, you will need to perform the following operations:
- Call the context menu of the language bar and select “Options”.
- When the “Regional and Language” window appears, click on the “General” tab (photo on the left).
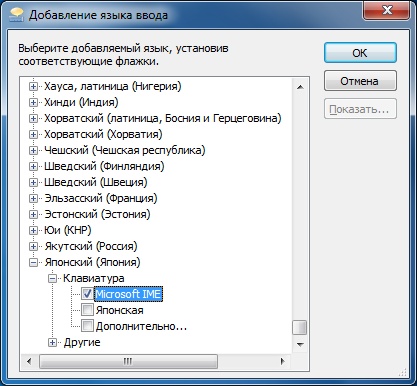
- Next, you should select one of the languages that will be considered the main one by default (it is installed automatically when you start the PC).
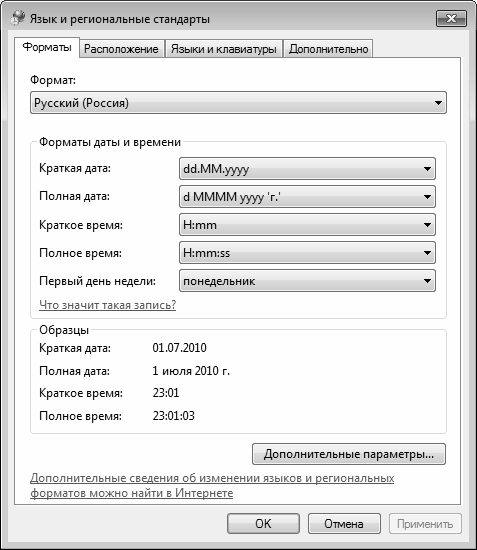
Additional Information! If there is no language bar, you can go to the “General” tab through “Regional and Language Standards”.
After this, you need to go to the “Language Bar” tab and pin it to the tray. To assign a keyboard shortcut that will change the layout, you will need to select the “Switch keyboard” tab (next to “General”). In it you need to select a convenient combination, and then click on the “Change” field.
How to set up a keyboard on Windows 7: step by step
A typical method for setting up a keyboard for Windows 7 includes the following operations:
- First, the user adjusts the character input speed and changes the repeat delay according to the algorithm already discussed earlier.
Important! For novice users (beginners), it is advisable to select the value of the second of these parameters as large as possible.
- Over time, when you gain some experience with the keyboard, the repeat delay can be reduced.
- At the next step of the setup operations, you need to select the basic layout.
- The default language after loading the OS should be displayed in the corresponding panel located next to the tray.
- By opening its context menu, you can configure locale standards in a manner convenient for each individual user.
Particular attention should be paid to setting up automatic layout switching, the need for which most often arises when you have to work with two languages at once. For these purposes, a special application called “punto switcher” is most suitable, the installation of which is also classified as setup procedures.
The installed utility provides automatic change of layout, which is selected by tracking the sequence of pressing individual keys. The user in this situation does not participate in any way in its change.Settings when working in Windows 7 also include troubleshooting problems that arise.
Troubleshooting
The main technical problem areas include:
- The system cannot “detect” this keyboard model.
- The lights on the display do not light up, indicating normal operating conditions.
- The batteries are discharged (for wireless models).
To troubleshoot these problems, you will need to check that the device is connected correctly to the PC and that the conductors through which it is connected to the USB port are in good condition.
Note! The wires should not have clearly visible damage in the form of sharp breaks or cuts.
In wireless samples of products of this class, if problems arise, the first thing to do is reset the “dead” batteries.
If the setup is carried out when connecting a keyboard with non-standard functionality, Windows 7 may simply not recognize it. Most often this is due to the fact that the system does not have a driver suitable for this device. In this case, you will need to download it from the disk supplied with the keyboard or find the appropriate software on the Internet. It is usually posted on the official website of the manufacturer of this model.