How to clean your camera sensor yourself
Cleaning the camera matrix is a very simple and painless process if you entrust it to professionals: you just need to give the camera to the master, and after a few hours everything is ready and it’s time to say goodbye to the money. But is there anything they do in the workshop that cannot be done at home? No. The camera sensor can be cleaned without much difficulty by yourself. True, improvised means cannot be used in this matter.
The content of the article
Automatic matrix cleaning
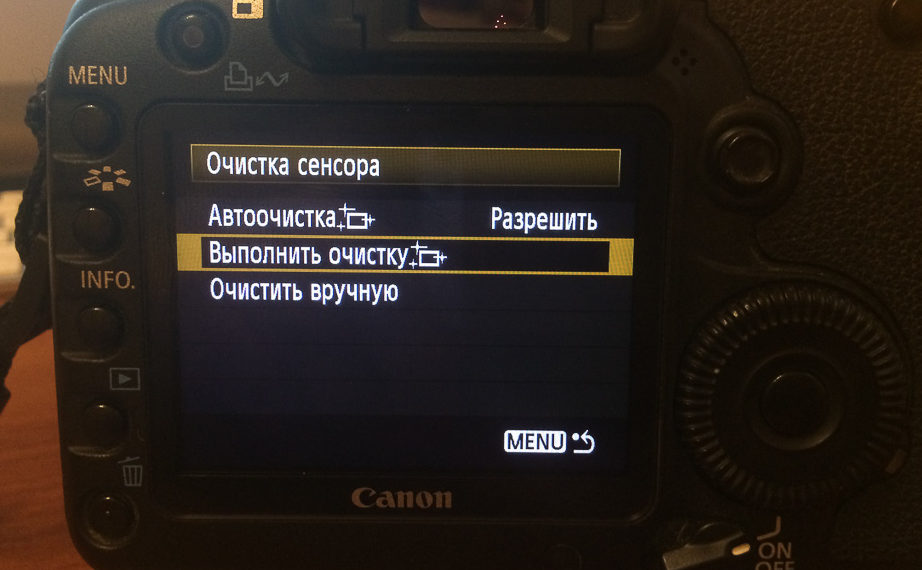
Many modern cameras have this useful feature. And in some of them it is even implemented in two versions. The first is auto-cleaning, which works by default whenever the camera is turned off. The second one is launched manually from the service menu (you can find out how in the user manual).
The default option is not particularly effective. In addition, it entails battery consumption. But if you treat the camera with care, this auto-cleaning mode is quite enough to prevent dust accumulation.
The good thing about the option launched from the service menu is that auto-cleaning can be carried out 2-3 times in a row, thereby getting rid of even quite complex contaminants. And this, in turn, helps to avoid too frequent manual cleanings, each of which can lead to damage to the matrix.
Important! If your camera has automatic cleaning, it is better to use this mode once again than to send the camera to a workshop or seriously think about removing dirt yourself. The fact is that every manual intervention carries a risk of scratching the matrix.
How to check if cleaning is needed
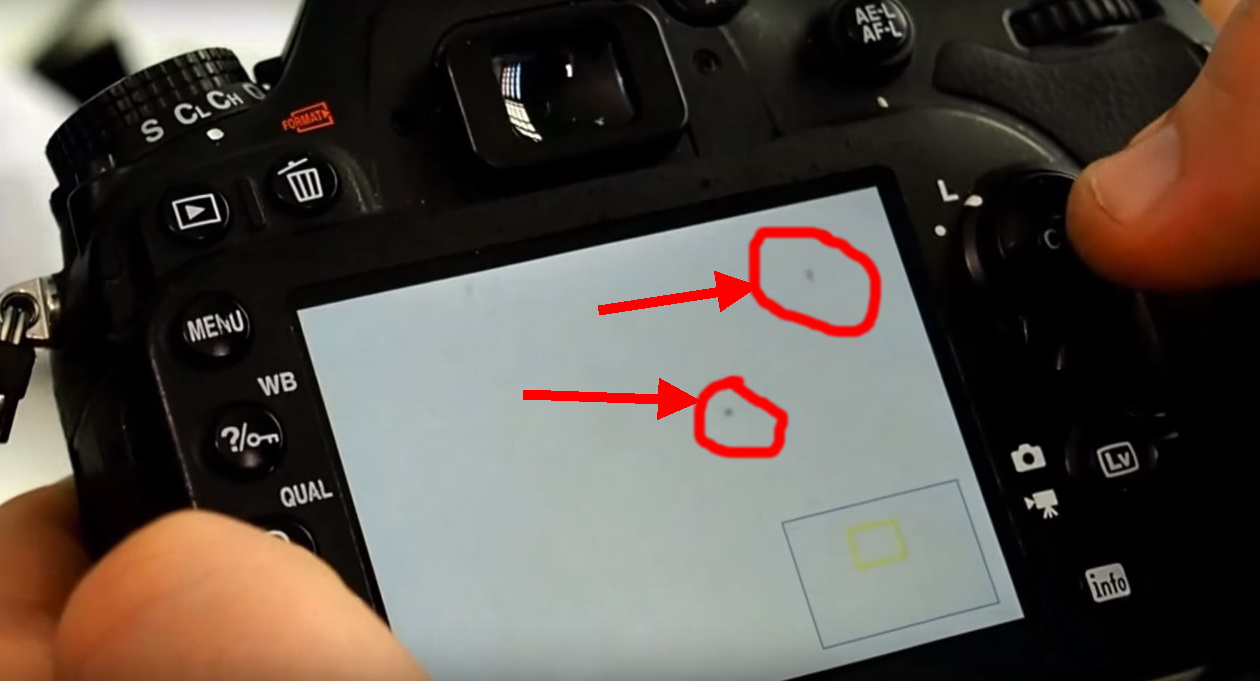
To verify the presence of contamination, you should close the aperture as much as possible and focus the lens at infinity (on a very distant object). The next step is to shoot a white sheet. Well, then all that remains is to examine the resulting frame, having previously enlarged it.
It is important to understand that this test will reveal both particles deposited on the matrix and dirt on the optics. In the first case, the dust will appear in the form of clear small dots or stripes. In the second, it will look like blurred large spots.
It is advisable to carry out a check after each cleaning stage. This will avoid unnecessary expenditure of expensive products and unnecessary contact with the matrix, which is too easily damaged.
What to prepare before manual cleaning
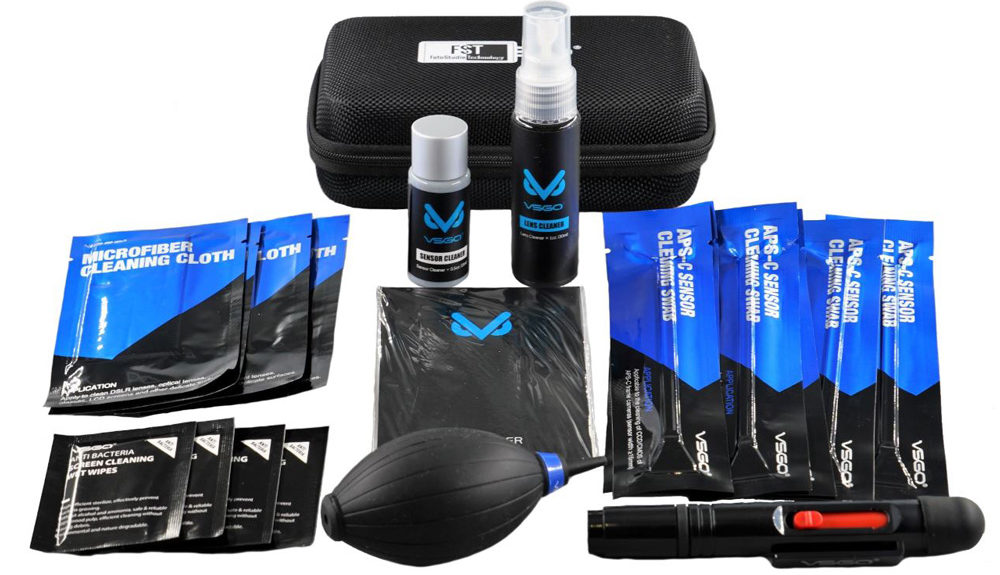
First of all, you should buy a matrix cleaning kit. It includes: a blower, disposable mops, wipes (not always), matrix cleaning fluid and optics cleaning fluid (not always). Sometimes this kit is supplemented with cotton swabs and/or an optical cleaning pencil.
A good sensor cleaning kit includes optical cleaners because it is advisable to do both processes at the same time.
If you just want to check whether you can put the camera in order without contacting a specialist, then it is recommended to choose the optimal set from among the disposable ones.For those who plan to learn how to maintain the camera themselves and completely abandon the services of specialists, it is better to purchase everything they need separately, but in large packages - this way, each individual cleaning will be cheaper.
How to clean: procedure
So, auto-cleaning is over; it did not bring the desired result, and you were convinced of this by taking a test shot. In this case, you should go to a room with a minimum amount of dust in the air. As an option, a bathroom is suitable, which it is advisable to pre-heat with steam so that the suspension from the air settles.
The next stage is preparation for the “opening”. If you are going to work with a SLR camera, then in the service menu you should select the command that raises the mirror (how to do this, see the instructions for the camera). After this, the lens is removed.
Then, using wet wipes or cotton swabs, clean the lens shank and the camera mount ring. Following this, the turn of the optics comes: after applying a small amount of the product to a special pencil or napkin, they are lightly pressed to the lenses and wiped with gentle circular movements directed from the center to the edges.
When the lens is in order, it’s time to blow through the matrix. To do this, you should use a pear, and position the camera itself so that the matrix “looks” down. This position allows the suspension raised by the air flow to freely fly outside the chamber body.
Important! There is no need to fuss at this stage. It is better to draw air into the bulb by moving its nose away from the camera. This reduces the likelihood of damage to the matrix by particles captured from it.
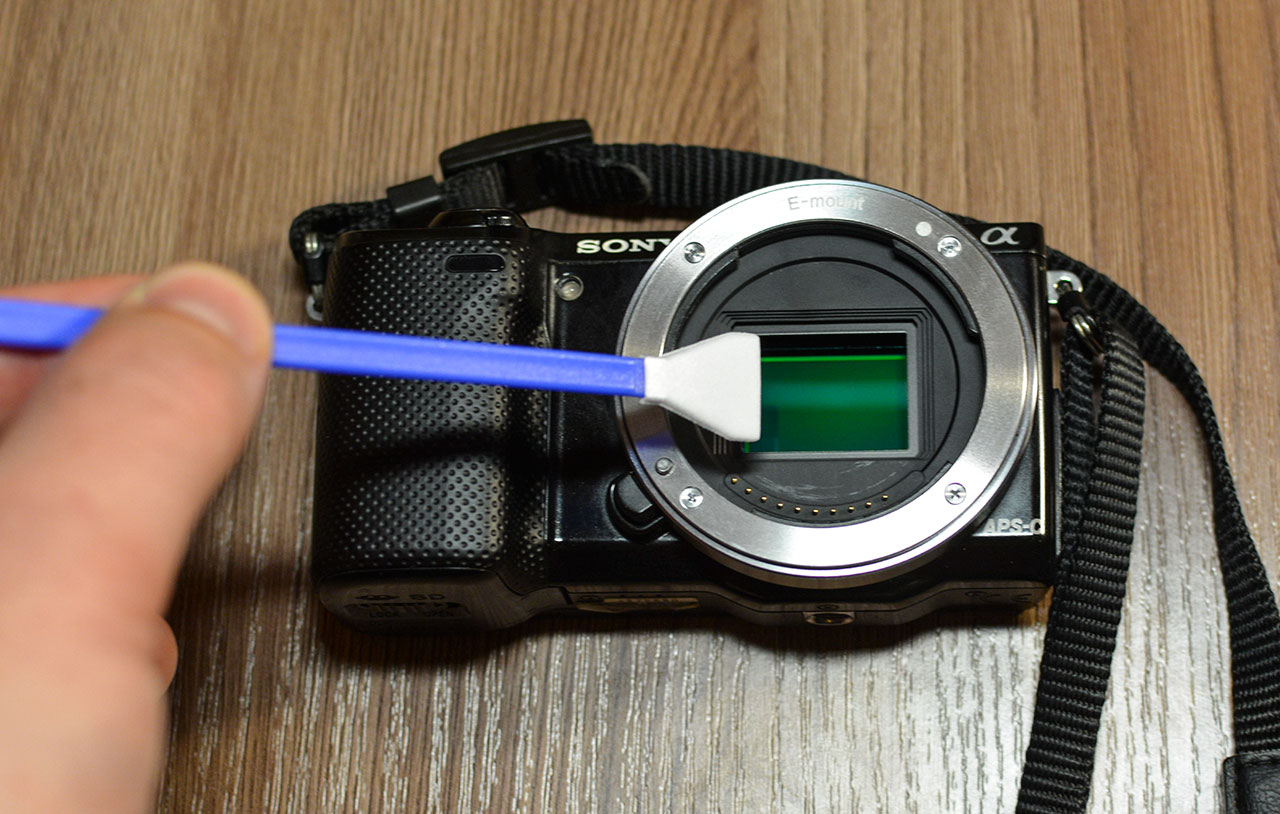
After purging, attach the lens and retest. If the control frame shows that the dust could not be removed, it is time to dry clean it with a special mop. After removing the optics, this mop is passed over the matrix twice: from edge to edge in one direction, and then the brush is turned over and passed in the opposite direction.
Important: it is advisable to select mops such that their width matches the width of the matrix. When using a mop, remember the golden rule: one side of the brush - one movement. You can’t move back and forth - the matrix will suffer.
If after this the test image shows that the dirt could not be removed, repeated cleaning with mops is carried out. The only difference from the previous stage is a few drops of the product applied to the tool’s brush. After such “cleaning”, the matrix will surely please you with perfect cleanliness, so we end the article with it.
Well, for those who prefer a visual demonstration of the process, we suggest watching a video on how to properly clean the matrix of an SLR or mirrorless camera at home: