DIY plasterboard ceiling with lighting
Light plays an important role in home decoration. Rooms with a well-designed lighting system look different, revealing the winning aspects of the interior. A plasterboard ceiling with interesting lighting fits well into different designs. Moreover, it is easy to do if you have the necessary tools at hand and basic finishing skills.
The content of the article
DIY plasterboard ceiling: step-by-step instructions
Lighting can be ordinary, representing a single-color light around the perimeter of the room, or combined. The second option shimmers in different colors and adjusts the brightness.
The technique of zoning using different categories of light is very popular. A large room is divided into several functional areas.
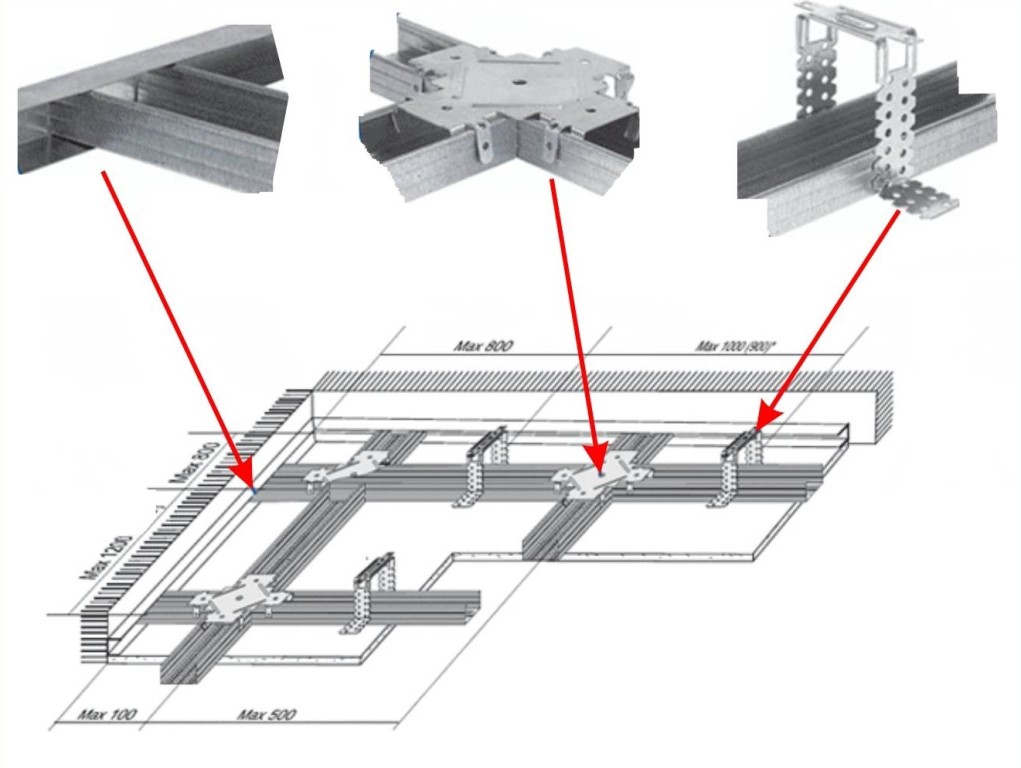
Creating a wireframe
To make the base for the light source, you will need UD guides. They are attached to the wall or ceiling, as well as in the middle of the structure, if necessary. In addition, you will need a CD profile of increased rigidity: it is used to make strong structural racks.
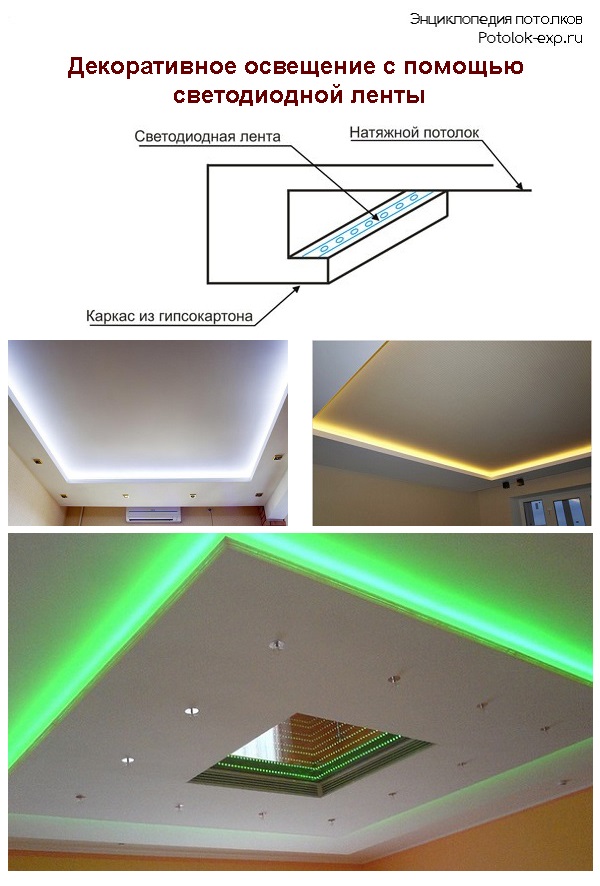
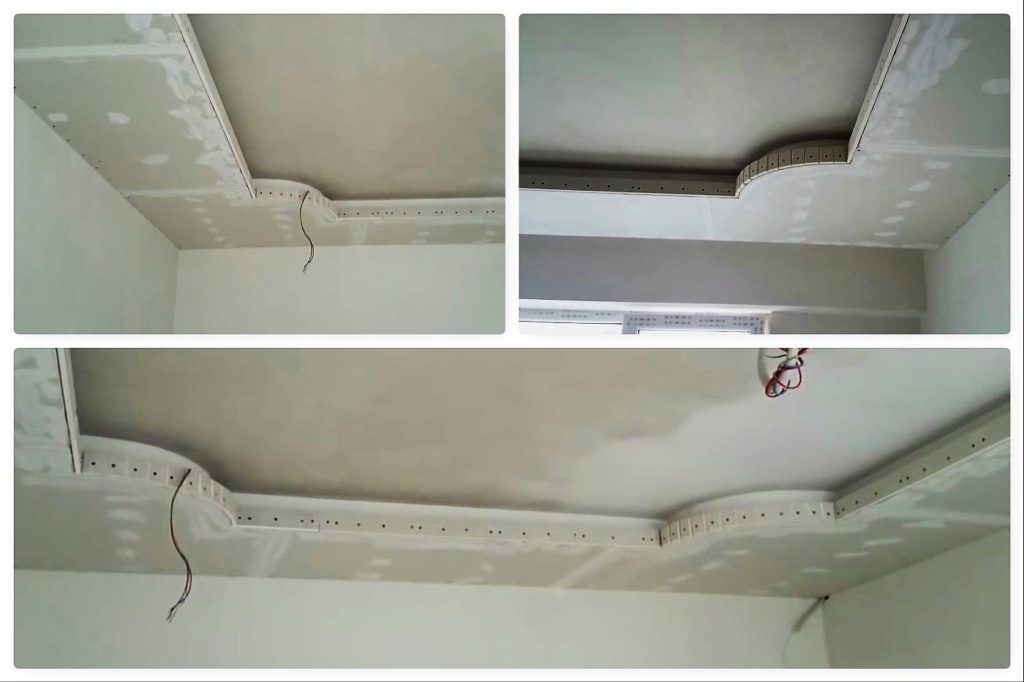
A ceiling with an LED strip is not necessarily geometrically correct.
The design may well be curved, but this is more difficult to implement. Proper bending of profiles and guides will help.The tape is placed inside the frame on the free side. Thus, by installing or removing the side, the angle of light is adjusted.
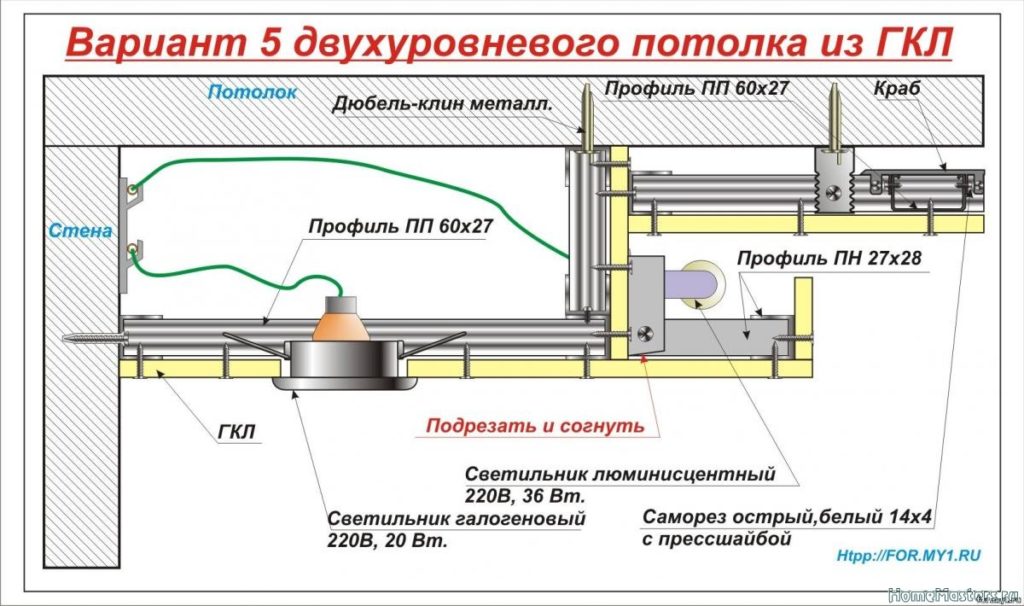
Installing a lighting box
When the frame is assembled, it is installed in place. At the designated distance from the ceiling, begin fastening the structure holding the tape. The work is carried out using a profile of increased rigidity and self-tapping screws.
Thus, having made strong racks, the main guides are attached to them. An LED strip will be placed on them.
Remember: for the light to be bright, the distance between the side and the surface must be at least 5 cm. Otherwise, it will become dim.
Ceiling plasterboard
The procedure is standard. Difficulties sometimes arise when modeling corners and curves. Initially, the panel is fastened by screwing it with self-tapping screws to create an expanded corner connection. If the design involves rounded edges of the backlight, square panels are screwed onto it. Then, smoothly rotating along the axis, carefully cut them around the perimeter. After this, it must be securely secured with additional screws.
Installation and connection of lighting
At this stage, if you intend to use an LED strip, you need to secure it. This is due to the fact that subsequently placing it inside the box will be much more difficult.
It is enough to stick it at a certain height from the profile. When the backlight is fixed, you need to begin installing the outer side. It is necessary to hide the entire structure of the box. In rounded areas, in order to achieve the desired shape from the drywall, it is necessary to evenly break it every 5 cm.
Design features for different rooms
Finally, all that remains is to putty the ceiling and cover it with the finishing compound.Depending on the type of room, the type of lighting is selected differently. In the kitchen, geometrically correct diodes placed around the perimeter are appropriate.
In the bedroom, the best solution would be to make curved, intricate lines. This will create a suitable atmosphere for relaxation. The colors are also selected softly, in some cases combined lighting is used.
With a ceiling LED strip, you won't need main lighting. But its installation does not prohibit the use of the chandelier. In addition, it creates a cozy atmosphere that helps you relax.