DIY sconces
Comfort in the home is important, as Captain Obvious would say. It’s exciting to create interior items yourself that will serve as home decoration. A beautiful hand-made lamp will add variety to the decor and fill the house with warmth. Anyone who is more or less handy with their hands can make a sconce with their own hands. How and from what to make it, we will tell you in the article.
The content of the article
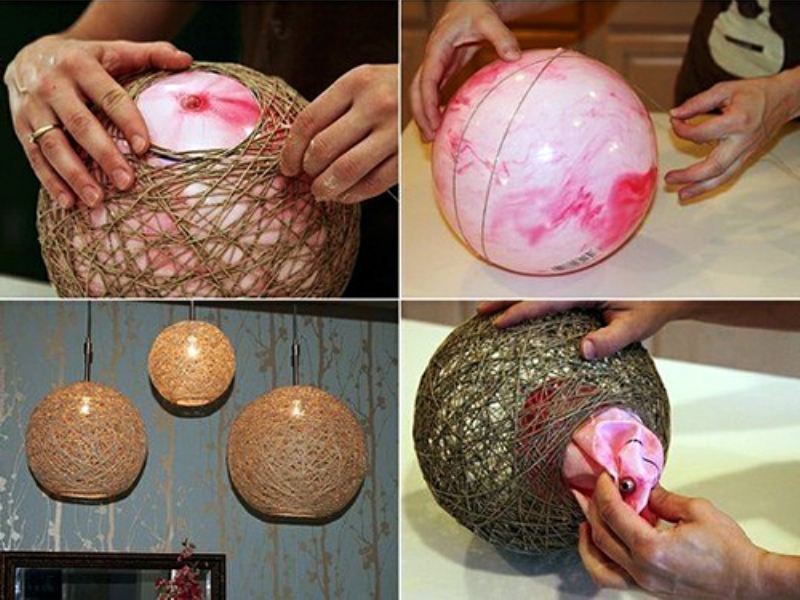
Sconce made of threads and balls
To create sconces, craftsmen use all kinds of available materials: glass, fabric, wood and even paper. We will figure out how to make an original lamp from... no, not from matches and acorns - from balloons and threads.
Necessary materials:
- PVA glue;
- balloon (3-4 pcs);
- several balls of thick colored threads;
- base from a table lamp.
Manufacturing process:
- First, let's inflate the balloons. You should inflate several in advance, in case the balloon accidentally bursts.
- On the ball with a marker we draw a circle with a diameter of 10 cm. This marking is for the hole for the stand with a light bulb.
- We place the ball on oilcloth and pour PVA into an unnecessary container (for example, a cut-off plastic bottle). Dip the threads in glue, then tie the end of the thread to the knot of the ball. We wrap the surface of the ball with thread evenly to the level outlined with a marker.
- We hang what we got and wait for it to dry. When the threads dry and harden, we pierce it, remove the remaining rubber, and insert a socket with a light bulb into the resulting shape. Ready!
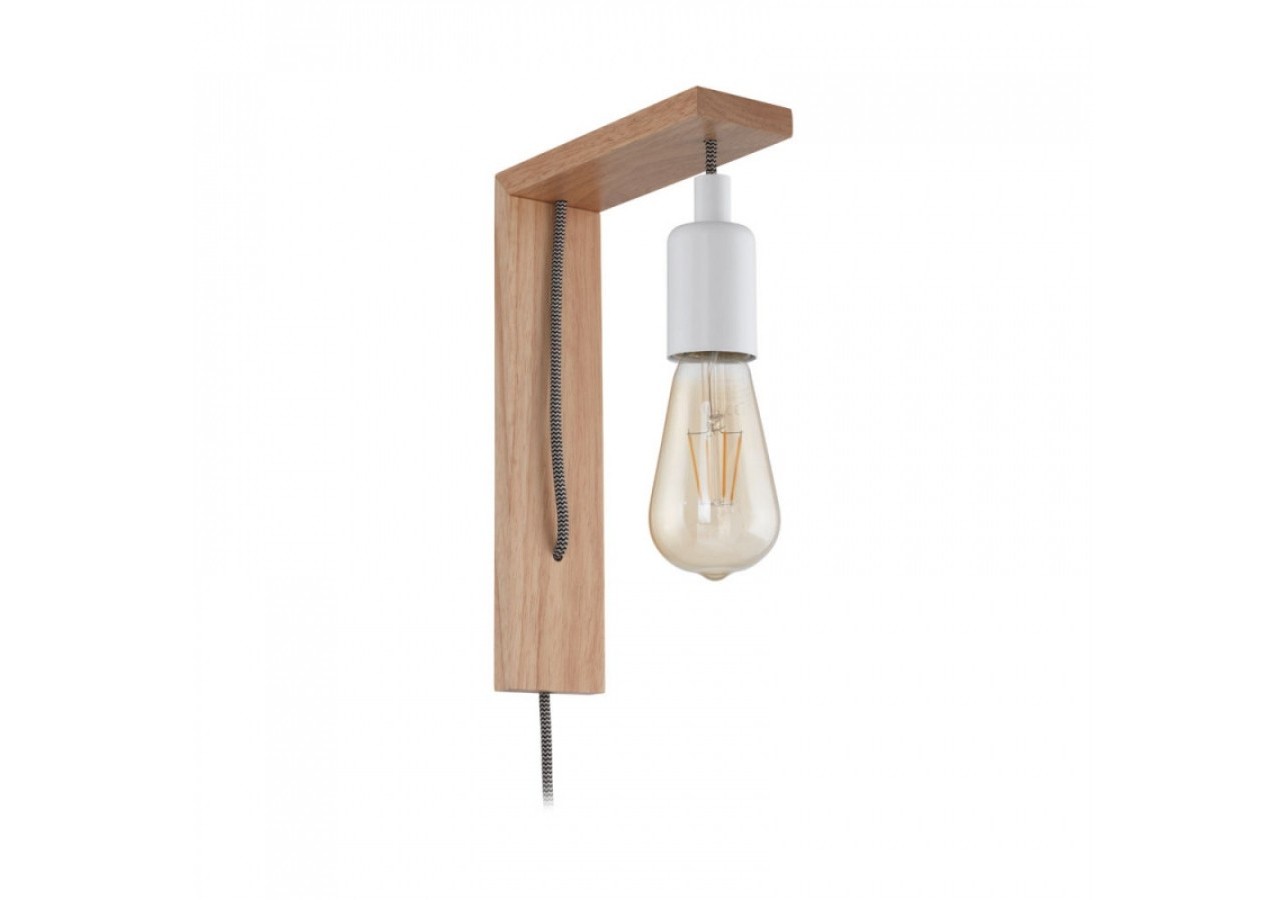
Wooden sconces
A lamp made of wood will look good in the interior. This is an inexpensive and high-quality material, the fashion for which will probably never go away. Here is a far from complete list of the advantages of wood:
- environmental friendliness;
- strength;
- durability.
To make the simplest L-shaped sconce you will need:
- A couple of planks 10-20 millimeters thick. To create a wall lamp from wood, you can, without further ado, take square or rectangular blanks. Or you can cut out something intricate with a jigsaw.
- The lampshade can be any shape you prefer.
- Drill with drill bit 6-10 mm.
- Acrylic varnish for wood, PVA glue.
- Self-tapping screws and fastening fittings.
The process itself looks something like this:
- Sand all visible surfaces on the future chandelier with sandpaper, and then varnish all parts several times, especially paying attention to the ends.
- Connect two pieces in an L-shape. You can cut the joints “miterally”, that is, at 45 degrees - it will be more beautiful. We glue the connection and tighten it with self-tapping screws - it’s more reliable.
- Where the wire will pass, carefully drill holes for it. Then we thread the wire and connect it to the lampshade.
- We drill into the wall and organize the fastening with dowels and self-tapping screws. We screw the fastening fittings onto the back of the lamp, hang it in its place, and check its functionality.
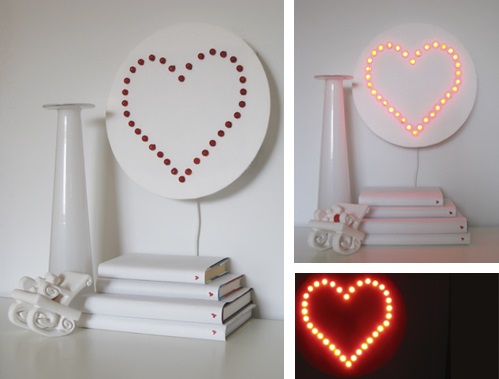
Foam sconce with garland
What beauty comes from simple improvised means! If, of course, you approach the issue creatively. Some seemingly unnecessary items can be used for interior decoration. Let's look at a useful idea for Valentine's Day.
To make a heart-shaped sconce, you will need:
- foam sheet;
- insulating tape;
- stationery knife;
- pencil or marker for marking;
- cutting mat (an old cutting board will also work);
- garland.
Manufacturing:
- We cut out a circle with a diameter of 30 cm from polystyrene foam. We do not throw away the foam scraps; they will be suitable for attaching the structure to the wall.
- Draw a heart in the center of the circle with a pencil. You can print the image on a printer, carefully cut it out and paste it on. Along the edge of the heart, at a distance of 3 cm from each other, mark the holes for the garland bulbs.
- Using a utility knife, cut out the holes. We thread garlands of light bulbs through them, securing the wires with electrical tape on the reverse side.
- We chop the remaining foam cuttings into layers and attach them to the back. If the lamp hangs on the wall, then the wires will not be visible, even when viewed from the side. Now you can hang the resulting lamp on the wall. We plug the garland into an outlet. If it turns out beautifully, feel free to invite your girl for a romantic evening.
Everyone in their home has objects and materials that are suitable for making sconces, and much more. As Filias Fogg used to say: “Use what is at hand, and do not look for anything else!”