How to install a hood in a closet
 It is difficult to imagine a modern kitchen without a hood. This kitchen unit performs an important function. A variety of models for air removal and purification allows you to select equipment of the desired shape and design.
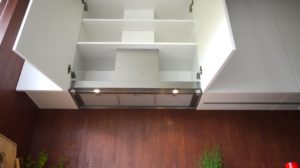
Installing built-in appliances in a wall cabinet will not only help clean the air from odors and grease, but will also save space. The compact arrangement of such equipment occupies a small part of the kitchen furniture, which preserves the functionality and aesthetics of the interior. We'll tell you how to install a hood with your own hands.
The content of the article
Requirements for a built-in hood and its placement
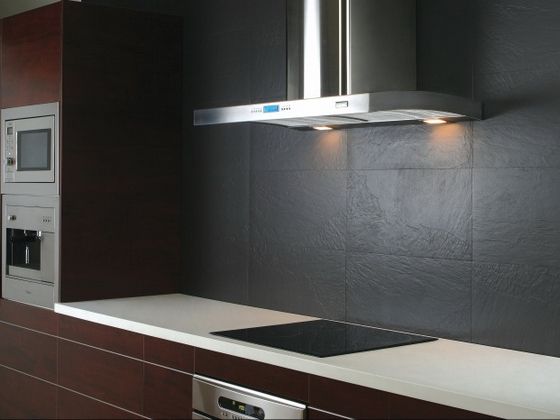
Based on the rules and regulations for the installation of electrical appliances, the hood is mounted directly above the stove.
Installation is carried out at a height of 60-80 cm from the stove, which meets fire safety requirements.
Depending on the area of the room, the power of the ventilation equipment is selected.
The dimensions of the device must correspond to the required parameters of the wall cabinet.
IMPORTANT! The design of the hood must be built into the wall cabinet.Domed, adjustable, hanging and the like, which can be built in, will require remodeling the furniture, and subsequently changing the interior of the kitchen.
Technical parameters of the built-in hood
In order to choose the right ventilation equipment for the kitchen, you need to understand the design features of the offered models.
Principle of operation
Units are divided into several types.
- Flow-through, using air ducts, they are connected to the home ventilation system.
- Recirculation (autonomous) filters purify the air using replaceable filters.
- Combined, they use two methods of air purification.
Shape and design
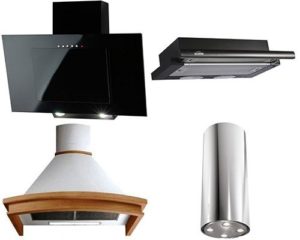
The following types of hoods are distinguished.
- Hanging. Such units are installed separately or under a kitchen cabinet. They can operate when connected to a central ventilation system or independently.
- Dome. Powerful ventilation equipment compared to other designs, designed for large kitchens. Works only if there is a central ventilation system.
- Island. T-shaped hoods, usually of high power, require connection to the home ventilation system.
- Built-in. A popular type of equipment, it has options with different power. Installation inside the furniture allows you to fit the unit into the interior of the kitchen.
IMPORTANT! Most models are connected to central ventilation.
By air treatment power
Ventilation equipment is divided as follows.
- Low-power installations – up to 700 cubic meters/hour.
- Average productivity – up to 1500 cubic meters/hour.
- Powerful - over 1500 cubic meters/hour.
The exact figures for power sharing are not regulated by regulatory documents, so the performance value is taken conditionally.
Location
Built-in units come in horizontal and vertical orientation.
The horizontal version is more popular for operation and installation in the kitchen.
Size
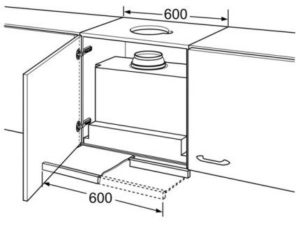
An important criterion that is taken into account when choosing ventilation equipment is its size.
Built-in hoods have a width of 45, 60 or 90 cm. These values correspond to the standard dimensions of wall-mounted cabinets. At the same time, the actual width of the outer part of the unit is made several millimeters smaller for ease of installation with adjacent shelves.
IMPORTANT! When purchasing equipment, the size of the built-in planes must be checked. Modern imported units often do not meet standards.
Some models of built-in hoods have a telescopic retractable air intake plane. This design allows you to increase the lower working area of the equipment during the cooking process. The comfort of using such a design is considered by the consumer individually.
Rules for the location of a built-in hood in the kitchen
It is more convenient to plan the installation location of ventilation equipment when completing a kitchen interior design project.
In this case, you can adjust the position of the plate. It should be as close as possible to the opening of the house ventilation system. Removal to the side, even by several tens of centimeters, will entail a complication of the design of the air outlet channel, which will occupy the internal space of the suspended shelves.
The lack of central ventilation in the house allows you to move the stove and built-in hood to a convenient place.
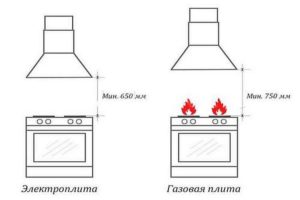
The main requirement for a hood is that it needs to be installed directly above the stove.
The installation height depends on the type of slab and has the following minimum permissible values:
- for gas stove 75 cm;
- for electric – 65 cm.
To connect to the electrical network, a 220 V socket with grounding must be installed near the installation site of the hood. All kinds of extension cords, terminal blocks or twists must be excluded for safe connection of ventilation equipment. The socket is mounted inside or next to the kitchen cabinet.
How to install a hood in a closet
Installing a ventilation unit inside a wall cabinet will require certain carpentry skills.
If the installation will be carried out in new furniture, then it is advisable to purchase a hood at the design stage of wall shelves to adjust the dimensions.
And when installing into existing kitchen furniture, it is important that the outer dimensions of the hood body correspond to the inside of the hanging cabinet.
Materials and tools needed for work
To complete the work you will need the following tool:
- tape measure, construction corner;
- pencil;
- screwdriver or screwdriver;
- wood hacksaw;
- jigsaw: simple or electric;
- clamps;
- awl.
Preparing the cabinet for installing a hood
Whether it is new kitchen furniture or an insert into an old cabinet, you need to prepare the internal space for installing a hood.
Let's consider step by step all the stages of performing work for the furniture used.
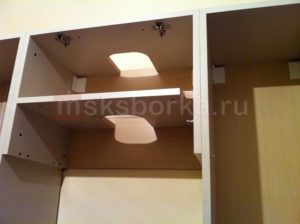
- First of all, you need to unscrew the facades from the module in which you plan to install the hood, as well as from the adjacent shelves.
- Remove the required cabinet from the wall. To do this, you need to unscrew all fastening connections, having previously secured the dismantled module with clamps to the vertical walls of adjacent shelves.
IMPORTANT! If you do not fix the cabinet using devices with adjacent modules, then someone must support it during dismantling. Otherwise, the furniture may fall and be damaged.
- Unscrew the lower cabinet shelf and remove it. Now you can make sure that you have chosen the right built-in appliances and determine the need to trim the side walls of the cabinet. If the visible part of the hood with control buttons is of small thickness, then it is better not to trim anything.
ATTENTION. Trimming the side walls will entail the need to trim the façade. And this is often not included in the work plan.
- After determining the fit to the side surfaces, you need to attach the removed lower shelf of the cabinet to the upper plane of the hood and outline the outline of the air channel and the place for inserting the cord with a plug.
- Cut out excess parts along the outlined contours.
- Next, you need to mark the depth of placement of the ventilation unit inside the cabinet. To do this, place the hood in the required place and mark the upper lines of the body with a pencil.
- Along the marked lines you need to attach the bottom shelf of the cabinet inside. The front part of the hood body is often covered with a decorative panel. Considering the location - behind the facade, such work is not necessary.
- In addition to the cutouts for the air duct and power cord, before installation, four holes are drilled in the places where the hood is attached to the horizontal shelf.
IMPORTANT! To accurately match the holes in the shelf with the equipment fastening points, it is advisable to use a paper stencil.
After fixing the shelf at the required level, the cabinet is installed in its original place. If there are shelves inside this module, then it is necessary to make a cutout for the air channel in them.
Hood installation
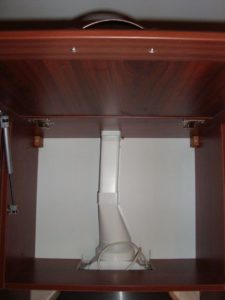
The cabinet attached to the wall requires electricity.
The external wiring of the electrical network is carried out in a fireproof braid and a socket is installed.
At the stage of wall construction, laying is carried out using a safe hidden method.
IMPORTANT! When carrying out electrical installation work, use a wire with a cross-section of at least 1.5 square meters. mm, and attach the socket to the walls of the furniture through a dielectric plate! Compliance with these requirements will make the connection secure.
Mounting and securing the device
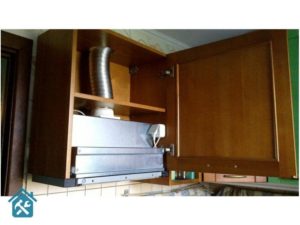
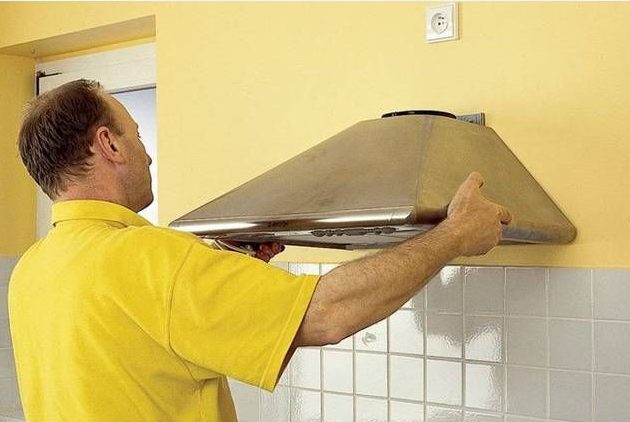
- Upon completion of the preparatory work, the hood is built into the required location.
- To securely fasten the ventilation equipment, use self-tapping screws, which are included in the delivery package. If such a kit is not available, four holes must be drilled in the upper part of the housing. The built-in hood is screwed through the prepared holes in the shelf.
- An air duct is laid inside the cabinet and connected to the unit and the home ventilation system.
- Then intermediate shelves are installed.
- Check the operation of the equipment. If deficiencies are found, they are eliminated.
- The last thing left to do is to install the facades.
When installing a ventilation unit in a new kitchen wall, less time and effort is spent. The appearance of newly installed furniture with built-in appliances is distinguished by smooth lines and freshness of manufacture.
A built-in hood allows you to preserve the desired interior of the kitchen, and proper selection of sizes and power will ensure the required air exchange.

