When and why do you need to replace the hatch cuff of an LG washing machine? We repair the cuff ourselves
The cuff is a thick rubber insert that is located between the door and the drum. It prevents water from leaking out, so that the tank space remains sealed after closing the door. Over time, this part wears out, so if there is damage, the washing machine hatch cuff will need to be replaced. How to do this is described in detail in the article.
The content of the article
In what cases is replacement required?
The cuff is made of fairly dense materials, but gradually it wears out. Along with objective reasons, there are other factors:
- abundant use of different powders;
- friction of buttons, locks and other hard objects, especially metal;
- growth of fungus (this often happens in rooms with high humidity);
- careless loading of the drum or careless removal of things.
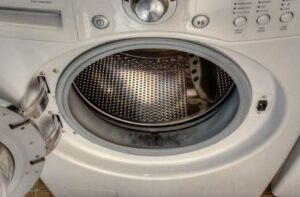
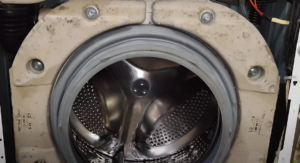
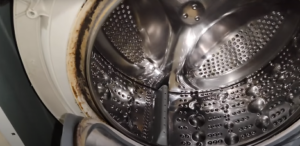
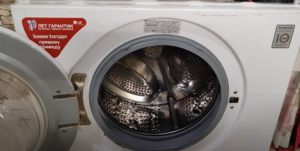
Determining the need for replacement is easy. It is required in cases where the surface is covered with a black coating, as in the photo, or is simply damaged (there are scratches, cracks and other defects).
Preparatory work
In order for the replacement of the hatch cuff of an LG washing machine to be successful, you first need to do a little preparation. First of all, buy a new rubber band, which should be exactly the same. Also at the preparatory stage they act like this:
- Disconnect the unit from the network.
- Close the water supply tap.
- Remove the drain and supply hoses.
- If necessary, move the machine to where it is more convenient to work.
- Replacing the cuff on an LG washing machine is quite simple. Before starting work, it is also advisable to roll up the cord so that it does not interfere.
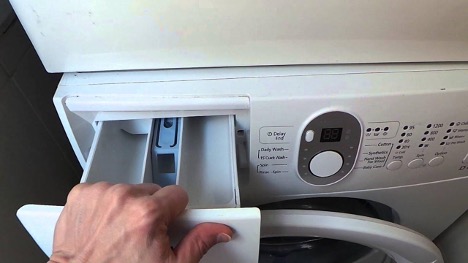
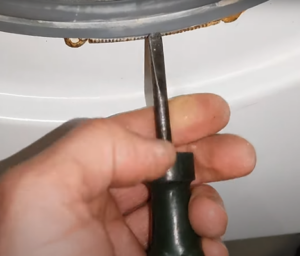
From the tools it is enough to take a Phillips and flat-head screwdriver, pliers, and a flashlight. You can also use a screwdriver to make removing and installing the bolts easier. Now you can begin how to remove the cuff on an LG washing machine.
Step-by-step instruction
Figuring out how to remove the seal on an LG washing machine is not difficult. But you need to work carefully, since you will have to remove the cover and several panels. The step-by-step instructions are as follows:
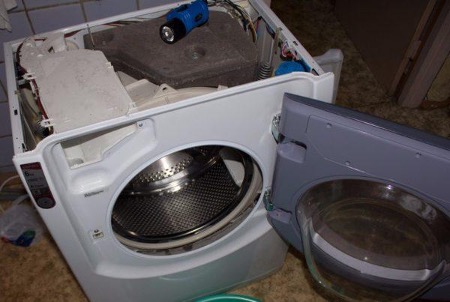
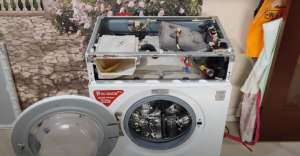
- Remove the top cover and front panel.
- Remove the panel from below by pulling it up with a screwdriver.
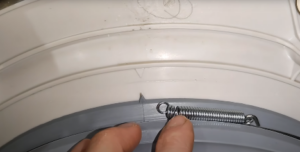
- Find the spring on the bottom - it is what holds the seal. Now it will become more clear how to replace the cuff on an LG washing machine.
- Pry up the ring with a flat screwdriver and remove it.
- Unscrew the 5 screws and remove the front panel. To do this, move it up a little and remove it. Thanks to this, replacing the rubber band on an LG washing machine will be quick.

- Remove all weights by unscrewing the bolts.
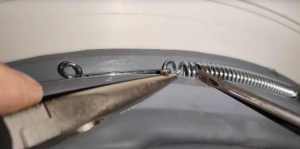
- Find the spring on top, pry it off with a screwdriver, and insert pliers into the adjacent loop. From this stage, the actual replacement of the rubber seal on the LG washing machine begins.
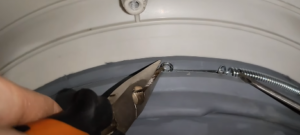
- Pull both tools towards each other until the hook is released. It may not work the first time, but you need to try again to figure out how to change the rubber band on an LG washing machine.
- After removing the old part, the picture looks something like this.It remains to figure out how to put the cuff on the washing machine, that is, install a new part.
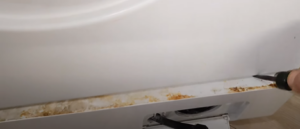
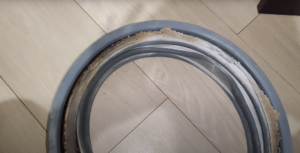
- The rubber band has persistent dirt in quite a large amount. Below is a photo of the cuff after continuous use for 10 years.
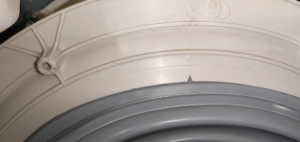
- Replacing the hatch handle of an LG washing machine and installing a new seal begins by looking for the triangle icon at the top. It is combined with a similar notch on the cuff.
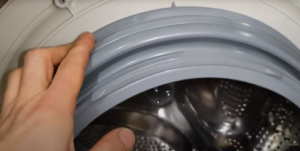
- Next, the seal in the LG washing machine is completely replaced - the new part is manually pressed along the entire circumference.
- Insert ring into 3 or 4 and tighten. It is clear how to remove the rubber cuff on a washing machine - after installing the new part, you need to assemble all the elements in the reverse order.
- The last step is to reinstall the front panel. If everything is done correctly, the new seal will last quite a long time. Therefore, you can forget about how to remove the rubber band on an LG washing machine for 5-10 years.
- Install the top cover and small front panel and do a test wash.
Basic preventive measures
Now it’s clear how to replace the rubber band on an LG washing machine. This is not a very complicated, but rather labor-intensive procedure that requires accuracy. To encounter this problem as rarely as possible, it is recommended to follow basic preventive measures:
- Wash bras using special bags. It is better to wash scarves, socks, and items with metal elements in them.
- You should not wash your shoes in a machine, although you can also find special bags on sale. But such items are very dirty and can cause the machine to overload.
- Also, do not wash car mats - otherwise you will again have to study the instructions on how to remove the rubber band from the drum of an LG washing machine.
- For washing, use only specially designed powder (manual detergent is not suitable).
- Before each closing of the lid, check whether the drum door fits tightly - this recommendation only applies to vertical washing machines.
- It is strictly forbidden to connect the unit to hot water, because it severely clogs not only the cuff, but also other parts (heating element, drum).
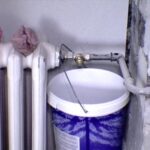
- Another dangerous factor is hard water. If it has too many magnesium and calcium bicarbonate salts, a special filter should be installed.
You can replace the cuff yourself, without the help of a specialist. To do this, you will need available tools - a screwdriver, pliers, you can also use a screwdriver. In extreme cases, it is allowed to call a specialist. This is justified if the car is under warranty.