How to change a bearing on a washing machine
 Various devices and units are created to save our energy and time. A modern person will not go to the river to do laundry and rub his clothes with crushed bricks.
Almost every home has a washing machine, you can select the desired mode, and after a while you take out the clothes clean. But such a unit has moving parts. The drum can rotate at high speed. It is connected to the rest of the structure by a bearing. But after several years of operation, bearing parts may wear out.
During operation, the bearing takes on the load, causing rolling and rotation. It is part of the support of the entire structure and is therefore subject to wear and tear. And if the machine begins to make a strong knock during operation or vibrates excessively, then it is quite possible that the bearing has worn out.
You can replace a worn part yourself or by contacting a workshop. The article will discuss how to detect this malfunction, disassemble the machine, change the bearing and reassemble the mechanism.
Bearing in a washing machine:
- Ensures drum rotation.
- Allows you to reduce vibrations and noise when the washing machine operates.
- Reduces friction force, therefore saving energy.
The content of the article
- Description of bearing operation
- Tips for operating a washing machine so that the bearings do not fail.
- Where is the bearing located in a washing machine?
- Types of bearings for a washing machine
- How to change bearings on washing machines of different models
- How to replace bearings in a non-separable drum of a washing machine
- Errors when replacing bearings in a washing machine
- Video
- Conclusion
Description of bearing operation
 One of the main parts in a washing machine is the bearing unit. It serves to transmit torque from the pulley to the drum.
Usually this element is installed on the crosspiece, but depending on the chosen manufacturer, there may be differences in design. The location of the cross is on the rear wall or inside the tank.
There are two types of bearings - plastic and metal. Economy class models are equipped with metal ones. Bearings, which are called plastic, actually have a metal housing inside and a protective plastic casing on top. Plastic protects metal parts from corrosion and increases their service life.
Most often, two bearings are used, internal and external, having different sizes. The bearing located near the drum takes on a large load. There are also machine models where the block with bearings is a double-row bearing, otherwise called a monobearing.
What functions does it perform?
Acts as a connecting link between the drum, which contains the laundry to be washed, and the pulley that drives this very drum.
Reasons for failure
 First of all, the rubber seal, which is a sealing material that protects metal parts, is damaged.
When this element breaks down, water begins to penetrate into the mechanism. Penetrating water washes away and dissolves the lubricant.Due to physical processes, under the influence of friction, the bearing wears out.
Usually this happens no earlier than 5-7 years after the start of operation. There can be several reasons for premature wear of the bearing mechanism:
- A manufacturing defect is a defect in the bearing itself or the seat for the oil seal.
- The machine is systematically overloaded with laundry, the permissible weight standards are exceeded.
- Operation of faulty equipment.
Tips for operating a washing machine so that the bearings do not fail.
 First of all, pay attention to the water quality in your area. If the water is constantly of poor quality, deposits form on water pipes and dishes, and faucets often have to be repaired. In these cases, you must add Calgon or any other water softener when washing.
Factory defects of the machine can also lead to wear. If parts are poorly aligned or improperly fitted, play and excessive vibration may occur. If you hear extraneous sounds during operation, for example, increased noise or grinding metal, you need to have it inspected by a specialist or yourself.
Another factor that provokes breakdowns is illiterate installation. Washing machines standing on uneven surfaces quickly break down. The instructions always indicate the maximum weight and volume of loaded laundry. To avoid failure of the mechanism parts, do not exceed the specified figures.
Where is the bearing located in a washing machine?
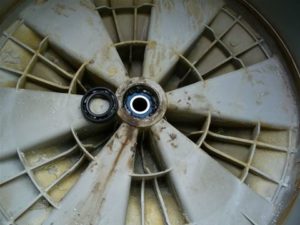 This part, depending on the assembly of the washing machine, is located in the rear wall or lid of the tank. The bearing is attached to the body of this element from the outside. In top-loading machines, two bearings are installed on which the drum is mounted.
Types of bearings for a washing machine
Besides the fact that ball bearings can be plastic or metal, they also vary in size. Manufacturers do not have a uniform standard for the included bearings. Therefore, cars of the same brand may have bearings with different markings. Typically, ball bearing sizes from the same manufacturer are similar. You can determine the size by finding a description of the technical characteristics of the unit in the instructions. As a last resort, you can take the worn part to the store to purchase exactly the same new one.
Based on the type of design, bearings are divided into single-row and double-row. Single-row ones contain one row of rolling elements. Double-row, consisting of two single-row, can withstand heavy loads. But the price of such ball bearings is higher, so those with one row of rolling elements are most common in economy and middle class models.
How to change bearings on washing machines of different models
Zanussi
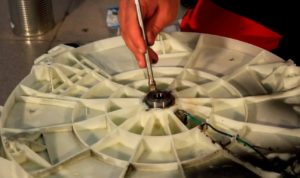 When disassembling the body, it should be taken into account that in Zanussi some of the bolts are hidden behind plugs. It is necessary to remove the cover and back wall. The top cover is held in place by two screws screwed to the body. Next, remove the washing powder tray by pressing the special latch. Then you should unscrew the bolts that secure the dashboard.
Now you can pull the wires out of the sockets. Place the rubber cuff inside the drum. Next, you should disconnect the tank from the pipes. The first priority is to turn off the air pipe. Now you need to remove the drive belt. Then use a hex wrench and pliers to remove the shock absorber mount.
The next step is to remove the sensor from the tank. Then the ground wire and the wiring going to the heating element are disconnected.Now you can pull out the wires and unscrew the engine. Next, the tube going to the pressure switch is turned off. Using an 8 mm socket, it is necessary to remove the filler and drain pipes.
By striking the center of the drum pulley, carefully unscrew the nut. Afterwards, the pulley can be removed without difficulty. By removing the counterweight and disconnecting the springs, the tank can be removed. The last preparatory stage is to disassemble the tank into two halves and pull out the drum. Now you can easily get to the bearings themselves.
Next, you need to remove the bearing according to the instructions:
- Feel for the oil seal in the tank cavity and pry it off with a screwdriver.
- Armed with pliers and a screwdriver, try to pull out the retaining ring.
- Lubricate the bearing.
- Turn the tank over and begin to knock out the bearing using a drift and hammer. Do not use too much force to avoid breaking fragile parts.
- Clean the groove in which the bearing was located.
- Treat the retaining ring with waterproof lubricant and wipe off excess with a napkin.
- Place the oil seal, pre-treated with lubricant, on the retaining ring. Treat the bearing bushing as well.
The above installation method is suitable for Zanussi machines with double row bearings. Therefore, installation is carried out together with fastening the retaining ring. In the case of a single row, you will have to knock out the outer bearing standing on the side of the bushing, then remove the oil seal and only then remove the inner one.
Candy
During repairs, some difficulties may arise, since the side covers of the unit cannot be removed, and the tank can only be removed through the top hole. As is the case with equipment from other manufacturers, it is necessary to disassemble the machine and remove the tank.Some Candy models come with one-piece oval-shaped tanks that have to be sawed at the joint. If the tank is collapsible, then it can be disconnected according to the standard scheme by unscrewing the bolts and opening the latches. Once the work is completed, all that remains is to reassemble the unit in reverse order. Step-by-step photos that you took while disassembling the machine will help you with this.
LG
Brand bearing sizes are 203–206, they are selected for a specific model. To remove the front wall, you must first remove the cuff and then unscrew the screws. When pulling out the tank, it is advisable to use an assistant. It will lift the part while you unhook the springs.
Indesit
After removing the powder cuvette and the front panel, remove the rubber cuff. After this, you can remove the hatch lock. To dismantle the pulley, it is supported with a wooden block, which prevents it from moving when the fastening is unscrewed. Next, the pulley is torn off, being careful not to damage the drum.
The tank lid is held in place by clamps that need to be removed. Next, the seals are removed. It is advisable to replace the gasket on which the moving unit is located. Now you can open the cover and press out the bearings yourself or take the removed part to a service center.
Bosch
The advantage of Bosh machines is that they have collapsible tanks, whereas many other manufacturers have welded tanks. Therefore, independent maintenance should not cause serious difficulties. The unit can be disassembled according to the standard procedure.
Samsung
Owners of machines of this brand can use a ready-made repair kit, which includes a set of bearings, lubricant and oil seal. Each set is designed for a specific model of home assistant.The work is carried out according to the same scheme as replacing Zanussi ball bearings. But to unscrew the case, you will additionally need a Phillips screwdriver, and you will need to remove not the back, but the front wall.
When dismantling the front wall, it is important to remove the cuff so that it does not tear. To do this, first unscrew the screws, then pull out the sensor and loosen the clamp. Only after these operations can you carefully tighten the cuff.
Whirlpool
Most Whirlpool washing machines have a collapsible tank that can be opened by unscrewing the bolts. It is pulled out through the front wall. Otherwise, Whirpool washing machines do not have any specific features.
Ariston
The model range includes devices with collapsible and non-dismountable tanks. To gain access to the bearing, you need to remove the front wall and top cover. It is recommended to use two types of lubricant - WD-40 for corrosion and waterproof - Litol-24.
Atlant
To remove the bearings, you must remove the cover, front panel and back wall. To remove the pulley, you will need to unscrew the central bolt. The belt is removed along with it. The oil seal is installed on the inside of the tank; the bearings do not need to be lubricated before installation.
Ardo
A characteristic feature is the drum shaft with a bronze bushing. It is necessary to ensure that the bearing assembly is tightly connected. It is important that the bushing remains clean, then the seal will press it out and will not let water through. Most models have a front device, and the bearings are located near the back wall, which needs to be removed.
Electrolux
The main feature of these machines is the body, which consists of only two parts. The halves are connected by a seam located in the middle of the side wall.To remove the tank, simply remove the back of the housing. The seal in Electrolux is installed on top of the bearing.
What is needed to replace a bearing on a washing machine
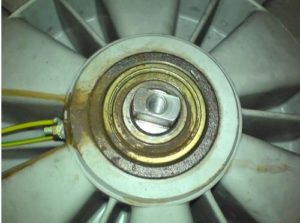 First, you need to purchase consumables - a sealing seal, lubricant and bearings, a set of tools. The minimum set of tools for repair is presented in the list:
- pliers;
- 8 mm hex wrenches and sockets;
- hammer;
- mallet;
- punch;
- bolt;
- screwdriver with replaceable flat bits and hex bits;
- lubricant;
- adhesive sealant;
- camera - you can use it to film every stage of disassembling the washing machine. It’s better not to rely on memory, otherwise later during assembly there will be “extra” parts.
Before replacing, try lubricating the bearing. Quite often, noise when the drum rotates is a consequence of lack of lubrication. Replacing a bearing at home will take about two hours. Regardless of the brand of your machine, to carry out repairs you will need to almost completely disassemble the unit. Move the washing machine to a spacious room and place newspapers or old towels under it so as not to stain the floor during the repair process.
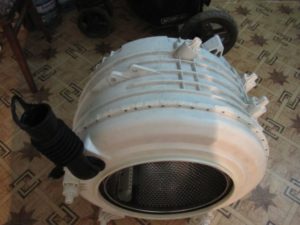
How to replace bearings in a non-separable drum of a washing machine
 In this case, you will need additional tools: a hacksaw, a wooden hammer, screws, a marker. The procedure is as follows:
- Place the tank on a flat surface and mark with a marker the areas for the mounting holes.
- Drill 15-20 holes for the screws, but do not drill too deep to avoid damaging the drum.
- Place the tank on its edge and start sawing.
 When the tank is divided into two halves, you can unscrew the pulley. To do this, just unscrew the nut.
- Using a hammer, carefully knock out the shaft with two bearings.
- New components are installed on the old seat. The oil seal must be lubricated before installation. The parts are carefully placed inside the cavity, tapping them with a mallet.
- Afterwards you need to press in the bearing and oil seal with a special rod and nuts.
- Now you can connect the halves of the tank, then glue them together with sealant and tighten the screws.
Errors when replacing bearings in a washing machine
When disassembling the case, novice craftsmen often do not pay attention to the condition of the bushing and seat. The bearing and oil seal are an inseparable pair, so they need to be replaced at the same time. It is important to ensure that the sealing element is evenly secured. The service life of the bearing is also affected by the selection of components, including lubrication. Therefore, it is so important to purchase original parts and follow the manufacturer's recommendations.
Video
Conclusion
You can replace the bearings yourself if you prepare for this operation in advance. At least you don’t have to wait for the master to arrive and pay for his services. First of all, you should find out the bearing markings of the selected model and purchase the appropriate components.
If you are not confident in your abilities, watch training videos before starting work. After all, not everyone will be able to understand complex terms and understand the structure of a washing machine the first time.


