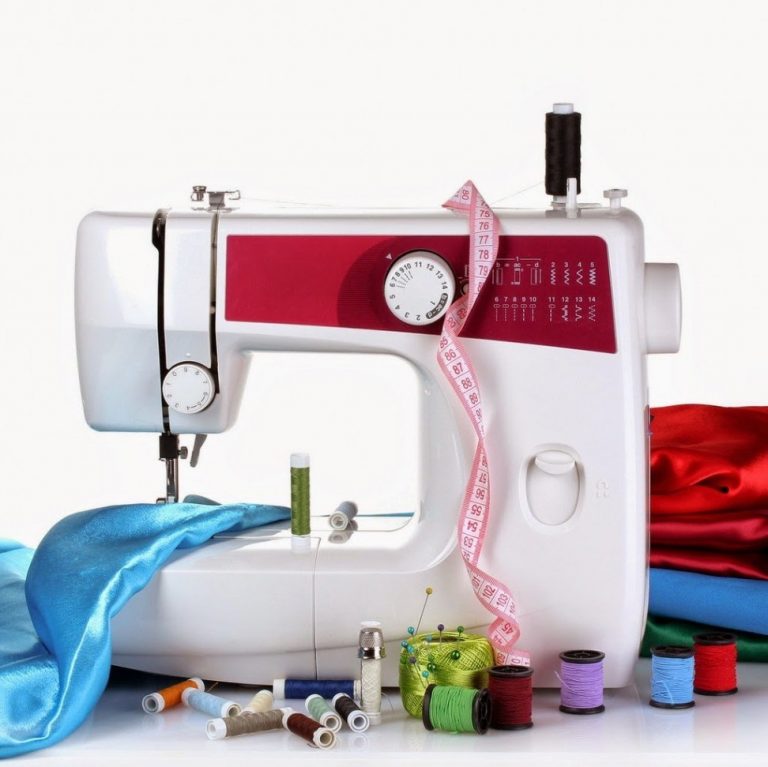
Sewing machine device
The first patent for a sewing machine was issued at the beginning of the nineteenth century. At first, the machines completely copied the hand sewing technique, then a needle with an eye near the sharp end, lockstitch stitches, a presser foot appeared, and, finally, the mechanisms came to the principle by which they work to this day. Modern machines can be driven by simply scrolling the handle or its cap, or connected to an electrical outlet; they can make simple stitches or several more complex types, including curly stitches and embroidery, but they are based on the same algorithm for connecting two threads on both sides of the fabric.
The content of the article
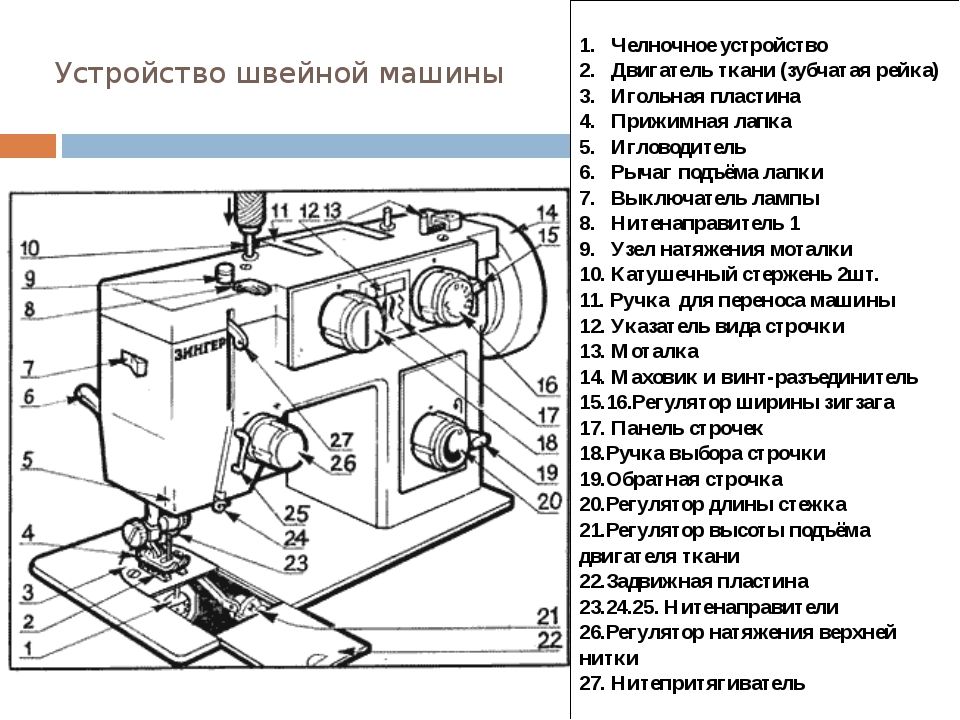
How a sewing machine works: parts of a sewing machine
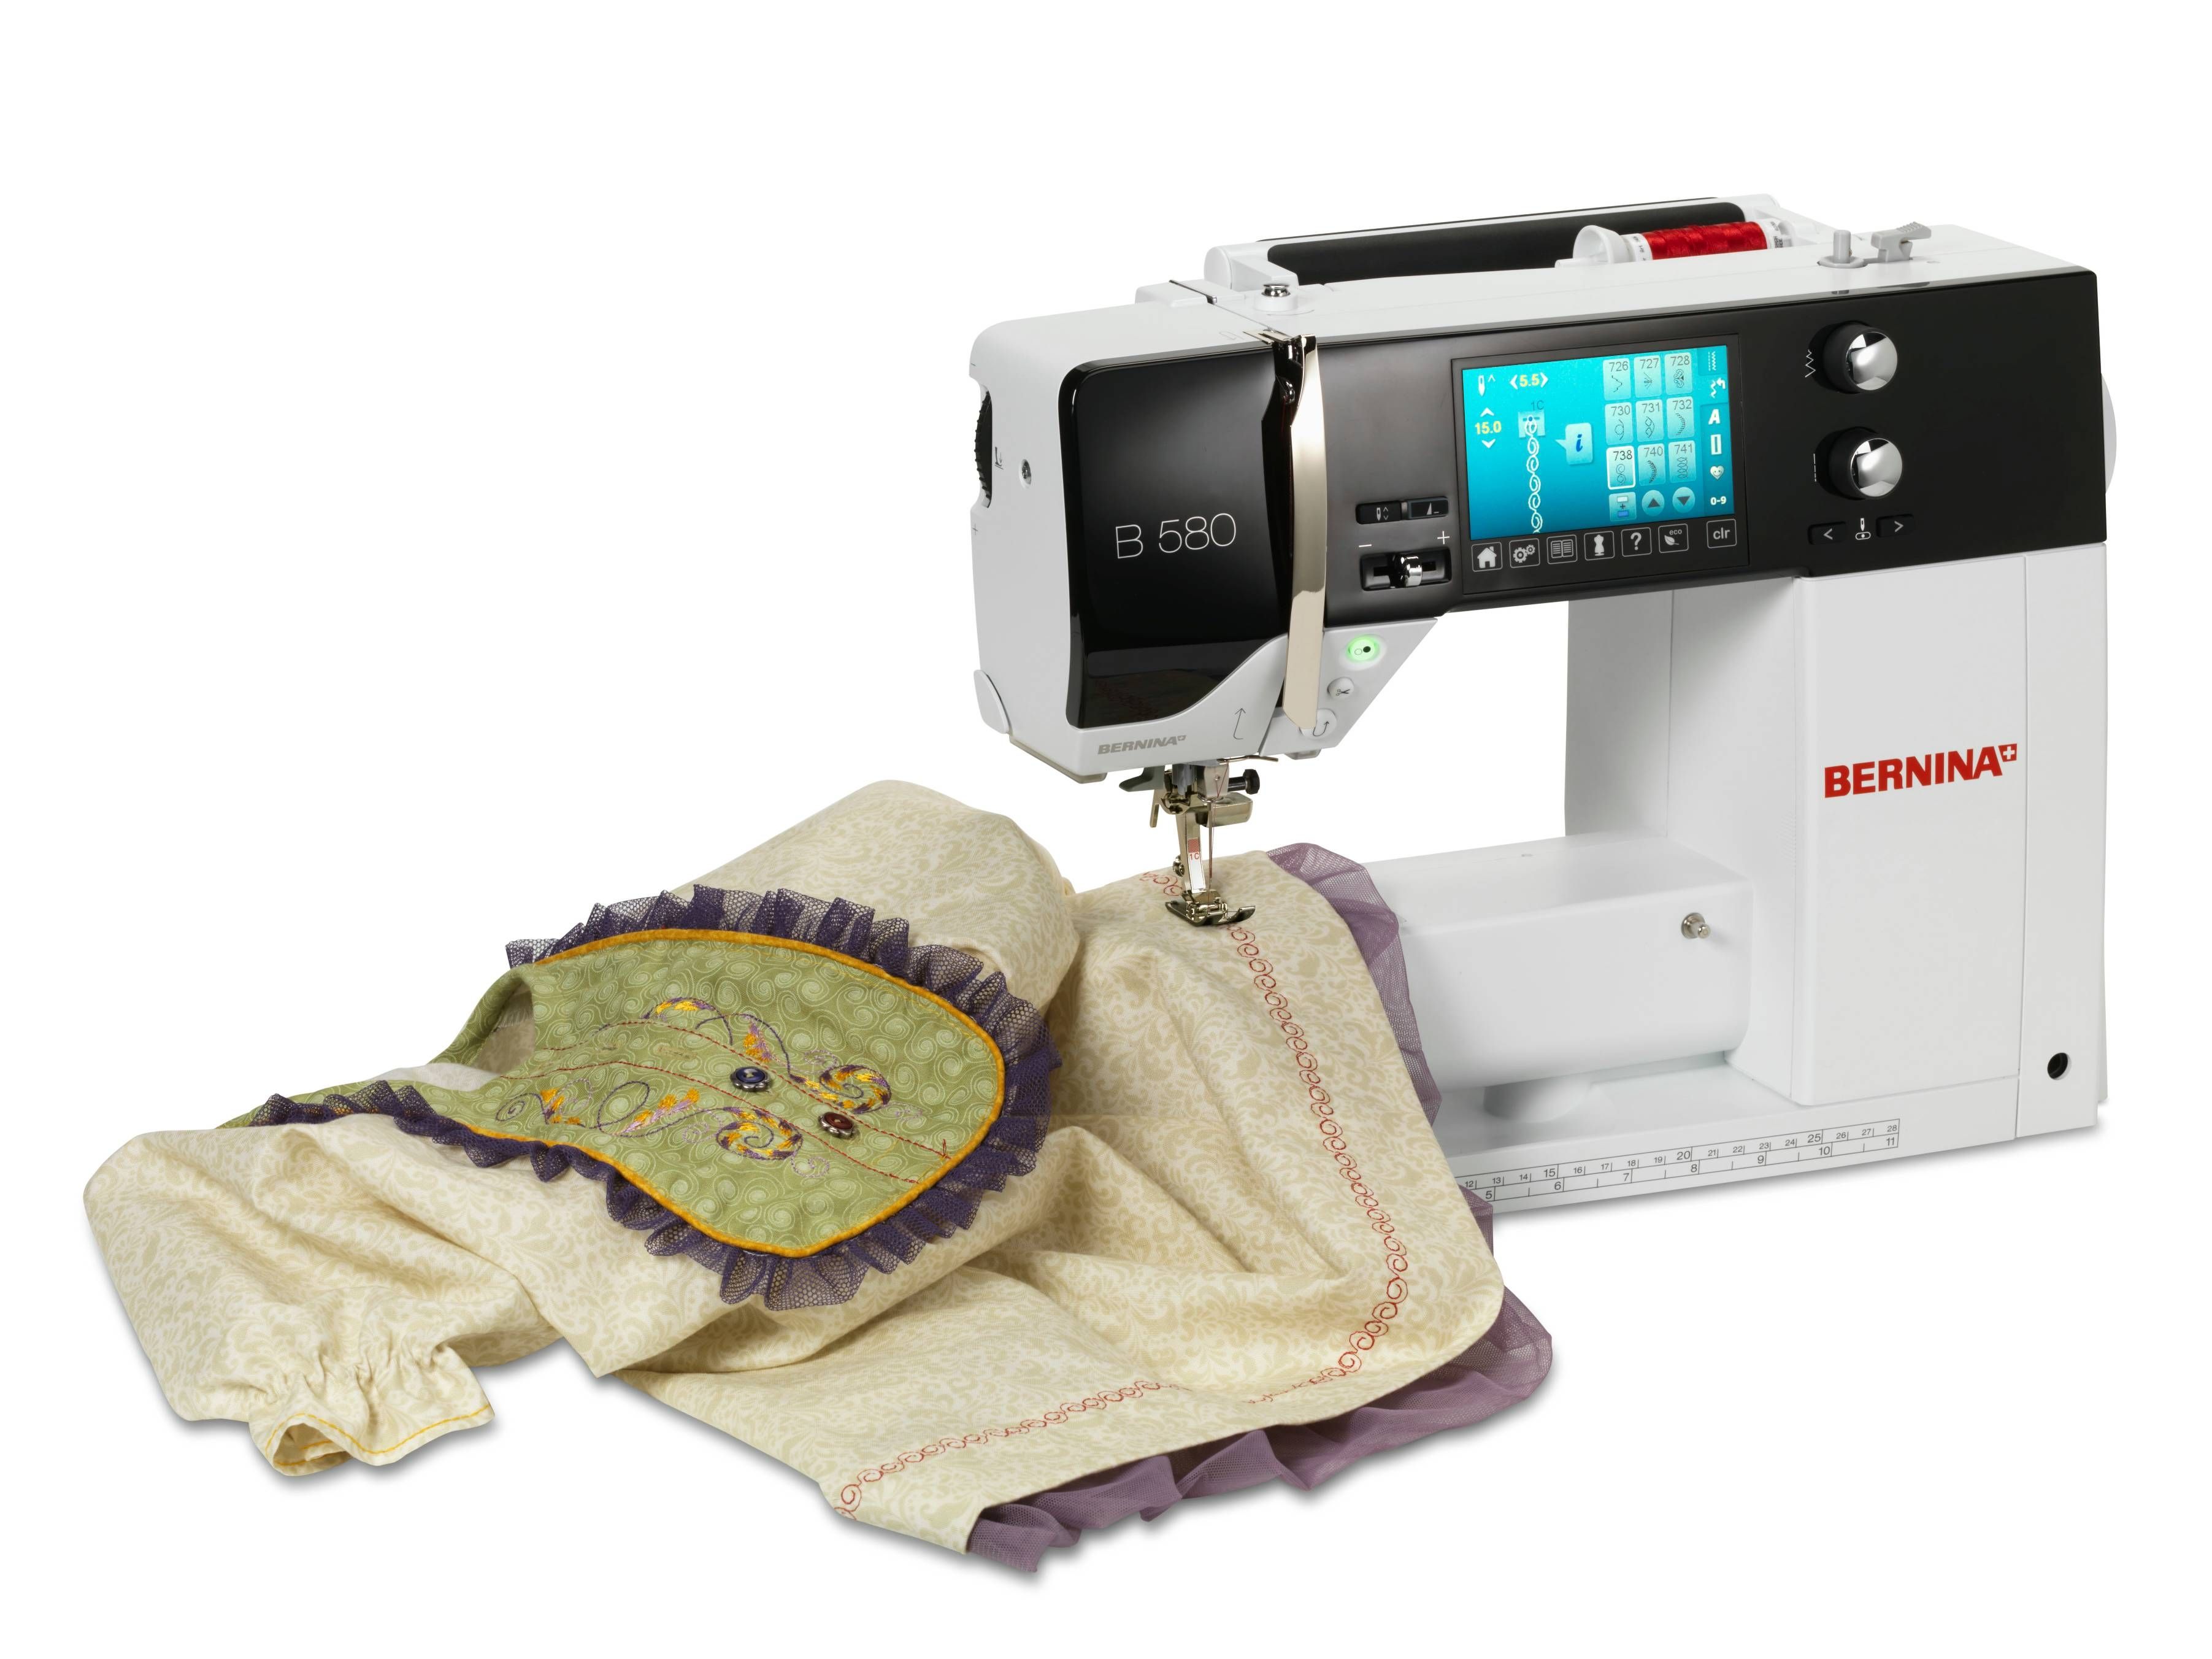
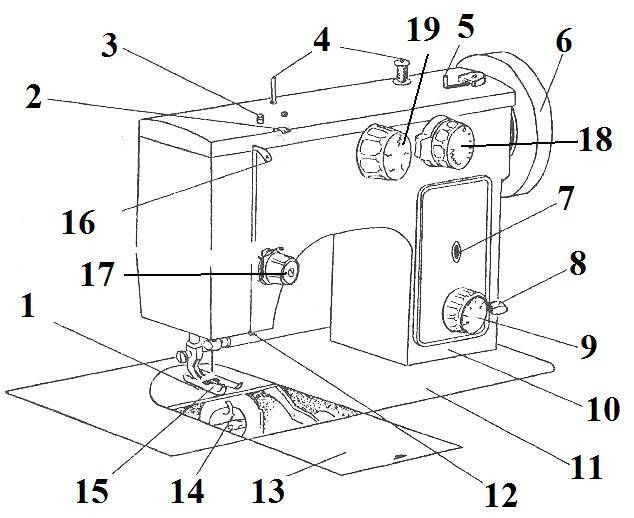
Despite the variety of models on the market, the main parts of most machines will be common:
- Flywheel - usually located on the right side of the body. Adjusts the needle height.
- The rod on which the spool of main thread is placed.
- Front panel stitch shape switch.
- The stitch length switch is located next to the shape selection knob.
- The thread guide tightens the thread to prevent it from getting tangled.
- The thread take-up moves up and down, feeding the thread from the spool into the machine.
- Thread tension regulator - a special screw or an option on the control panel.
- The presser foot holds the fabric in position.
- Presser foot pressure regulator is needed for fabrics made of different materials.
- Lever for raising and lowering the presser foot at the beginning and end of work.
- A needle that sews.
- The screw that secures the needle.
- A needle threader makes life very easy for the user.
- Thread cutter to quickly break the thread when finished.
- The plate under the foot is equipped with a conveyor - a gear wheel that moves the fabric under the needle.
- Under the needle and presser foot there is a shuttle device closed with a lid. If you open it, you will see the bobbin under the cap.
- Often modern machines also have a compartment for storing spare parts, threads and other small items.
What you need first: bobbin and hook
The shuttle is the main unit of operation of the sewing machine; it catches the top thread and connects it to the thread of the bottom line. It is on its settings that the operation of the machine depends, whether there will be any skips, breaks or tangled loops. The part is driven by a drive and moves back and forth in a given direction.
The shuttle can be vertical, horizontal, pendulum or rotating.
- A swing or pendulum shuttle is found in the cheapest models and is suitable for beginners or those who rarely use a sewing machine. It is simple but reliable and does not require special skills to operate. Disadvantages of this solution: low speed, noise and vibration during operation, limited choice of stitches.
- A vertical double-running/rotating/rotary shuttle is used in more expensive and professional equipment. It works quickly and reliably, prevents thread tangling and can withstand heavy loads when working with different materials.
- The horizontal shuttle differs from the previous ones in its location and design. It lies under the needle plate and is covered with a transparent cover.It is convenient that in such a system the bobbin is not hidden under a cap, and the color of the thread and how much is left are immediately visible. These machines are easy to use, they work quickly and quietly and are suitable for most people who sew regularly.
 A bobbin is a small spool of thread for the bottom stitch. Usually several pieces are included when purchasing.
REFERENCE! The bobbins must match the shape and material of the cap. Keep this in mind if you buy them separately from the machine itself. The choice of bobbin mechanism is an important point.
The screw located on the bobbin regulates the tension of the bobbin thread. If the thread is too loose, stitches will skip, and if the thread is too tight, it will break.
Incorrect winding of the thread on the bobbin also affects the quality of sewing. For example, hand winding may result in incorrect stitch tension. Therefore, it is better to wind the thread using the mechanism built into the machine, in accordance with the instructions.
- Open the shuttle compartment cover. If necessary, remove the hook and open the cover to remove the bobbin.
- Place the spool of thread you need on the pin on the top of the sewing machine.
- Unwind a little thread and pass the end through the thread guide.
- Loop it around the disc tensioner.
- Secure the end to the bobbin by threading it once through the special hole.
- Place the bobbin on the special winding rod.
- Start the machine using the pedal or button.
- Wind as much as you need, but make sure that the thread does not extend beyond the outer edge of the bobbin.
- Cut the thread and insert the bobbin into its place in the hook compartment.
Mechanism
The basic principle of operation of a sewing machine is the interaction of the needle with the upper thread and the shuttle with the thread of the lower stitch.
- The drive starts the needle moving up and down.
- The needle pierces the fabric and forms a loop underneath.
- The shuttle catches this loop and ties it to the thread from the bobbin.
- The thread take-up begins to lift the upper thread.
- The thread is tightened and the material feeder advances the fabric the length of the stitch.
 Under the body there is a motor that is started manually mechanically or electrically. There are many videos on the Internet demonstrating the operation of the engine. It rotates three shafts: a central one and two side ones. The central shaft is connected by a connecting rod to the flywheel axis and runs the needle bar, while the side shafts are responsible for the shuttle and the advancement of the fabric. It is the synchronous interaction of all parts that allows you to make even stitches, and a failure in this system leads to various problems.
IMPORTANT! The mechanisms of sewing machines, as a rule, do not wear out for a long time, and can serve for decades without requiring repair. The main thing is to follow the operating rules and lubricate the parts on time.
How to move fabric
After each movement of the needle, the fabric should move forward for a new stitch. The distance between the punctures is called the stitch pitch and is usually adjusted using the control lever on the sewing machine.
 The material is moved by a toothed rack protruding in the grooves of the needle plate. The operation of this mechanism greatly affects the quality of the stitches.
- At the first stage of stitch formation - in the lower position of the needle and staff - the distance between them should be 1.5-2mm.The master will help you accurately adjust this position, but after one correct adjustment you will forget for a long time about problems with skipping stitches and fabric getting stuck.
- As the needle moves upward, a stitch is formed, the teeth of the staff should be completely hidden, and the fabric should not move. Otherwise, the machine will start skipping stitches and breaking needles.
- After the stitch is formed, the bar rises and grabs the fabric with its teeth to move it to the desired distance.
Remember:
- The foot should be evenly pressed against the plane on all sides, avoiding distortion or stronger pressure on one side;
- Do not pull the fabric forward or pinch it too hard to avoid interfering with the driving mechanism.
How to replace threads:
- First, unplug the machine to avoid injury.
- Raise the presser foot and use the handwheel to fix the needle in the up position.
- Place the coil on the special pin for it.
- Pull the thread through the top conductor and then down into the right channel.
- Wrap it around the thread tension device between the channels.
- Pull the thread up the left channel, through the thread take-up hook, and down again towards the needle on the other side of the lever.
- Thread the thread through the thread guide above the needle.
- Insert it into the eye of the needle, pull it away from you and place the free edge (about 5 cm) behind the machine.
What else you need to know about cars
Many sewing machines are equipped with additional functions:
- In most modern models, the needle can move not only up and down, but also left and right. This allows you to make a zigzag stitch or simple patterns using the principle of satin stitch embroidery.
- Presser feet are available in different shapes for different purposes: decorative stitching, buttonhole sewing, sewing in zippers and sewing on buttons.
- For darning, a special pad is put on the rail that moves the fabric, which fixes the material in place.
- It would seem like a trifle! But without a light bulb built into the machine to illuminate the working surface, you will more often miss mistakes and strain your eyes more.
- It is advisable to choose a machine that comes with tools for home repairs - a screwdriver and keys.
 Other types of machines for home use:
- Computerized ones are controlled by a computer board and can produce more intricate stitches. The number and complexity of programs depends on the amount of memory.
- The lockstitch is durable, but does not stretch well, so it is rarely used for sewing knitwear. Here you need a machine that uses flat stitches.
- You can purchase an overlocker for overcasting fabrics. It is equipped with a trimming mechanism and is used for hemming fabrics in a variety of ways, including the finest lace and chiffon.
Some tips:
- Excessive load may damage the motor. This often happens during long continuous work - for example, hemming tablecloths, curtains and bed linen. Take breaks between turning on the electric drive.
- The needle must be straight and sharp. Do not attempt to use a damaged one or to repair or sharpen it yourself - it is not intended for this. And using a damaged needle can lead to breakdown of the entire machine.
- Also, the needle must match the fabric that it is sewing - for lace and leather, needles of different thicknesses are needed, and for knitwear, a needle with a rounded tip is used.A standard set can be purchased at almost any craft store.
Understanding how a sewing machine works makes it easier to operate and allows you to correct minor problems without leaving your desk. With the help of a good machine, you can not only do simple jobs like shortening trousers or mending damaged clothes, but also get creative and turn household chores into a hobby.

