How to insert a bobbin into a sewing machine
 A properly threaded bobbin into a sewing machine has a direct impact on the quality of sewing. This process scares many novice craftsmen. However, this is not difficult if you strictly follow the instructions.
The content of the article
What is a bobbin for?
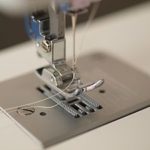
One of the main parts in a sewing machine is the bobbin case. It must always be in good working order and in perfect condition. Its surface should be smooth. After all, even a minor flaw can lead to deformation of the stitching. This could be either skipping stitches or thread breakage. During sewing, the upper thread pulls the lower thread, which is located in the bobbin case. Both threads are intertwined with each other resulting in stitches.
ATTENTION! The degree of thread tension is influenced by the weight of the bobbin, as well as the material from which it is made. A plastic product will slide much easier inside the mechanism, unlike a metal one.
Preparing the machine for a shift
 First you need to prepare the machine. Let's look at this process step by step:
- It is very important to raise the needle to the highest position. To do this, rotate the flywheel towards you. It is also advisable to turn off the power to the machine by turning off the main control button. If necessary, move the presser foot lever up
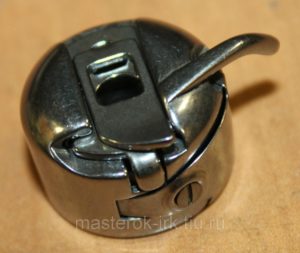
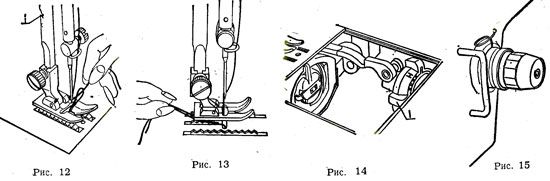
- Next, remove the bobbin case.To do this, you need to open the lid and move the valve. Then pull the bobbin lock towards you and gradually, as it loosens, remove the entire product.
IMPORTANT! Many devices have a special threading drawing, which shows the path of movement of the thread from the spool, as well as the subsequent threading of the bobbin.
Instructions on how to properly replace the bobbin
 You should start working by winding the bobbin. To do this, you need to install a special pin, which is located on the top of the device. Make sure that the thread unwinds from the pin strictly counterclockwise. Repeat the following steps:
- First you need to unwind the thread a little and pass it through the disc tensioner. Most often it is located on the opposite side of the coil, approximately above the needle. It may also have a small wire piece attached to it to hold the thread.
- Next, place the tip into one of the notches on the bobbin. Next, make a couple of turns for initial fastening. Many stores offer pre-threaded bobbins to choose from.
- Then I install the bobbin on the winder, which also looks like a small pin and is located not far from the spool pin.
- Next, fix the bobbin in the winding position. To do this, either the pin is moved to the right, or the latch is moved to the left. If everything is done correctly, a small sound should be heard.
- To start the winding process, press the pedal of the machine or a special button on its body. After a few turns, it is better to stop temporarily to cut off the protruding tip with scissors.
- Fill the part completely with thread. The device usually stops on its own. Sometimes it is better to track this process.
- Return the latch to its original position.The bobbin is ready for further work.
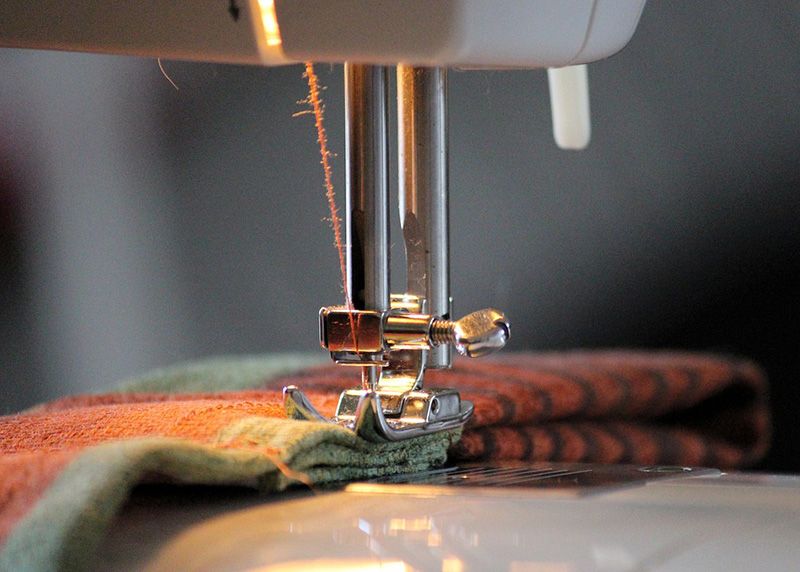
After the device is prepared, the top thread is inserted, and the thread is wound on the bobbin, you should begin the process of replacing the bobbin. Modern devices can have a shuttle of both vertical and horizontal types. The vertical option is more common. It is used both in production and in budget sewing devices. The horizontal type is most often found in more expensive electronic machines. It is considered more convenient and may have a transparent cover, which allows you to see the bobbin and the work of the lower thread. It is also convenient to track possible problems.
Instructions
If everything is done correctly and according to the instructions, then the machine is ready for use. Let's look at this process step by step:
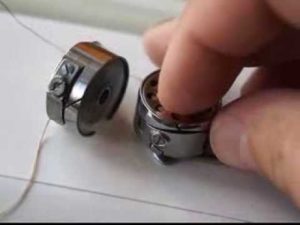
- You need to place the bobbin in the cap and thread the tip of the thread into the notch on the cap. Therefore, before inserting the bobbin, you should unwind a few centimeters.
- During threading, the bobbin case is held so that the hook from the lock lies on the person’s thumb.
- The part is put in place and the free end of the thread is pulled into the groove of the cap. It should fit into the spring terminal and exit through a special recess in the thread guide.
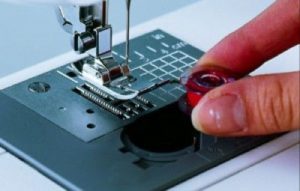
- Then grab the cap by the seal and place it in the machine. When it is in place, the latch can be released. It should sit tightly in the device and not turn.
- Next, you should turn the flywheel towards you so that the needle makes a couple of moves it is accustomed to. As a result, the upper and lower threads should connect and the output will be a large loop.
- The resulting loop is untied, the upper and lower threads are pulled out (about 15 cm) and guided behind the foot.
 Next you should check the thread tension.Modern devices have special thread tension regulators. In general, the threading process may vary from device to device. In most cases, there are detailed diagrams and descriptions of refueling. In addition, the elements are arranged in such a way that it is easy to guess the meaning of further actions. Certain difficulties arise more often with manual control mechanisms.
REFERENCE! The threads in the bobbin case should rotate strictly clockwise.
When you first get acquainted with the machine, threading may seem difficult and tedious. However, after repeating this action a couple of times, in the future it can be done very quickly, without even thinking about the sequence.