How to insert thread into a sewing machine
 The quality characteristics of future items and the speed of sewing depend on the thread correctly threaded into the sewing machine. Inaccurate threading can lead to needle breakage and cause more serious problems with the machine. This action, which is mandatory for all masters, should be given special attention during the initial phase of training and familiarization with the new mechanism. This will help you change threads quickly and accurately the first time.
The content of the article
How to properly thread a standard sewing machine
Conscientiously study the manual supplied with the sewing device. Reliable manufacturers are interested in long-term operation of their mechanisms. Therefore, detailed diagrams, descriptions and recommendations for refueling are attached. If you don't have the instructions at hand, don't worry! We will tell you how to perform this important operation.
For a regular stitch
The principle of threading for all standard machines is approximately the same.
First you need to check the reel so that it moves well and does not get stuck anywhere. The thread should pass from the thread tensioner to the thread take-up and then enter the needle hole.
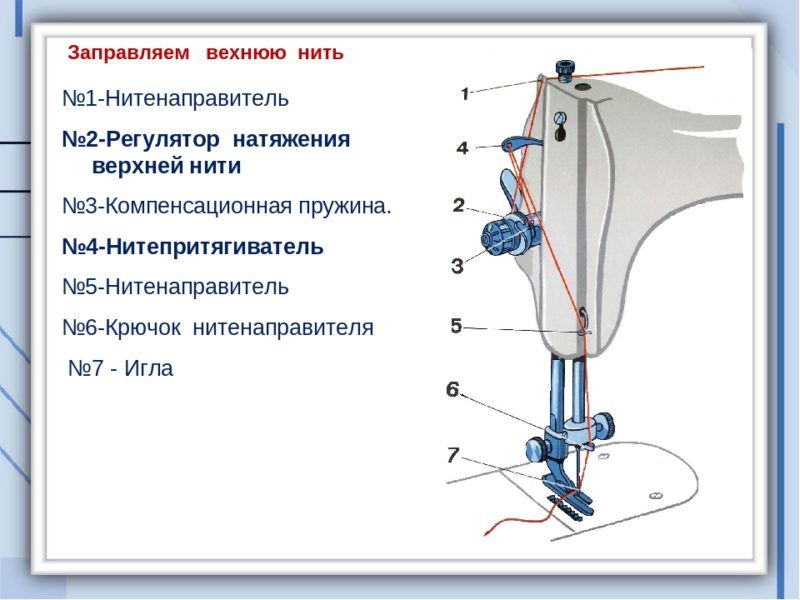
There are special thread guides between these elements.These can be small hooks or springs. They are designed to guide the thread in the right direction so that it catches less as it moves.
Algorithm of actions
Let's look at this process step by step.
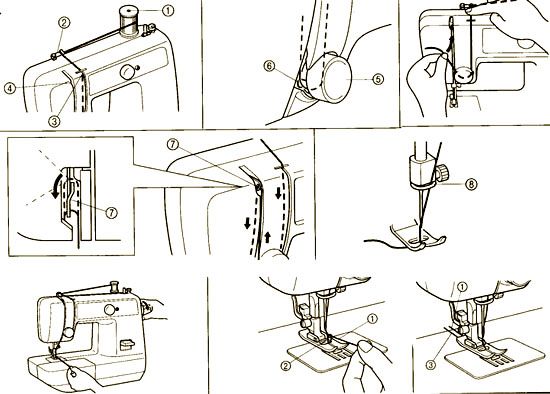
- Let's start threading the top thread. It should pass through the guide and into the thread tensioner between the two plates.
- Next, it is pulled up so that a small click is heard. This happens because there is a compensation spring inside the thread tensioner.
- Then we pass the thread through the thread take-up (upper lever).
- After this, it passes through all the thread guides encountered along the route.
- For convenience, lift the needle up and insert the thread into it from front to back. It is necessary to leave a free end about 5 cm long. It is better to place it so that it does not interfere and is located behind the device.
- Next, you should thread the lower thread, having first turned off the flywheel. First you need to wind the threads onto the bobbin, then put it in the bobbin case.
IMPORTANT! Make sure that the machine is de-energized when performing these steps.
- Before the bobbin ends up in the special device, unwind a little thread.
- The cap is placed in the shuttle, making sure that its slot intersects with the bobbin pin. A characteristic sound should be heard. If all of the above points are followed correctly, the cap will be completely fixed.
REFERENCE! The threads in the bobbin should rotate strictly clockwise.
Checking the correct threading
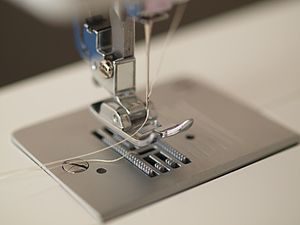
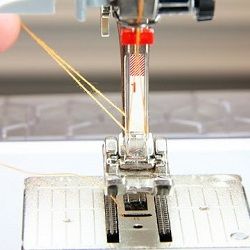
To make sure everything is done correctly, you need to rotate the flywheel. After the needle reaches the top and then the bottom position, a small loop should come out of the recess under the foot.
Next, both threads need to be connected together and brought back under the shoulder blade. They should be behind the foot, and the top one should go between the notch of the foot.
At the end of threading, you need to check the quality of the stitching. To do this, you need to sew a small piece on a test sample. If the thread breaks, adjustment is necessary. For example, tightening the thread tensioner.
IMPORTANT! With the presser foot raised, the thread should pass easily and stretch unhindered through the eye of the needle.
For double needle work
If you need a seam that imitates a cover stitch, then you need to choose a special double needle.
In this case, refilling is done as usual, but you will need an additional coil. Both threads must be inserted into the thread tensioner located on top. Follow these steps:
- We change the regular needle to a double one. She looks very unusual, and some difficulties may arise when getting to know her. But in practice everything turns out to be much easier. It is necessary to take into account that the sawed side of the needle should be directed away from you, and the rounded side - towards the person.
- Both threads are passed through all thread guides encountered along the way. As a result, the lower thread guides should play the role of a separator.
- The left thread is threaded into the needle from the left, and the right thread must be inserted from the right. If the thread guide is singular, then the left thread is passed through the thread guide, and the right thread is placed next to it, tucked under the eye of the needle.
How to thread an old-style manual machine
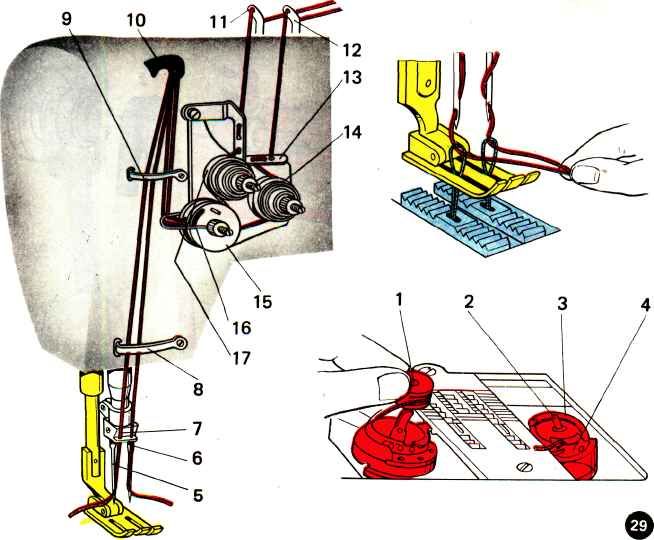
More ancient mechanisms use their own methods; they differ significantly from the technology for refueling new machines.
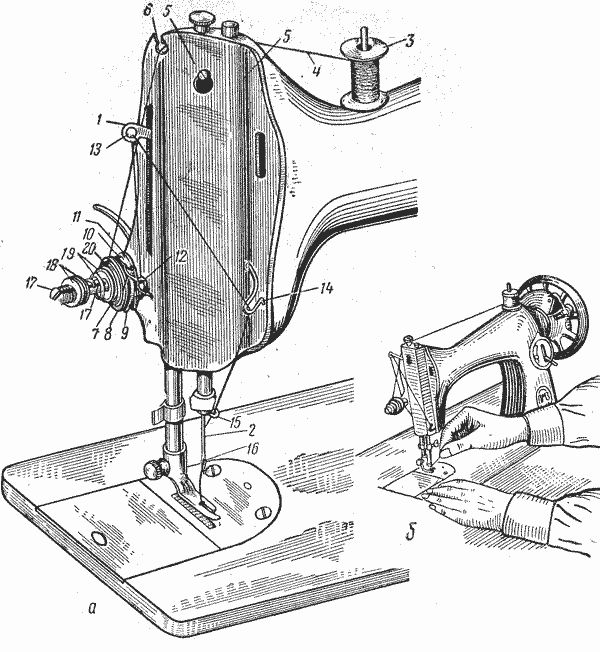
Let's look at the principle of threading a Rzhev machine.
- Attach the spool of thread to the device.
- Carefully thread the thread through the upper thread tensioner.
- We remove the thread using a special spring for compensation. Outwardly, it resembles a squiggle.
- Then we lower the thread down and thread it into the needle holder.
ATTENTION! Older models of machines have a special fork that throws the thread towards itself. This device is an alternative to a thread guide.
These products can be found only occasionally. These include Rzhev and Volga cars.
Possible errors in threading
Let's look at the most common nuances that cause breakdowns and reduced quality of tailoring.
- The spring responsible for regulating the tension does not hold the thread well. This is quite easy to notice. When lowering the foot, the thread is inserted into the needle and directed upward. When the presser foot is raised, the needle is released and the thread stretches well. This technique should be applied repeatedly, noting how tight the tension is. If no snags occur when tensioning, then the reason lies in the tensioner spring.
- The thread is over-tightened. This can be seen by the seam on the inside. The line loops and looks uneven and sloppy. In this case, the bobbin thread tension should be adjusted.
- The lower thread is denser in volume. The upper thread serves as the main thread in each line and is responsible for the lower one, which should be thinner. The thread should be selected taking into account this requirement. The stability of the operation of the entire device as a whole and the quality characteristics of the resulting product depend on the correct choice of material.
It is worth understanding that there are no trifles when working on a sewing machine, so you need to follow a strictly fixed sequence of actions.
We hope this article will help you understand the key points of this process.

