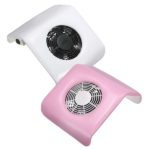
DIY manicure vacuum cleaner
 Both in nail salons and at home, when working on fingernails and toenails, a lot of dust is generated. Small particles - pieces of nails, skin, old varnish - fly in the air, get on the mucous membranes and into the lungs. This is not just unpleasant, but allergic reactions and respiratory diseases can become constant companions for people doing manicures. To collect such dust, a special device was created - a manicure vacuum cleaner, which collects microscopic particles in the master’s working area. All modern salons already have such devices; many purchase them for home use.
The content of the article
What types of manicure vacuum cleaners are there?
Manicure vacuum cleaners can be divided into two types:
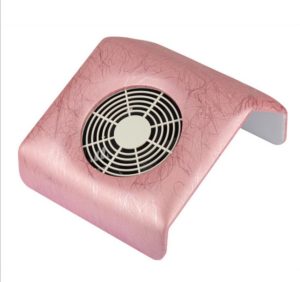
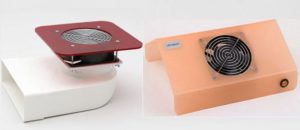
- portable, they can be taken to the client’s home or moved around the salon;
- stationary, as a rule, more powerful, built-in or located directly at the master’s workplace.
It is necessary to analyze in detail both options for manufacturing equipment.
Important! If you wish, following the instructions provided, you can make a manicure vacuum cleaner of the required design and power with your own hands from scrap materials.
How to make your own vacuum cleaner for manicure
 To make a device yourself, you don’t need to be an electrician or a carpenter; the main thing is to do everything slowly, carefully, and with the electrical equipment unplugged. The main working part of our device is an electric motor, which, by rotating the blades, will create the thrust necessary to remove small particles from the working area. The electric motor can be taken from an unnecessary kitchen hood, fan, hair dryer. Everything will depend on its power - too powerful a motor will not only consume more electricity, but will also create more noise. A weak motor will not give the desired effect. Ideally, electric motors of 30-60 W are suitable for stationary devices. If you don’t have a suitable motor at home, you can buy one at a hardware store, with blades and a power supply, preferably with a speed controller. In addition, you may need wires for switching, plastic sleeves (pipes) of different diameters and material for decorative finishing - plastic, fabric, protective mesh. All this is also available in such stores.
Exhausting a computer cooler: step-by-step instructions
This type of device is the easiest to manufacture; it can be made in one day, and it will bring a lot of benefits.
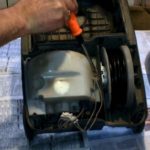
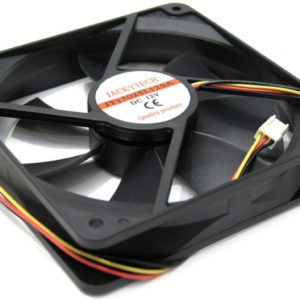
- We need to get a computer cooler. This is an electric motor with blades - a mini-fan that cools the inside of the computer. It can be removed from an old car or purchased at a specialized electrical goods store.
- The motor supply voltage is 12 V, and the network is 220, which means you will need a power supply. The power supply from a laptop is ideal. It’s true that the output voltage is a little higher, but this will not harm our device - it will rotate faster.You can also look for power supplies from different devices (game consoles, children's toys), or, as a last resort, buy them.
- Frame. The manufacture of the housing should be approached with special care; the ease of operation will depend on the angles of inclination. There are a lot of examples on the Internet; the easiest way is to make a body from plywood and cover it with fabric. In any case, such little things can be corrected later.
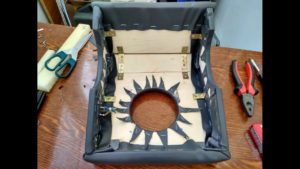
- Safety net. As a protective metal mesh, you can use a standard computer mesh.
- Assembly of the structure. The cooler and mesh are attached to the body with self-tapping screws. When connecting the fan, the main thing is to observe the polarity; if it doesn’t work the first time, then you need to disconnect the device and swap the wires. If the power supply is needed for some other purpose, then you will have to install a connector, and if it is used only for a manicure vacuum cleaner, the wires are soldered to the terminals of the electric motor and insulated. If you wish, you can also install a microswitch on the side panel.
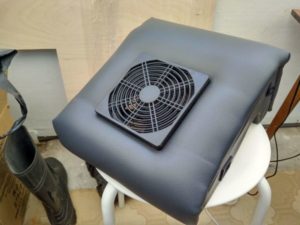
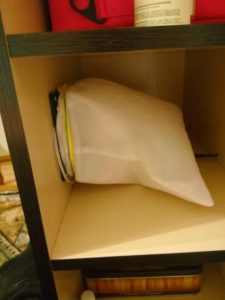
- Garbage collection bag. Take a ready-made bag from shoes or sew it from fabric. The bag is attached to the cooler with elastic bands.
Built-in vacuum cleaner for manicure: step-by-step instructions
A vacuum cleaner built into the desk is the best solution. It is convenient to work at such a table; nothing interferes with or limits the movements of the master. A powerful hood copes not only with microparticles, but also with odors. To make such professional equipment, you may need the help of men.
- It is necessary to make a cutout in the table top (tabletop) to suit the size of the fan. If you have no experience in such work, then it is better to contact a specialist. The cutout can be of any shape.
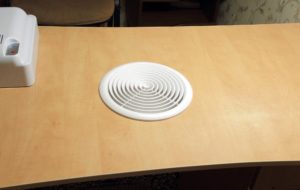
- Fan installation.The fan can be used with a standard hood, these are installed in bathrooms and toilets. It is also fastened with self-tapping screws or bolts. As an option, you can install several computer coolers.
- Installation of a protective grid.
Attention! The protective mesh must have small cells; a high-power electric motor can cause serious injuries if a finger gets into the rotation zone.
4. Garbage collection bag. The bag can be made of dense material and attached to the fan using a cord or rubber band.
5.Switch. It would be nice to equip such a stationary structure with a switch that will always be at hand.
As you can see from the review, there is nothing complicated in making a manicure vacuum cleaner - if only you had the desire!