Do-it-yourself bricklaying stoves
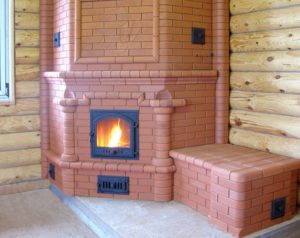
Currently, there are many heating systems that heat homes with various types of fuel, however, more recently, only a solid fuel stove was used for this. Despite the fact that its popularity has decreased somewhat, the stove is used everywhere for cooking, barbecuing and barbecuing, creating a cozy, relaxing environment and family time.
The content of the article
Features of laying a brick oven with your own hands
 Before you start drawing up diagrams and drawings of stoves with your own hands, it is worth understanding what the device will be intended for. Since the design is complex and takes many years to complete, it will simply be impossible to correct the error in the future. Depending on their purpose, stoves are divided into:
- Heating systems are prefabricated and simple, they are used exclusively for heating homes;
- Heating and cooking stoves are a popular option because, along with heating, they provide the opportunity to cook food.
Note! Laying brick stoves with your own hands is possible even for a person with no experience, however, their design is not so simple and requires careful study.It is strongly recommended that before starting work, you study the design features of the products, get an initial idea of masonry from books, Internet resources, etc.
The design of any furnace is both simple and complex, with the main goal being maximum productivity. If we talk about elements, in particular, the main ones are:
- Firebox. It differs in size and is used for storing fuel. When designing, you should take into account the type of fuel, its volume and the desired performance. Its arrangement is made only from fire-resistant bricks;
- Chimney. Its purpose is to remove smoke and harmful gases from the stove that are formed during the combustion process. Ideally, if it is simply vertical, since the more bends the chimney has, the lower the draft and heating efficiency will be;
- ash pan chamber. With its help, accumulated ash is removed and air is supplied.
Important! Design is the key to further successful installation and longevity of the stove, so you should not save money or use dubious designs. It’s better to pay a competent stove maker once than to try unsuccessfully to correct the defects later.
Selection of materials and tools
 When the type of brick stoves for the home, drawings with instructions for which are publicly available on the Internet, have been chosen, it is time to choose materials and tools. Then you can start laying the stove with your own hands in order. As for materials, attention should be paid to brick - ceramic and fireproof are needed for masonry.
The latter is most often used only for fireplaces and fireboxes, while ceramic is used for the construction of the entire structure.
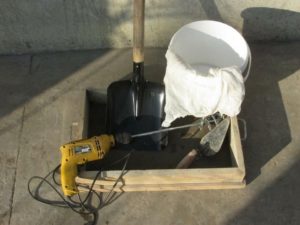
Laying stoves with your own hands, the features and nuances of the construction work of which will be presented below, requires the presence of some tools. For self-construction, you will need the following tools: trowel, spatula, plumb bob, tying wire, tape measure, grinder, metal corners and tapes, stove, valves, doors, grate, level and containers for mortar.
Preparation of the solution
 As for the mortar for laying stoves with your own hands, it is possible to either prepare it yourself from clay and sand, or buy a ready-made mixture. Clay for refractory bricks must be fireclay (fireproof, withstands heating up to 1500 degrees), and for masonry - ordinary clay.
The proportions of the components of the solution are established experimentally. To do this, the clay is soaked for a day, then divided into 5 parts, each of which is mixed with sand in different proportions, and left for several hours. After this, the samples are rolled into sausages (1-1.5 cm) and an object about 5 cm thick is wrapped with them:
- If cracks larger than 2 mm form in the solution, it is unsuitable;
- Cracks up to 2 mm - suitable for a stove that does not heat above 300 degrees;
- No cracks - can be used for masonry.
Advice! The solution directly affects the performance of the furnace and its service life, so following the rules for its preparation is mandatory!
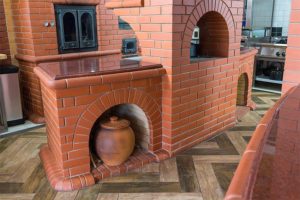
Step-by-step instructions for laying a Russian stove with a stove bench and stove
 Laying the stoves with your own hands in such an order that the structure has a lot of weight. This means the foundation must be strong and confidently withstand it.The material for it is a classic mortar of cement, sand and crushed stone, which is poured to a depth of about 700 mm using a reinforcement cage with a cross-section of 10 mm.
At the same time, when arranging a Russian stove with a stove bench and a stove, it is first recommended to make a cushion up to 200 mm thick from sand and crushed stone. To avoid airiness of the foundation, it is necessary to pierce it as often as possible with a rod or use a vibropress, if possible. At the end, the structure is leveled, and after 4 weeks it is covered with a double layer of roofing felt.
Step-by-step laying of a brick stove for a home consists of the following steps:
- Laying out the ash pan and the lower part of the first hood, installing the ash pan door and securing it with wire.
- Installation of the grate and laying the firebox (refractory brick and fireclay clay). Fastening the fuel chamber door.
- Laying up to the 12th row, covering the firebox and installing the slab, checking its evenness with a level.
- Arrangement of the brewing compartment, the first hood on the left edge of the stove and the summer passage, installation of a valve for it.
- Laying out is carried out up to the 20th row, the brewing compartment and the first hood are covered using metal corners for strength. Holes should be left in the masonry for the lifting channel, vents for the cooking compartment, as well as the summer passage. It is recommended to hide the cooking compartment with fireplace doors, which allow you to monitor the combustion process. Installation of cleaning doors for cleaning soot in a convenient accessible location.
- Laying the walls of the cap up to the 23rd row and covering it. A chimney channel of 260x260 mm with a smoke collector above the stove is left.
- Arrangement of the chimney and further finishing of the stove.
Note! The final finishing of the structure is carried out only after the oven has dried. The choice of its option is made based on personal preferences and financial capabilities.
Expert advice on laying a brick stove
 Each master has individual skills and preferences in laying a furnace, and methods that are convenient for him. Despite this, some features of the work are the same for everyone. First of all, this concerns the choice of material - the brick should be carefully inspected, the quality of firing, integrity, and absence of cracks should be checked.
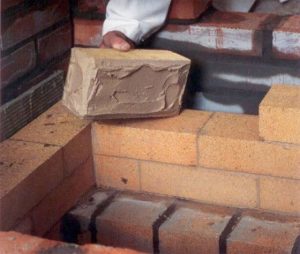
When installing the slab, you should leave a small gap with the brick wall to compensate for the thermal expansion of the metal. Well, the main thing is that the masonry must be carried out in strict accordance with the stove diagram, without any “gag”. Dust and crumbs must be carefully removed from each brick, and if it was not possible to apply the solution to it immediately, re-application should be preceded by cleaning it.
The key to building a functional, efficient and beautiful stove with your own hands is the same at all times - hard work, patience and strict adherence to the advice of professionals.