DIY sauna stoves
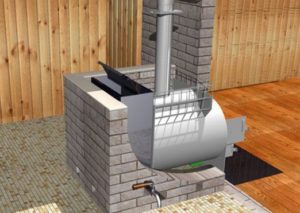 The beneficial effects of bath procedures on the body have been known for a long time, so it is not surprising that interest in them increases from year to year. Do-it-yourself sauna stoves are more of a necessity than a whim, since not a single factory design can satisfy all the buyer’s requirements. Ideally, the product should combine both attractiveness and excellent efficiency, so true connoisseurs prefer to roll up their sleeves and install it themselves.
The content of the article
Types of sauna stoves
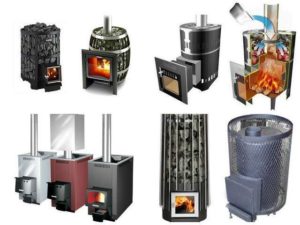 It is logical to assume that a balanced choice requires studying all types of units and selecting the best one for a particular room. Depending on your preferences, it is worth considering the possibility of arranging a stove with your own hands - some do not require special skills and effort, while others, on the contrary, will require the involvement of a specialist.
Differences in material of manufacture
The main material throughout time has been burnt brick, which many people prefer for its performance characteristics and aesthetics.Along with this, bricklaying cannot be called a simple task, but the heat of such a stove is retained longer. For a brick structure, a foundation is required that is not connected to the foundation of the bathhouse, which can become an obstacle due to the small size of the building. In addition, it is highly desirable to have at least a little experience, since violation of technology can lead to disastrous consequences - this is the reason why many fans of health procedures turn to masters.
No less popular are metal structures, which differ:
- quick installation and compact dimensions;
- a variety of models, which makes it possible to select a product for a specific project;
- made from scrap materials (pipes, recycled gas cylinders, wheels, barrels, etc.).
Only steel is suitable for a bathhouse, since cast iron is not resistant to temperature changes, which can result in the appearance of cracks on the walls. The only thing that stops you from purchasing a metal structure is its rapid cooling.
ATTENTION! If you like both metal and brick stoves, or the bathhouse does not have a large space, the best solution would be to install a metal structure and cover it with brick. This will help to slightly smooth out the imperfections of the metal and give the product an aesthetic appearance.
Differences in installation location and fuel used
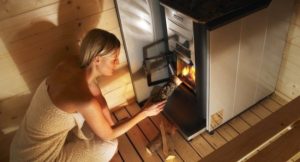 Often the unit is installed directly in the steam room, from where it is fired, which is an inexpensive and easy-to-manufacture option. However, there are also disadvantages, for example, you cannot store firewood in it, as it will become wet.Also, the steam room is usually small in size and there is a risk of getting burned on the door of the fuel chamber. For these reasons, it is advisable to remove the door to the dressing room and maintain the fire without causing discomfort to anyone or risking injury.
As for the energy source, the classic choice would be to use firewood. There are models that run on electricity, gas, and liquid fuel, but it is firewood that allows you to create a unique atmosphere in the bathhouse, which is so valued by lovers of wellness treatments.
Methods for heating stones
Heating a heater in a sauna stove is carried out in two ways:
- Constantly. The most common option, in which the stones do not come into contact with burning materials, is located either in a metal tank attached to the body, or in lattice containers on the pipe or walls. In this case, small stones are used, which heat up to 400 degrees without becoming covered with soot, since there is no contact with combustion products. The main advantage is the duration of rest in the bathhouse - the desired temperature can be maintained for as long as desired.
- Periodically. In this case, hot gases are removed directly through the heater and then discharged outside. The temperature of the stones can reach 1000 degrees, but before entering the steam room you should wait until the fuel burns out and carbon monoxide is removed.
For classic Russian stoves, the second heating method was used - the stones used were large, round, their high temperature was more than enough for an entire family. From time to time, the heater was disassembled to replace broken stones and clean them from soot.
Features of metal stoves
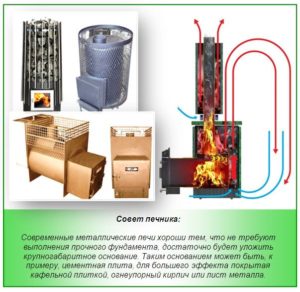
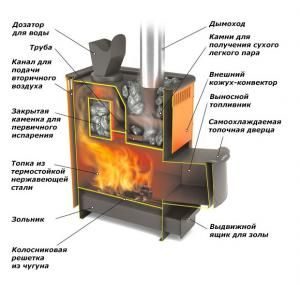 Modern metal units are safe, as they are made from sheet iron 3–5 mm thick. They are equipped with a thermal chamber used for laying stones, as well as an additional water tank. The safety of their installation, as well as higher efficiency, is ensured by lining with refractory bricks.
ATTENTION! To install a metal unit, there is no need for a solid foundation - it will be enough to install a concrete slab and cover it with metal sheets and tiles.
By design, metal products can be closed (they are small in size and often lined with brick), open (they have an open heater, which should be covered with a metal lid, and are equipped with a compact water tank) and combined. They also differ in the fuel used:
- Firewood. The most common option, which requires a significant amount of firewood and regular thorough cleaning.
- Electricity. They are a structure with thermal insulation components and a heating element.
- Gas. Durable, reliable models equipped with a thermostat that allows you to smoothly regulate power. Safety of use is ensured by a fuse that shuts off the gas supply if the burner goes out.
If we talk about metal stoves, there are many ready-made solutions worthy of attention. But still, a structure created by yourself will be more reliable, durable and durable, and will provide special pleasure from visiting the steam room.
Technology for self-production of sauna stoves
The undeniable advantage of home-made stoves is the ability to create an individual, unique model.There are a huge number of their varieties and nothing prevents you from taking individual features from several you like, and then combining them in your design.
What tools and materials are required for the job?
 Regardless of the material of manufacture, first of all you should prepare a design diagram and it would be useful to show it to a specialist. For a metal furnace you will need: sheet metal 8 mm thick, tap, grates, thick-walled pipe with a diameter of 550–600 mm, 2 m of ordinary pipe with a diameter of 110–115 mm, a rod with a cross-section of 10 mm, latches, doors, as well as a welding machine, an angle grinder.
For a brick unit you will need a brick (solid regular and refractory), a dry clay-sand mixture, a trowel, a level, a rubber hammer, a pencil, a tape measure, containers for water and mortar, corners and metal strips.
Step-by-step production of the furnace
The manufacturing process is as follows:
- A 50x200 mm blower is cut out of the pipe, after which a mount is welded above it from the inside to secure the grate. A metal plate with eyes, which is sold in all hardware stores, is suitable for this purpose.
- Arrangement of the firebox. A hole of 200x250 mm is cut and fastenings for the heater rods are welded above it, which can also serve as grates.
- A hole is made on the reverse side of the structure for pouring water, after which stones are placed in the heater (granite, flint or mica-containing stones cannot be used).
- A hole is made in the lid of the future stove for subsequent installation of the chimney. Also at this stage, you should weld a tank for heating water and install a faucet in its lower part.
- The final stage will be making the lid of the heating tank.It is cut in half, after which one half with a pre-cut hole for the chimney is welded to the tank, and a handle is attached to the second and it remains removable on hinges.
IMPORTANT! The main condition for arranging a metal structure is the tightness of all seams, which determines the durability and efficiency of its use.
Independent installation of a brick oven requires a leisurely approach and patience. Before proceeding directly to the laying, you should make a foundation pit according to the dimensions of the future structure, the depth of which should be at least 0.7 m.
ATTENTION! For masonry, a clay-sand mortar is used, which is recommended to be purchased in a store, since it is difficult to find the necessary clay.
Stages of work:
- The foundation is being poured. Laying is carried out no earlier than it is completely dry.
- The foundation is covered with an asbestos cement sheet, after which a row of heaters is laid out.
- Further rows are laid in accordance with the drawing, and it is necessary to constantly monitor their level to avoid distortion. Tapping the bricks should be done with a rubber hammer, which will prevent them from being damaged.
- The stove is lined with refractory bricks. A grinder is used to cut bricks - the fragments will have precise dimensions, while the amount of construction waste will be significantly reduced.
- The chimney is laid using ordinary bricks, after which a deflector is mounted on it to enhance draft and protect against precipitation.
Before heating the stove for the first time, it is necessary to pause for 2 weeks to allow the structure to properly settle and dry.
Installing a stove in a bathhouse
The location for installing the stove should be chosen in advance, after which a shallow foundation is built, on which 2 rows of bricks are subsequently laid. Fire safety rules require the structure to be installed at a distance of at least 1 m from the wall (ideally it should be covered with protective foil). It is also recommended to insulate the chimney and install a ceiling passage assembly. Brick cladding will further improve the safety of using the stove, as well as its aesthetic and performance qualities.
Advantages and disadvantages of a metal sauna stove
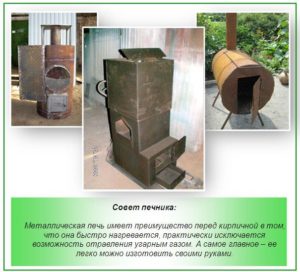 Metal structures have become more widespread, primarily because of their compactness, because most often home baths are not large in size. In addition, they have such advantages as:
- no need for a strong foundation;
- fast warming up and ability to control temperature;
- affordable price.
Along with the advantages, there are also disadvantages:
- fast cooling;
- not the best choice for spacious rooms;
- high fire hazard;
- the need to arrange double walls of the bathhouse to avoid heat stroke.
A self-made sauna stove is a real challenge for lovers of healthy relaxation. Despite the many nuances, the process is not very complicated and requires only a small amount of free time, patience and strict adherence to installation technology.


