How to set up an overlocker
 After purchasing an overlocker, you immediately want to get to work. But don't rush! In order for the work to be of high quality, it is necessary to carefully consider setting up such a delicate device. You should set up your sewing machine in stages.
The content of the article
How to properly set up your overlocker before sewing
Compared to a sewing machine, an overlock machine is more complex. Setting up many criteria of device components and repairing mechanisms can only be done by an experienced specialist. A number of works (for example, interaction of loopers) are very problematic to carry out on your own. But often no repair or adjustment work is required; you just need to set the tension of the isod threads correctly, which will ensure high-quality operation of the machine.
Thread tension
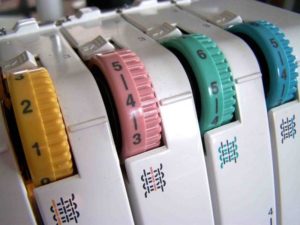 Previously, setting up an overlocker was difficult, since all actions were regulated by conical springs closed under the machine body. Today, the availability of the necessary controls on an external panel makes it easier to set balanced values.
Professionals advise adjusting the tension using the whole indicators on the regulator. The divisions between them are necessary in order to adjust the stitch for a specific type of work.
In order for the thread tension (three-thread overlock) to be optimal, it is necessary to ensure the correct position of the regulator on the body of the sewing machine.
Settings from 2 to 4 will result in weak tension, values from 4 to 5 will result in medium tension, and values from 6 to 7 will result in strong tension.
Important! All regulators should be located at the same mark, and all threads tucked into them should be of the same number and structure.
Stitch and cut size
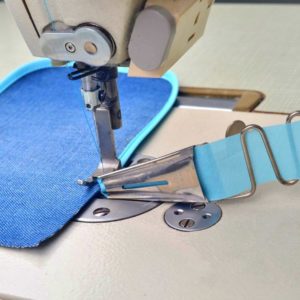 To ensure a high-quality seam, it is advisable to determine the width and length of the stitch. The presence of a universal mode provides standard overlock work on most fabrics. To make small seams, it is not necessary to set up the machine.
It is necessary to use the largest values in cases where a larger volume of fabric needs to be placed inside the stitch. It is quite difficult to work at minimum values: due to the optimal tension, it periodically breaks.
How to get quality stitching
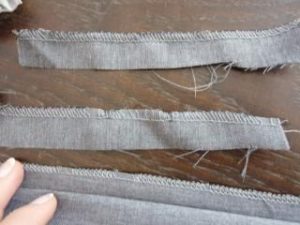 To achieve the optimal setting, you will need a small piece of jersey to check the quality of the stitching. Sew the material and carefully examine the resulting seam.
First you should inspect the loops of the left needle. The presence of wrinkled fabric indicates a strong tension on the thread of the left needle. It is necessary to weaken it by gradually changing the regulator parameters. Check each change with a stitch until the wrinkles on the fabric completely disappear.
At the next stage of setting up the device, you need to check the evenness of the stitching: position the fabric so that the stitching is in the middle, stretch the ends to the sides - a ladder of threads requires increasing the tension.
Important! You need to focus on the left thread of the needle, as it is responsible for connecting the loops to each other.
If it is tensioned correctly, the stitching will be of high quality. Having found the correct indicator of the left thread, you need to duplicate it on the right thread. This principle is acceptable for all types of matter; the values for the right and left should be the same.
The last step is to determine where the looper threads intertwine (the outermost piece of fabric). The stitching should be even with a smooth pattern between the stitches. The presence of loops behind the edge of the material indicates that the looper threads are loose; it is necessary to tighten them and recheck them on another piece of fabric. If the loops of only one looper protrude, you need to tighten its thread. In some cases, it is necessary to immediately tighten one and loosen the other looper (it is better to start loosening, then tighten).
Troubleshooting common problems
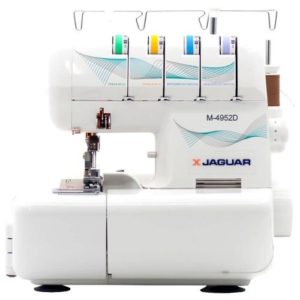 If the material does not move during overcasting, then the presser foot presses the fabric very weakly. When working with fabric that is too thin, it is necessary to keep the pressure of the presser foot to a minimum, or the fabric will wrinkle.
- When overcasting thick material, the presser foot pressure must be increased.
- A break indicates incorrect refueling. Looper threads must be threaded with extreme care. In certain types of machines, threading can only be done with curved tweezers - the process is quite complicated.
- Using the diagram will allow you to correctly insert the thread in the required places; missing one fastener will lead to uneven seams.
- A break may be the result of an incorrectly selected thread. The threads used are also important for working with an overlocker; they are indicators of overcast seams. Different quality and thickness will affect the change in seam pattern. It is better not to use thick or cotton threads. Thin and elastic, it will easily pass through the fabric being processed, into the needle, and loopers.It is recommended to use the same threads for conical bobbins.
- Tangling may occur due to improperly wound thread on the bobbin. You need to check the direction of the thread.
Skipping stitches may be due to:
- the needle is bent or not sharp. A blunt needle is determined by running the thumbnail along the tip of the needle in a circumferential manner. If the needle is bent, the nail will feel it. The same can be done using a magnifying glass. If a defect is detected, do not straighten the needle - this is unacceptable for fine adjustment of the overlocker.
It is important to study which needle is in the machine and use only those categories and brands that are recommended by the manufacturer.
the needle is not installed correctly; - the needle cannot be used according to the manufacturer's recommendations, incorrect;
- weak pressing of the fabric with the foot;
- missing one of the thread fastenings.
Lubricating and cleaning the overlocker
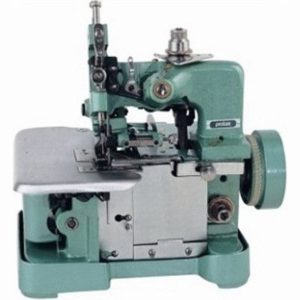 Long-term use of the machine leads to the need to clean the looper compartments and other accessible places for the accumulation of dirt (clippings, lint, oil stains). You can lubricate and clean the overlocker yourself. Today there are a large number of videos that show how to carry out these procedures. Regardless of whether Chinese, branded or industrial, an overlocker is used.
For cleaning it is better to use a stiff hair brush. It is necessary to avoid excess oil at the needle, as this may damage the material. Accuracy is necessary to lubricate the units in contact with the material.
Lubrication should be carried out once every six months, with frequent use once every 30 days. The oil can (better) can be replaced with a medical syringe; it will provide access to difficult places with little oil consumption.
In the diagram you can find instructions for lubrication, but it is better to lubricate all accessible places.


