How to assemble a Soviet meat grinder
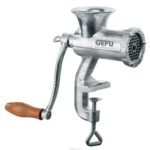
Every housewife has an indispensable kitchen assistant - a meat grinder. At the moment there are many variations and models. Electrical devices 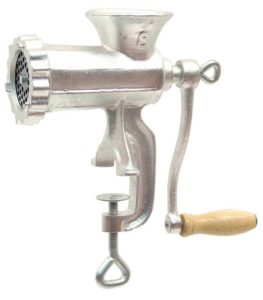 are gaining more and more popularity, but the manual mechanical meat grinder remains an unchanged classic. It would seem that at a time when all people are switching to automated simplified options, why choose the ordinary option, which requires a lot of physical effort? The main advantages of a manual meat grinder are the following factors: ease of use, low price, durability. Of course, there are also disadvantages: it requires more energy expenditure and turns cranking meat or anything else into a very labor-intensive process.
The content of the article
How to assemble a Soviet manual meat grinder: step-by-step process with photos
In order for the meat grinder to efficiently grind the meat into minced meat, it is necessary to correctly assemble all the parts. Otherwise, the meat will simply clump and fall back through the feed hole.
Manufacturers are modernizing the appearance of meat grinders, making changes, improving the design, but the operating principle itself remains unchanged. The main parts that perform the main function are the same in all models. To use a meat grinder for a long time and without any problems, you need to provide it with proper storage and, of course, be able to assemble it correctly!
Important! The meat grinder must be stored disassembled, and all parts of the structure must be dry.
WITHAssembling a manual meat grinder is not a difficult task, you just need to follow the instructions and take your time step by step, securely fixing each element.
Step 1
To begin, take all the structural elements and lay them out on the table. Make sure they are clean and dry.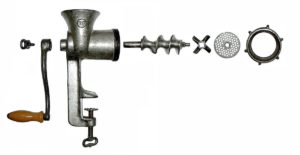
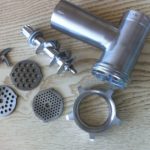
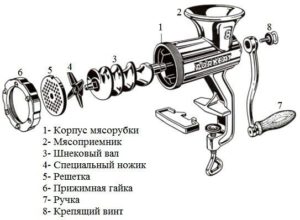
You should have 6 elements in front of you:
- The building itself is where we put the meat. It is usually made of a reliable metal alloy.
- Screw shaft. A large iron spiral, which, when rotated, will push the food into the blade itself.
- A knife with which food is chopped. As is correct, in standard devices, it comes in two types: disk or four-wing propeller.
- Lattice. It is a round plate with small holes. At the last stage, meat passes through the holes in the disk; their size determines the intensity of grinding.
- Nut for fastening. It twists on top and secures the grille and blade.
- Pen. It is inserted on the side opposite to the grille.
Step 2
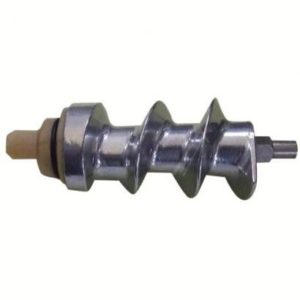
Take the metal frame and insert the auger shaft inside. You need to place it in such a way that the wide side comes out from the back - into the narrow passage, and the thin side - from the edge where the knife is located.
Step 3
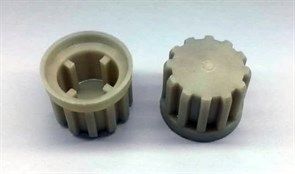
If the kit includes a nut for installing the handle, then use it and be sure to tighten the screw well. If there is no fastening, the handle is attached last.
Step 4
Put on the knife.Please note that this point is one of the key ones and if installed incorrectly, the meat grinder will not work properly and will “chew” the meat only by pressing on it, but not cutting it.
Remember that the knife is put on with the flat side facing out and nothing else. If you notice that something goes wrong during scrolling, disassemble the device and once again make sure that you put the knife on the right side. This is the most common mistake when assembling a meat grinder.
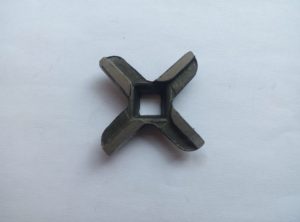
Step 5
Firmly insert the hole plate onto the end of the rod. Make sure it fits as tightly as possible against the blade.
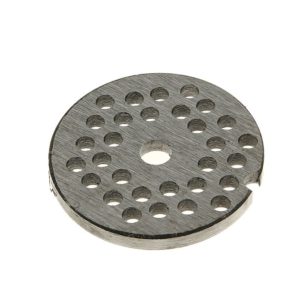
Step 6
Finally, for secure fixation, secure the structure with a nut.
Care instructions: how to properly disassemble and properly clean a meat grinder
In order for your kitchen helper to serve you faithfully, you should follow simple rules and treat her with care. The main requirement for long-term operation is immediate cleaning of all elements and thorough washing.
Some housewives, who do not want to take everything apart and thoroughly wash it, advise skipping a piece of sugar and it will supposedly clean everything. The choice, of course, is yours, but this method clearly does not ensure the necessary cleanliness of the device.
Clogged dirt is scary not only because it causes rust to form, but food debris that has not yet been removed can begin to emit an unpleasant odor. It can be difficult to discover where it came from.
Important! The device can only be washed when disassembled and in no other way.
The sequence for disassembling the meat grinder is as follows:
- unscrew the handle;
- unscrew the nut that secures the device;
- take out the grate;
- then take out the knife;
- and lastly, take out the screw shaft.
You can wash all the elements with regular detergent, and then be sure to dry them.

