How to disassemble a microwave oven
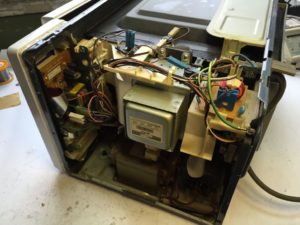 At first glance it may seem that a microwave oven is a complex device, but in fact it has a simple design. It includes the following main elements:
- magnetron;
- heating chambers;
- windings;
- waveguide.
The latter is needed to connect the magnetron to the camera.
The content of the article
Is it possible to disassemble a microwave oven yourself?
Undoubtedly, it is possible if you follow basic safety rules. First: before disassembling the stove, it is disconnected from the power supply and the voltage is removed from the high-voltage modules.
Important! When the device is turned on, it is prohibited to disassemble it.
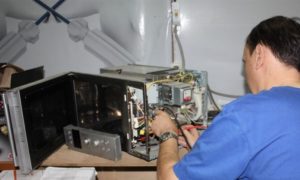
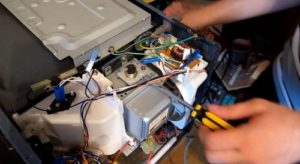
How to disassemble a microwave oven: step by step instructions
Like any technical device, it is disassembled in a certain sequence.
1. Removing the casing
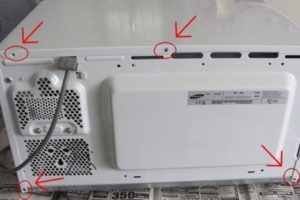 At the first stage, remove the casing; to do this, you need to disconnect the cord from the power socket, unscrew the fasteners from the back and side surfaces of the stove. When the cover is released, it should be moved back and raised up.
2. Unplugging the power cable
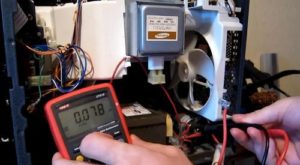
Once the cover is removed, you can begin removing the power cord. Disconnect the leads from the filter and disconnect the middle cable of the power cord.
ATTENTION! Do not forget that an electrical protection tool is used to discharge a high-voltage capacitor.
3. Removing the front panel and control unit
 To dismantle the panel and control module, it is necessary to carry out the following manipulations - disconnect the cable from the control module. Remove the grounding fasteners and fasteners fixing the module. After the plastic fasteners are released, pull out the control panel. The unit is mounted using three screws that must be removed to remove it. The last step is to remove the display panel.
Important! Dismantling is carried out carefully; when disconnecting cables, it is not recommended to pull on them.
4. Removing the door
After the control unit is removed, it is permissible to begin removing the door. It is opened and the restrictor plate is removed using a flathead screwdriver. Care must be taken when working. One careless movement and you can damage the rubber seal. Then lift and remove the door.
Important! After reinstalling the door, check that the switches are working properly.
Dismantling may have an impact on the level of microwave radiation. The limit level should not be more than 4 mW/cm2.
After reassembly, you need to make sure that the door and frame are parallel. Adjust as needed. The door must be installed so that there is no gap between it and the chassis.
5. Removing the magnetron
When removing the magnetron, you must disconnect the cables from the capacitor and transformer. Remove the fasteners that hold them to the frame.The assembly is disconnected until the tip comes completely out of the waveguide.
When removing, do not allow it to collide with parts installed nearby. This may cause damage. After returning the magnetron to its place, you will need to check the radiation level. It should not exceed 5 mW/cm2.
6. Removing the noise filter, diodes and other components.
To do this, perform the following manipulations:
- Disconnect the power harnesses from the filter and remove the fasteners securing the filter grounding wire to the rear wall.
- After this, the filter is removed. To do this, you need to press two plastic latches.
- After the power harnesses are disconnected from the tank and the screw is unscrewed, fix the grounding wire of the high-voltage diode.
- At the next stage, the harnesses are disconnected from the current relay and the fan. Then remove the fan mount and remove it.
The filter should be removed with caution, as it may contain various pathogenic organisms.
7. Removing the backlight
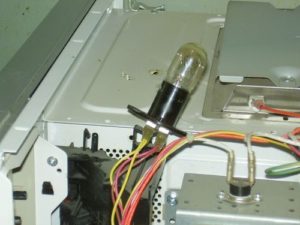 In order to remove the backlight lamp, disconnect the wires from the lamp and remove the fasteners securing the air duct to the magnetron. After pressing the air duct latches, remove the display panel.
In general, the extraction of microwave oven components is carried out according to one scheme:
- Disconnecting wires.
- Removing fasteners.
- Removing a component.
How to disassemble the microwave door
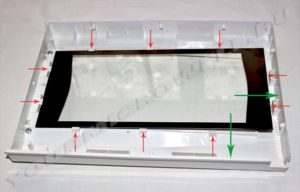 Regardless of the manufacturer, doors have many common design features. In particular, any door consists of several layers - a load-bearing one (it is made of metal), a protective one and an outer one, for the manufacture of which plastic is used.
To disassemble the door you will need a knife and two slotted screwdrivers.The first step is to separate the seal frame; at the next stage, remove the outer part; it can be secured using traditional fasteners or using plastic clips. And they immediately pull out the glass. This concludes the analysis.
Important tips on how to best disassemble a microwave oven
 When starting disassembly, you need to remember that there are many models of these household appliances on the market from different manufacturers, and each model may have its own subtleties in disassembly. For example, for disassembling some models, an ordinary Phillips-head screwdriver may not be suitable; they use fasteners with a different slot shape.
For those who perform this operation for the first time, it makes sense to accompany the disassembly process with photographs of each stage, which can help with reassembly.