How to check a thermocouple on a gas stove? Cleaning and replacing parts
The thermocouple is a small but very important element of the gas stove, which prevents the supply of fuel in the event of a fire stop. Thanks to this, unwanted and even dangerous situations, including explosions, can be prevented. That is why it is useful to understand how to check the thermocouple on a gas stove, how to clean it and how to replace it if necessary. All this is described in detail in the article.
The content of the article
Purpose and principle of operation of the device
A thermocouple is essentially a thermoelectric converter. It measures temperature over a relatively wide range. It is a network of 2 conductors, in the circuit of which an electromotive force arises. The greater the difference between the contact temperatures, the greater the difference. The value also depends on the composition of the conductors.
Replacing the thermocouple in a gas stove is mandatory as the equipment wears out. This is a very important unit that shuts off the gas supply in an emergency. Normally, gas flows to the nozzle and burns. But if it is blocked (for example, the burner is flooded with water), it is necessary to immediately stop supplying.
This ensures the safety of residents in the house:
- no explosion threat;
- no risk of gas poisoning;
- No excess fuel is supplied, which makes it possible to save gas.
From time to time the element becomes clogged, so it is important to understand how to clean the thermocouple in a gas stove. To understand this, you need to understand what it is. A thermocouple is an electrical contact through which a pulse is transmitted using:
- ration;
- welding;
- crimping
These contacts are made of metal, so they can become clogged over time. In this case, you will need to replace the thermocouple in the gas stove with your own hands or a cleaning procedure.
How to clean
It is quite possible to repair the thermocouple of a gas stove yourself. As a rule, the damage is not too significant - cleaning is enough. The instructions are:
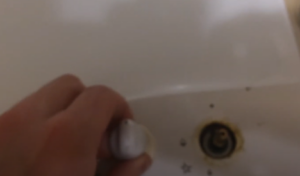
- Turn off the stove and turn off the gas supply.
- Remove all items - replacing the thermocouple in a gas oven is carried out if there is free access to it.
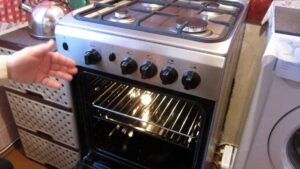
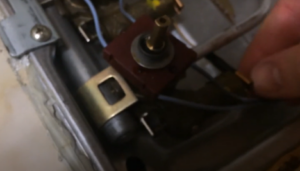
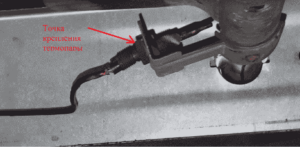
- Next you need to find a thermocouple. This is a small unit and is usually located in the upper zone of the oven. The element must be located close to the divider, since it regulates the gas supply. Based on this, you can understand why a thermocouple is needed - it immediately stops the gas supply in the event of a strong drop in temperature (due to extinguishing the flame).

- On the reverse side you can find soot and soot, dust and other accumulations. In most cases, it is for this reason that the thermocouple on a gas stove does not work. Cleaning is carried out using sandpaper, but it should be fine-grained.
- Next, all removed debris is removed, if necessary, wiped with a clean cloth and checked whether the device works or not.
Cleaning must be done carefully, never hitting the surface. We can say about the oven thermostat that it is a device that is not very durable (compared to the same burner).Therefore, they work exclusively with high-quality sandpaper with a fine-grained structure.
How to check and replace a thermocouple
In some cases, the device does not work even after complete cleaning. You can easily verify this by turning on the gas and not giving a spark. If fuel continues to flow and creates an emergency situation, then cleaning did not help. Then you will need to check it and replace it if necessary.
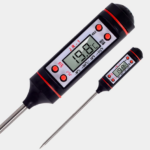
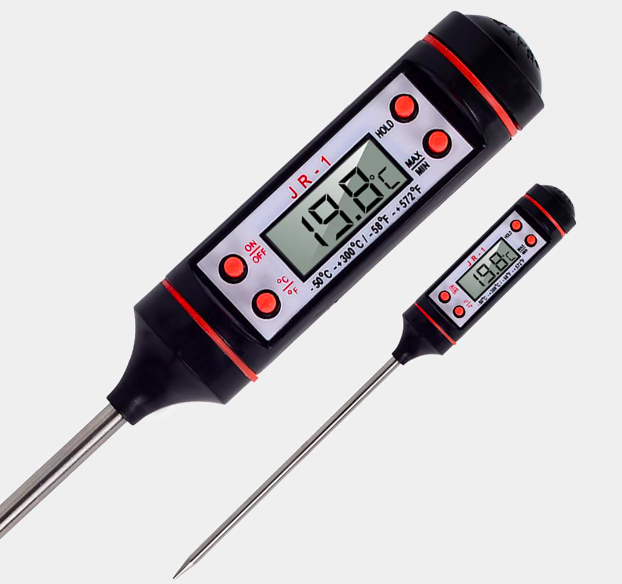
To do this you will need a multimeter or millivoltmeter. The sequence of actions is as follows:
- Turn off the gas stove and turn off the gas supply.
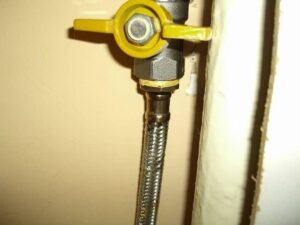
- Unscrew the nut from the valve using a regular wrench.
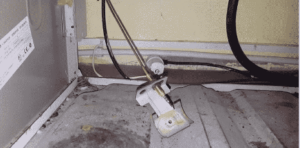
- Remove the thermocouple from the oven.
- Wear gloves, take the sensor and heat it over a candle or a lit gas burner. You need to keep it at a minimum height above the flame - literally 1 cm.
- Set the tester or voltmeter to mV. After heating the thermocouple, attach the probe to its body, and the second one will go to the output contact.
- Measure the voltage within 50-60 seconds. Normally, it should take values in the range from 18 to 25 mV.
- If the value is slightly below 18 mV, you need to move the thermocouple in the flame area and take readings again using a multimeter.
Since the operating principle of a thermocouple for a gas boiler is exactly the same, checking and cleaning are carried out in the same way. If this does not help, the device must be replaced. If you have minimal experience, you can also do it yourself. The instructions consist of the following steps:
- When purchasing a new model, it is best to check the thermocouple code on it or in the stove’s passport in advance.
- Turn off the stove and shut off the gas supply, as in the previous case.
- Remove the dividers and grilles.
- They take out the handles.
- Remove the panel.

- Disconnect the solenoid valve.
- Unscrew the wire and remove the thermocouple.
- Then install a new one and assemble all the elements in reverse order.
Next, you need to again monitor the gas with a thermocouple. If the stove immediately turns off after feeding fuel idle, the device is working normally. Otherwise, you need to check the contacts. It is clear that you can repair the thermocouple of a gas stove with your own hands. But if it malfunctions, you should definitely call a specialist so as not to expose yourself to unnecessary risks.