How to disassemble a hair dryer? Step-by-step instructions for disassembling and repairing a hair dryer with your own hands Roventa
If a hair dryer malfunctions, you will need to remove the fastening elements and disconnect the halves of the plastic case. This can be done using a special screwdriver, since the nozzles have a non-standard shape. Instructions on how to disassemble a hair dryer, as well as how to repair typical faults, are presented in this article.
The content of the article
Step-by-step instruction
You can repair a Rowenta hair dryer yourself, even with minimal skills. To do this, you need to prepare a screwdriver with several attachments (or a set of screwdrivers), as well as an electric soldering iron. To repair a Roventa hair dryer, you may also need a multimeter. It is necessary for diagnosing the serviceability of individual parts (“contacts ring” and determine the resistance level).
To disassemble the case proceed as follows:
- First you need to understand how the case is attached. If they have latches, they are simply removed, but often the halves are attached with screws. And not standard, but with an unusual shape of edges in the form of a plus, fork, triangle or star. During Roventa repairs, they are unscrewed with special attachments.
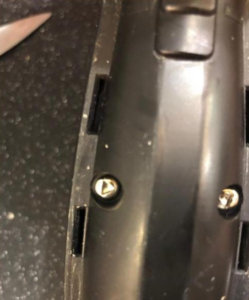
- On many models of the Roventa hair dryer, it is easier to repair the brush and other elements, since the body tilts due to a regular self-tapping screw. However, it is under a plastic covering in the shape of a triangle that needs to be plucked.And they do it with a nail file - a screwdriver won’t do it.
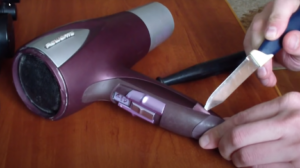
- There is a screw here - in order for the Rowenta Brush Activ to be disassembled successfully, it must be removed using a screwdriver. It should be flat, but with a slot in the middle. This cannot be done with other tools, such as tweezers.
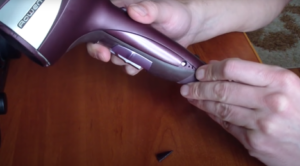
- At the next stage, repairing a Roventa hair dryer with your own hands comes down to opening both halves of the handle. It is more convenient to place your fingers first, and then carefully expand the parts.
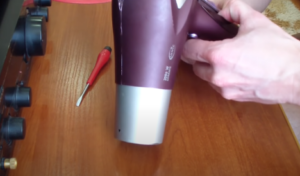
- In the end it should look something like this.
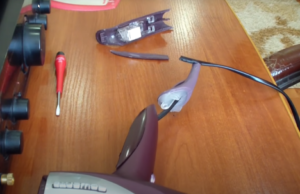
- Now you can figure out the circuit of the Rowent hair dryer, as shown below, determine which part is broken, and begin the repair.
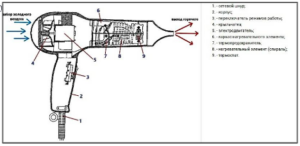
Repair of the Roventa hair dryer is carried out with your own hands and takes into account the electrical circuit.
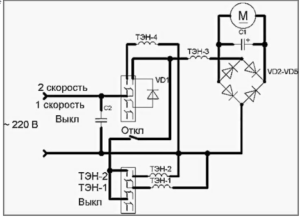
How to repair a hair dryer
Disassembling the Rowenta CV7430 hair dryer, like other models, is quite simple. After this, it is necessary to carefully inspect each part, carry out diagnostics and, if necessary, begin repairs. The main types of malfunctions and methods for eliminating them are described below.
Cord
It’s clear how to disassemble a Rowenta epilator or hair dryer. In some cases, you don’t even have to do this, since the malfunction is due to a lack of current or a faulty socket. If it works normally, you need to inspect the cord of the device.
Knowledge of how to disassemble a hair dryer comb will come in handy here, but first you need to inspect the cord. If it is partially twisted, there is a bend point, the element is highly likely to fail - then it must be replaced, since repairs are impractical.
After this, you should proceed to the instructions on how to disassemble Rowenta Brush Active. After dismantling, examine the contacts in which the wire approaches the mode switch. To do this, use a multimeter.
Switch
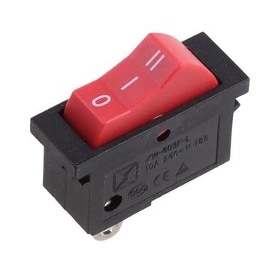
How to disassemble the Rowenta Brush Active 1000 hair dryer and repair it is quite simple if you accurately determine the cause of the breakdown. After inspecting the cord, you should learn how the switch button works. There should be no traces of melting or carbon deposits on its contacts.
If the switch is a three-position type, each mode is turned on separately. Before starting the test, it is recommended to take detailed photographs or notes so as not to confuse the contacts. All damage is cleaned with emery and soldered using a soldering iron.
Fan
Instructions on how to disassemble the Rowenta hair dryer brush will also be needed to repair the fan. This element provides air flow by rotating a plastic impeller, which is mounted on a metal rod. If the fan begins to work worse, this may be due to hair getting into the holes in the casing or on the impeller itself. One or more blades may also break.
The repair is carried out in 2 stages. First, they go through step-by-step instructions on how to disassemble a Sterlingg hair dryer, then clean the air duct:
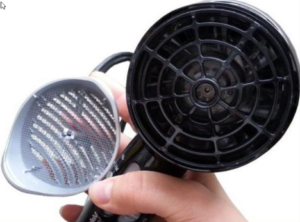
- If the device has a replaceable filter, remove it and thoroughly clean it.
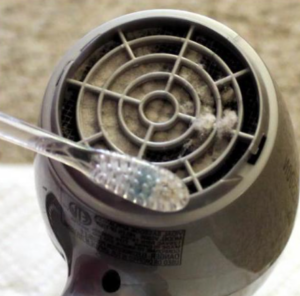
- If dirt has accumulated in the cracks, cleaning can be done with a toothbrush.
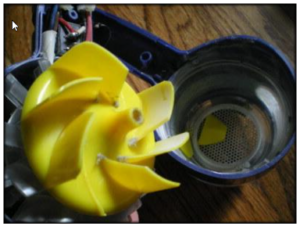
- Then you need to understand how to disassemble the Rowenta Studio Dry 2000 hair dryer to clean the impeller. All hair is removed from it and then checked by rotation. If the part spins normally, it will work normally.
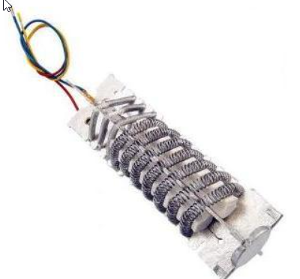
A heating element
You will also need to understand how to disassemble the Rowenta Studio Dry 2000 when repairing the heating element. The fact that it is faulty can be understood by the air not being warm enough or, conversely, being too hot. Another obvious sign is the appearance of a burning smell.
During repairs, proceed as follows:
- Carefully inspect the heating element and check its integrity.
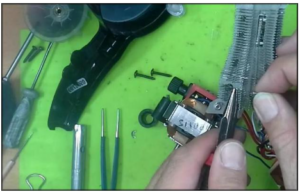
- If a burnt area is detected, the thread must be soldered or the 2 ends twisted on different sides. You can also crimp the spiral at both ends using a thin copper tube.
- First, you need to use the instructions on how to disassemble the Rowenta Studio Dry 2000 hair dryer, and then repair the coil. But it is important to understand that it will not work for a long time, so it is better to completely replace the element.
Engine
Do-it-yourself repair of a Rowenta hair dryer will also be necessary in cases where the engine breaks down. This can happen for 2 reasons - the wiring is broken or the motor itself has stopped working (in this case, a burning smell appears, the fan stops rotating, and you can hear a buzzing or crackling sound).
If the problem is related to the wiring, you can fix it as described above (using the cord as an example). If the motor itself fails, repairing the Rowenta is impractical. In such cases, you can try contacting a workshop, but it will often be easier to buy a new device.
Now it’s clear how to disassemble a Severin hair dryer, as well as diagnose and fix major faults. In most cases, repair work can be carried out independently. If you don’t have the skills, it’s better to contact a specialist, and if the engine breaks down, buy a new hair dryer.


