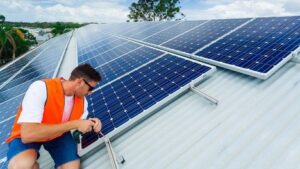
Installing solar panels on the roof with your own hands: how to mount
Installation of solar panels is carried out independently. To do this you will need available materials and tools. Specific skills are also not needed, but you should calculate in advance the angle of inclination, the height of the panels, as well as the distances between the rows. How to do this is described in detail below.
The content of the article
Installation Requirements
Installing solar panels is a responsible undertaking, because even with a slight violation of the angle, the amount of energy will significantly decrease. In addition, it is important to take care of the fastening and correct placement of the panels. To do this, several requirements must be met:
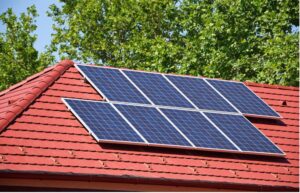
- First of all, the panels are placed in the most illuminated place, on which no shadow falls, for example, from houses or trees. You can place them on the roof or on the wall on the south, southeast side.
- The mounting of solar panels on the roof is done in such a way as to take into account the correct azimuth. In regions of the northern hemisphere, the direction should be only south, and the azimuth should be 180 degrees.
- It is also important to correctly determine the angle of inclination of the solar panels. It exactly corresponds to the indicator of geographical latitude. For example, in St. Petersburg, Leningrad region - 60 degrees. But this is not a strict value, because in summer it needs to be reduced by 12 degrees, and in winter it needs to be increased by the same amount.
- From a purely practical point of view, it is necessary to ensure free access to the panels at any time of the year. This is important for removing snow and dirt.If this is not possible, you can place the batteries perpendicular to the ground (an angle close to 90 degrees), for example, by attaching them to a wall.
- If it is intended to place panels in several rows, an interval is maintained between them, which should be 170% of the height of one row. For example, if it is 50 cm, then 50 * 1.7 = 85 cm.

What fasteners to use
Any method of installing solar panels involves the use of fasteners. The most commonly used types are:
- L-feet (MR-VI-01) is a universal mount that can be mounted in concrete or metal structures. The clamp goes through a rubber gasket, which ensures no gap and maximum density. Installation of solar panels involves fixing them to the profile using a special channel nut. In this case, the height of the protruding part of the profile can be up to 25 mm.
- L-shaped fastening and bolts - a set of several elements, which also includes a metal corner and a self-tapping screw. Can be used on roofs of complex profiles made of different materials, for example, metal tiles or corrugated sheets. As in the previous case, waterproofing is provided by a special rubber cuff.
- Another do-it-yourself solar panel mount is a bolt with a platform MR-VI-02. This kit contains a special pin in the form of a self-tapping screw, a plate made of stainless steel, and a side clamp designed for an aluminum profile.
- MR-RI-03 is a fastening element that is designed specifically for tiled roofs. A small margin of height within 30 mm is allowed.
- MR-VI-04 – a fixing element in the form of a metal trapezoid. Well suited, for example, for roofs made of sandwich panels.
- The universal clamp XMR-VI-08 is one of the simplest options.This fastener allows you to save the roof surface, lasts quite a long time and is suitable for almost any material.
- MR-VI-06 is another simple solution that combines a profile and an adapter for installation. But such parts are only suitable for perfectly flat, new roofs. Because otherwise the structure may turn out to be fragile.
How to install
For work, prepare a set of available tools and materials:
- bolts;
- metal corners;
- hairpins;
- screws;
- screwdriver;
- wrenches;
- ladder.
The installation work itself is carried out very carefully, taking into account the installation angle of the solar panels. The main stages are as follows:
- A frame or frame is assembled from metal profiles. This must be done on the ground, connecting each element in series. Metal squares 25*25 and 50*50 cm are used as a basis.
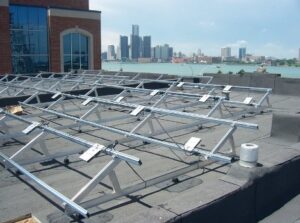
- Assembly can be carried out at height, but in any case, all holes are made in advance. When installing the frame, take into account that the gap between the battery and the roof should be from 50 to 100 cm so that the surface does not overheat.
- Each element is sequentially fixed to an aluminum profile frame.
- If the structure is sloped, markings are made on the profile, triangles are cut out and assembled - rigid supports.
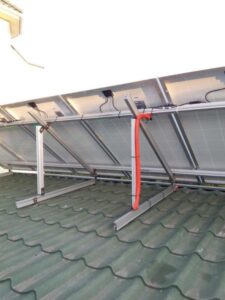
Now it’s clear how to mount solar panels on the roof. The installation itself is quite simple, but it is important to correctly calculate the angle of inclination and measure it during installation. To do this, use available tools; it is advisable to monitor the progress of work using a construction laser level.