Compressor repair: how to make a check valve at home
In this article we will tell you how to make a check valve for a water pipe and how to make a simple check valve for ventilation, the operating principle of a ball check valve, the design and design of a check valve.
In any liquid or gas supply system, the substance must move only in a certain direction, but sometimes the liquid/gas can go in the opposite direction. To avoid this, check valves are installed in plumbing and ventilation systems.
Check valves are devices for blocking the reverse movement of liquid or gas. They are installed in compressors, pumps, plumbing systems, ventilation systems, and refrigeration circuits.
The substance can flow back due to various reasons: in the case of a pipeline, the pump is turned off; in ventilation, if the system is installed incorrectly, the fan is turned off. Check valves differ in appearance, operating principle, and dimensions, but they have the same concept - to let liquid/gas flow in one direction and block its movement in the opposite direction.
Each check valve consists of:
- Housings with insulation and plug.
- Locking mechanism.
The locking mechanism differs from the type of valve. Below we will analyze the principle of operation of a ball check valve, and also tell you how to make a ball check valve for a water supply system with your own hands.
The content of the article
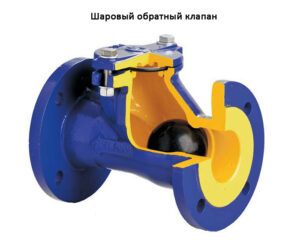
Operating principle of ball check valve
ktto.com.ua
As mentioned above, a ball valve consists of a body and a locking mechanism. The locking mechanism consists of a spring, a plug and the ball itself. The check valve body looks like a classic tee.
Through one tube, water under pressure enters the valve. The opposite side is closed with an insulated plug. The spring is pressed tightly against the plug. The spring pushes the metal ball forward, closing the inlet. If the water pressure is strong enough, it will push the ball back, compressing the spring and rising up the system. When the pressure drops and water begins to be “sucked” through the inlet, the spring pushes out the ball, which closes it. Water doesn't flow back.
How to make a ball check valve yourself at home
To make a check valve you will need:
- Coupling with external thread.
- Tee (internal thread).
- Spring (diameter less than the diameter of the tee).
- Metal ball (its diameter is also smaller than the diameter of the tee).
- Plug with thread for tee.
- Tow, FUM tape or other sealant.
When making a check valve, you need to choose the right spring - if it pushes the ball too weakly, it may not close the inlet hole. But if it presses too hard on the ball, the water pressure may not be enough - the water will not flow.
If you don’t want to make a mistake with a spring, buy several options at once or make your own. To do this, take a flat rod, heat up the steel wire and start winding it around the rod. Wire that is too long needs to be cut. Watch the distance between turns.Large – weak and long spring, small – short and powerful. Let the manufactured spring cool and remove it from the rod.
Ball Check Valve Manufacturing Process
Apply a sealant to the threads of the coupling - wind tow or FUM tape. Screw the coupling into one of the holes of the tee so that the coupling protrudes from the inside by 1-2 millimeters. Insert a ball into the opposite hole. Insert a spring behind the ball. Apply sealant to the male threaded plug. Tighten the plug tightly on the spring side.
A homemade check valve works like the one described above:
Water comes from the side with the coupling. If the pressure is strong enough, it pushes the ball away and compresses the spring, after which it rises and exits into the system through the top hole. When the pressure drops and water begins to “pull” into the inlet, the spring pushes the ball out, and it closes the hole, preventing water from flowing further.
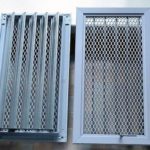
How to make a check valve for ventilation
The simplest check vent valve is made of flexible plastic that is attached to the grille/fan. To make such a valve you will need flexible material - a plastic plate, scissors, glue/screws.
Manufacturing a check valve for ventilation:
- Remove the grill/fan.
- Place a flexible plastic plate on the grille/fan of the system. Cut it to their size.
- Make small holes at the edges of the plate and in its center.
- Glue or attach the sides of the plate to the grille/fan.
- Reinstall the structure. You can cover it with a lid if you wish.
A homemade check valve for ventilation works as follows:
Air from the ventilation is supplied to this plate.It “hits” it and comes out from below and above the plate, as well as through holes in the center and at the edges. When the system begins to draw air from the room, it sucks the plate into the grille/fan. The plate cuts off the air supply.