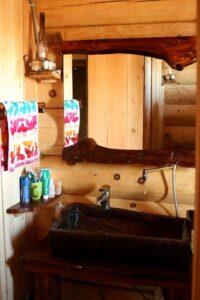
DIY sink made of epoxy resin and wood: how to make
Epoxy resin sinks are made in two ways - from solid wood or individual sheets. Each option has its pros and cons. But in any case, if you follow the installation rules, you can make a really good, sealed container. Step-by-step instructions for each option are described in the article.
The content of the article
Solid wood sink
If there is an array of wood, i.e. part of a trunk 1.2-1.5 m long and 1 m in diameter, you can literally hollow out the core, getting a kind of trough, and then cover the surfaces with epoxy resin. This is a rather labor-intensive process and also takes a lot of time. But a sink made of epoxy resin and wood turns out to be massive and reliable; if the correct manufacturing technology is followed, it will last for many years.
The main stages are:
- Prepare a fragment of the trunk, remove the bark and carefully remove the core using a chainsaw.

- Process the edges and protruding parts with a chisel so that you get a wooden trough with a relatively smooth inner surface.
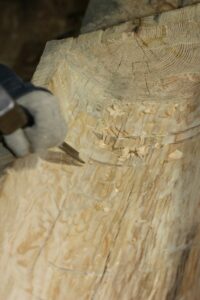
- Level the sides and make a slope at the bottom around the future drain hole. Then treat the surface with an iron brush - this is a regular disc on an angle grinder. Next, the drain is drilled and covered with a stain, such as walnut.
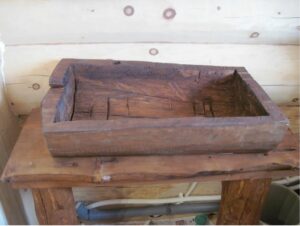
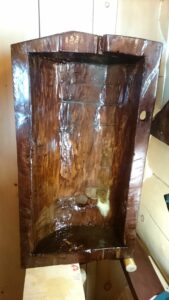
- Once dry, coat the sink with epoxy resin hardener. First, this is done over all surfaces, and then each part (sides, slope, edges) separately.The end result should be something like this.
- All that remains is to install the sink and connect the communications, then check for leaks.
Sink made of wooden sheets
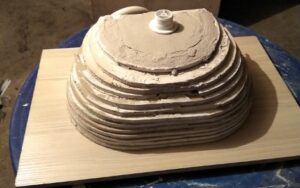
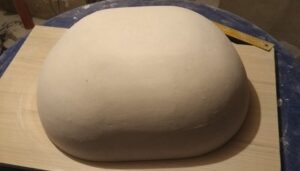
Solid wood is not always available, and it also requires a lot of effort at the stage of forming the container and draining it. Therefore, you can use another option, using thick plywood or wooden sheets as a basis. In this case, a do-it-yourself epoxy resin sink can be made faster, and besides, it is not so massive. The step-by-step instructions are as follows:
- First, a drawing is created and a shape matrix (cast) of the inner surface is constructed. The model can be made from plasterboard by adjusting different sheets according to the required dimensions. Then they transfer the dimensions onto wooden sheets or plywood, and cut off the excess parts with a jigsaw. Glue with Volma putty.
- It should be noted that the workpiece takes a long time to dry - up to 2-3 days. It should be taken out into a well-ventilated area or into fresh air under a canopy. After a few days, the edges are rounded off with a small grinder (an emery wheel with a grit value of 40 is used as an attachment). They must wear a respirator and gloves when working.
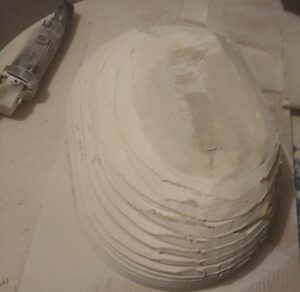
- Apply the putty in several layers and allow it to dry completely.
- Then sand again using a disc with a grit rating of 40 to 80.
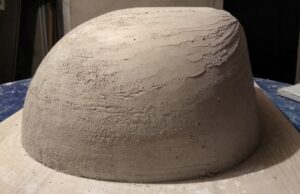
- Next, it is recommended to take automotive putty, process it, let it dry and sand it again.
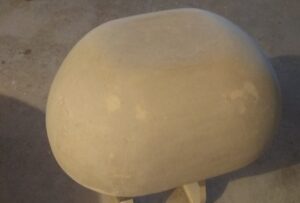
- Now you need to sand it with water, and then sand it with sandpaper.

- Apply a layer of epoxy resin, carefully treating the entire surface inside and out.
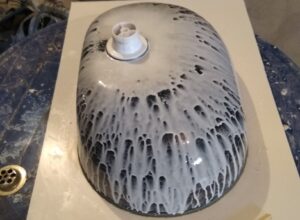
- After complete drying, paint using a spray can (it will be more beautiful this way).

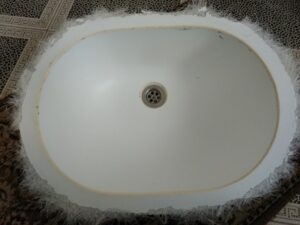
- Install the sink and check its tightness.
Thus, you can make a sink yourself. Special equipment is not required for this, but you need to be careful and draw up a preliminary drawing, and in some cases, a matrix. Particular attention is paid to finishing, thanks to which the product will be completely sealed and will last for many years.