Why the stapler doesn’t hammer the staples in completely: learning how to repair the tool
Why doesn't the stapler hammer the staples all the way in? This question is asked by every second user of a construction stapler, because over time, like any other construction tool, a stapler may develop problems due to intensive use. There is no need to immediately throw the stapler in the trash and run to the store for a new one, since most problems with the tool can be solved independently and in a few minutes.
Typically, unstable operation of the stapler is accompanied by minor breakdowns of its parts or incorrect settings. To find out how to fix a stapler yourself, be sure to read the article to the end.
The content of the article
Why doesn't the stapler hammer the staples all the way in?
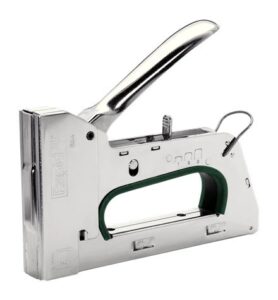
To begin with, let's quickly go over the design of a construction stapler. To do this, look at the following picture:

Typically, a construction stapler is made of metal or metal is combined with plastic inserts. There is no need to study in detail what exactly the stapler is made of, since such information will not help you with repairs. If you disassemble a construction stapler yourself, you will see that it essentially consists of a body and several spring mechanisms. For example:
- staple rammer spring;
- action spring;
- handle spring;
- and etc.
In the operation of a stapler, all mechanisms are important, however, if you do not know why the stapler does not hammer the staples in completely, then the first thing you need to pay attention to is the mainspring and the mainspring force adjustment screw. The most common reason why a stapler does not hammer the staples in completely is incorrect adjustment of the spring tension. In simple terms: you had a stapler set up that was great for driving staples into soft wood, but as soon as you need to drive a staple into hard wood, then the spring simply doesn’t have enough force. All that is needed in this case is to “tighten” the mainspring force adjustment screw so that the stapler “hits harder.”
In exactly the same way, the opposite effect occurs when the spring is “overtightened”. In this case, the stapler drives the staples very deeply into the soft base, which is also not very good. Then you need to relax the spring a little. In general, it is considered good practice to use a construction stapler to pre-adjust the spring tension before using the tool. That is, you first need to “shoot” with a stapler: drive in a few staples “in vain” to adjust the spring force to the density of the base. And only after this you need to begin full-fledged work.
Why the stapler doesn’t hammer the staples all the way in: the tension screw didn’t help
What should you do if you turn the mainspring tension screw back and forth, but the stapler still does not hammer the staples in completely? Yes, this happens too. This situation can be caused by several reasons:
- The stapler is “wrong.” It happens that you need to drive staples into a fairly hard material, and your stapler is simply physically not capable of it. You have tightened the mainspring “to the end”, but the staples still do not clog.Construction staplers come in different sizes: different sizes, different sizes of staples and with different capabilities. Perhaps your stapler is one of the “basic” staplers and you need to find a more powerful stapler that will get the job done.
- Tension spring problems. Before you run out to buy a new stapler, you should try to repair your existing one. There is a chance that the mainspring is faulty. First, disassemble the stapler and remove the mainspring. It happens that it is simply very clogged with dust and is unable to perform its tasks. Another possibility is that the spring has stretched or even broken. In this case, replace the spring with another one and the stapler will work perfectly again.
- The staples are "wrong". This is also a fairly common reason. It happens that you start using staples from another manufacturer, but they are not of high quality. Your stapler doesn't finish them and bends as soon as you try to drive the staples into a hard surface. In this case, replace the staples with quality ones.
- Very dense material. It is possible that you are trying to drive staples into a very dense material and not a single construction stapler can cope with this task. You can adjust and clean the mainspring, change the manufacturer of the staples, and even change the stapler to a more powerful one, but the situation will not change in any way, because the construction stapler also has limitations in functionality. Here you have to either put up with the “unfinished staples” and finish them off manually with a small hammer, or abandon the stapler and find another fastening method.
- The hands are not the same. Another fairly common reason why a stapler does not hammer the staples in completely is the inept operation of the tool.When trying to drive a staple into a solid base, the stapler does not have enough of its own weight and it “bounces” off the base, feeling resistance from the staple being driven. There is only one way out: press the stapler tightly and forcefully to the base while working. If you do not do this, then not a single stapler will hammer the staple all the way into a solid base.
How to fix a stapler: other common problems
A construction stapler seems like a simple tool that shouldn’t cause any problems in your work. However, during the operation of the tool, all its “working” parts wear out, which can lead to various problems with the stapler. We will give you several examples of unstable operation and what to look for in order to fix the stapler.
- The staples don't come out. The simplest reason is that there are no staples in the stapler magazine, so it just needs to be reloaded. Another reason is that the staples do not match the stapler. Perhaps they are slightly larger or installed incorrectly. The exit hole may also be clogged: you chose staples that were too soft and tried to drive them into a hard surface, so one of the staples creased and clogged the hole.
- The staples come out unstable. There is a high probability that there is a malfunction in the sending mechanism. This is the mechanism that “pushes” the staple cartridges inside the stapler magazine. Usually the problem is solved by cleaning and lubricating the mechanism. At the same time, it is still important to check the cleanliness of the outlet; perhaps it is partially clogged, so the staples come out “every once in a while.”
- The staples are wrinkled. We have already indirectly touched upon this problem. Its reason is the quality of the staples, namely the discrepancy between their quality and the structure of the base into which they are driven.For example, you have chosen soft staples with long legs and are trying to drive them into hard wood - as a result they bend. In this case, the best choice would be solid staples with a short stem, which fit into a solid base more easily.
- Two staples come out or the staples cling to each other. In this case, the stapler striker, which is responsible for releasing the staples, is most likely faulty. Over time, it can become deformed or even become unusable, and because of this, problems with removing staples begin. It needs to be examined. If it is simply deformed or clogged, then you can clean it and return it to its proper shape. In extreme cases, it will need to be replaced.
- The staples come out in an “M” shape. This problem is not caused by the stapler, but by the staples and their quality. Usually the "M" shape is for staples with long legs, so just replace the staples with "short leg" ones. If this does not help, then the problem is caused by the firing pin, which has worn out over time and taken on an incorrect shape. In this case, you need to disassemble the stapler and slightly “correct” the geometric shape of the striker using a file.
Conclusion
Now you know almost all the reasons why the stapler does not hammer the staples in completely. In most cases, this problem can be solved on your own. You can also repair the stapler yourself if other problems arise with the operation of this tool. Repairing the old one or buying a new one is up to you.