Attaching joists to a concrete floor: how and with what to install, what to lay
The joists are usually secured to the concrete floor using reliable screws or anchors. The latter option is more reliable, although along with it they also use corners and stands with automatic correction. Step-by-step instructions in different cases, practical advice from experienced craftsmen can be found in this article.
The content of the article
What kind of logs are suitable?
Logs are an affordable material that can be easily installed on your own. They ensure an even load on the floor and save money on installation. Fasteners for floor joists fit well both on a leveled surface and on a floor with defects that can be corrected by extending or sawing the timber.
But there is a significant disadvantage associated with the fact that the design can creak. Extraneous sounds appear due to improper installation or as parts wear out due to misalignment. Therefore, fasteners for joists on a concrete floor must be very rigid. In addition, it is necessary to take into account several requirements for the material:
- the humidity indicator should be a maximum of 18%, preferably even less;
- if the logs are not treated with compounds against rotting and for fire safety, this must be done immediately before installation;
- It is better not to fasten the lags right away - they need to be kept for several days in the room where installation is planned.
Installing logs involves choosing a material of a certain cross-section. It depends on what the beam pitch will be, i.e. distance between adjacent elements.
| Interval, cm | Minimum cross-section, mm |
| 30 | 150*80 |
| 40 | 180*100 |
| 50 | 200*150 |
| 60 | 220*180 |
In order for the fastening for the floor joists to be as reliable as possible, the maximum distance between adjacent beams should be calculated. It directly depends on the thickness of the top covering, for example, plywood.
| Coating thickness, mm | Maximum step, cm |
| 20 | 30 |
| 25 | 40 |
| 30 | 50 |
| 35 | 60 |
| 40 | 70 |
| 45 | 80 |
Fastening technology options
There are several ways to attach joists to a concrete floor. For example, they can be fixed with self-tapping screws or using such a reliable element as an anchor bolt. Step-by-step instructions with photos look like this.
Fastening using self-tapping screws
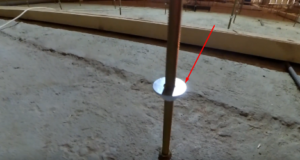
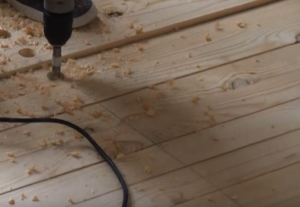
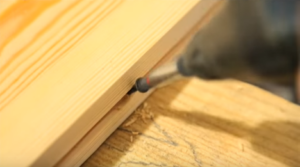
The main answer to the question of how to attach joists to a concrete floor is with self-tapping screws. To do this, just drill holes for dowels in the concrete floor and wooden beams. The sequence of actions is as follows:
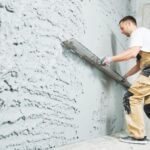
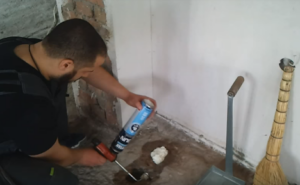
- All defects on the concrete surface are first eliminated. To do this, use polyurethane foam or solution.
- Attaching the joist to the concrete must be done on a clean surface; dust must first be removed from it using a vacuum cleaner.
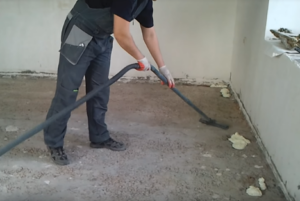
- Then they go over the floor with a primer solution, to which it is recommended to add an antiseptic.
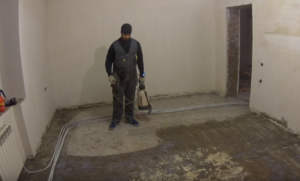
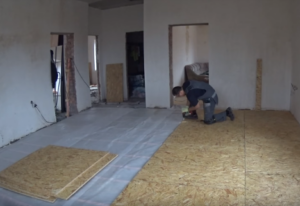
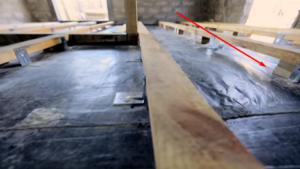
- Installation of logs on a concrete floor is carried out at intervals of 50 cm or less, depending on their cross-section.
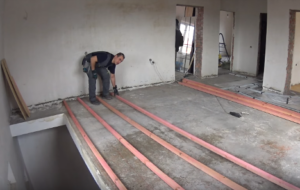
- If necessary, place plastic wedges under the bars to adjust the height. Constantly check the level readings.
- Regardless of the method of attaching the logs, the principle is the same - you need to make marks and drill holes for screws or anchors.
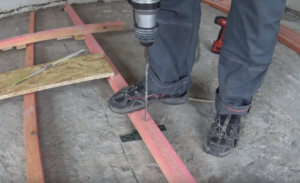
- Next, install a self-tapping screw, screw it in, and do the same with the rest of the fasteners.
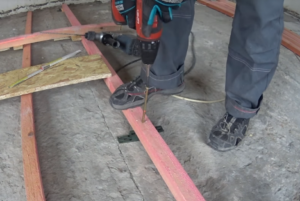
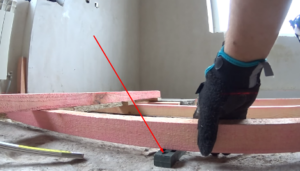
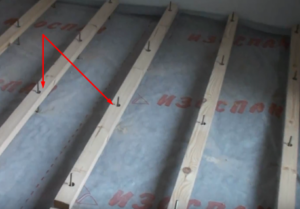
- The wedges are fixed with mounting tape, as shown by the arrows in the photo.
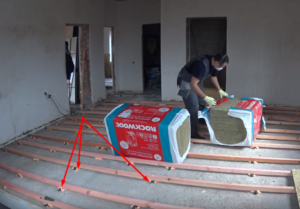
- Now it's time to lay the insulation in the space between the beams.
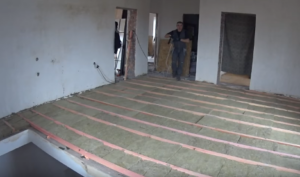
- A vapor barrier is laid on top.

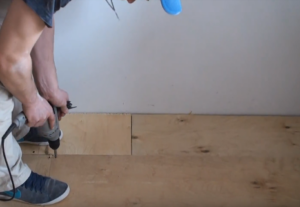
- OSB boards are laid and fixed - then comes the finishing.
Using Anchors
There is another way to install logs - for this they use anchor bolts. This fastening element is more reliable than self-tapping screws, since it provides maximum structural rigidity.
The method of securing joists to a concrete floor can be described as follows:
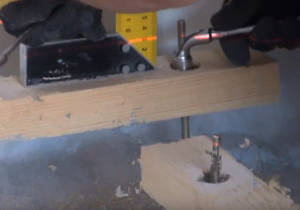
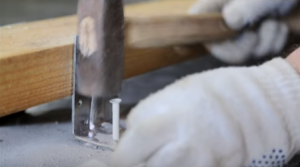
- They make markings, make holes in the beams and the floor surface, and the holes must be sufficient for the caps to “sink” into the wood. Drive the anchors directly into the concrete using a hammer.
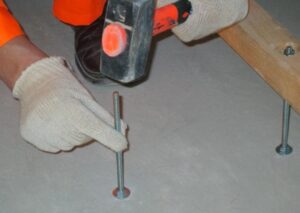
- Using a 13mm wrench, pull each anchor nut through to ensure it is well tightened. But at the same time, you shouldn’t make maximum efforts - you can break the thread.
- Before you begin installing the joists, you need to screw the bottom nut onto each anchor and install a washer. Moreover, the nut is placed with the reverse side.
- You need to put a washer on top.
- Drill holes in the joists taking into account the diameter of the cap.
- The corner joists are installed on anchors.
- Place the anchor cap on top for fixation.

- The nuts are tightened to the level.
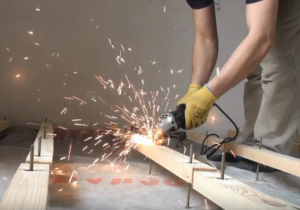
- Excess parts are removed with a grinder.
- Then, as in the previous case, it is necessary to lay the insulation and carry out the finishing touches.
Fastening with corners
There is no doubt whether joists need to be attached to a concrete floor. But this can be done in different ways, for example, using metal corners. The main stages are:
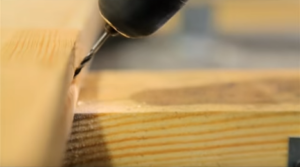
- Before attaching the corners to the joists, drill holes for self-tapping screws. Moreover, the fasteners need to be immersed in the wood as deeply as possible.
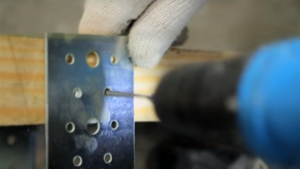
- It is necessary to drill holes in the surface of the concrete floor for dowels.
- Dowels are placed in the holes and screws are screwed in.
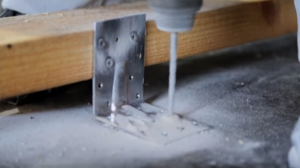
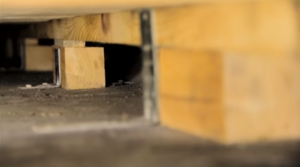
- Now you need to decide what to put under the joists on the concrete floor. It is recommended to place beams under them. This creates enough space and allows air to circulate unhindered.
- The bars are fixed using metal corners.
- Lay wooden flooring from tongue and groove boards.

- To strengthen the board at an angle, holes are made for self-tapping screws.
- The boards are fixed with self-tapping screws - they are placed in the grooves, maintaining an angle of 45°.
Today on the market you can also find adjustable beams with special racks. They are installed on a flat surface, and then the optimal height is determined by level. Such supports automatically adjust the tilt level within 5 degrees.
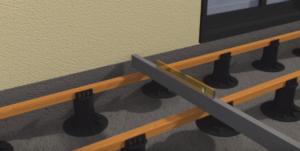
However, it is not at all necessary to purchase self-adjusting stands. In any case, you will need to pre-prepare the surface - if it is not level, the differences will become noticeable. Often in practice they use the option of fastening with anchors, since this will make the structure as rigid as possible. And even after several years of active load, the floor will not creak while walking.