How to work as a wood engraver: features of the profession and tricks from the masters
There are several rules that describe how to work as an engraver. They are associated with the peculiarities of preparing the design and processing the wooden surface. In general, burning technology depends little on the type of tool. The main stages of work and a master class with step-by-step instructions can be found in this material.
The content of the article
Main stages of work
To understand how to work as a wood engraver, you need to have proper training. Patterns and shapes can be very different, just like the models of drills. At the same time, the drawing technique is approximately the same in all cases. The step-by-step instructions are as follows:
- First, prepare a sketch. You can draw it yourself or print a ready-made version from open sources.
- The drawing is transferred to paper, preferably to copy paper.
- They process it, create a draft, draw the contours using a small drill or a needle cutter.
- Next you need to outline the background area using a large cutter.
- Create a base - processing wood with an engraver requires the use of stain or paint.
- When the surface is ready, sprinkle it with bronze powder and then blow off the excess. Can be wiped with a soft cloth.
This completes the main stage of work.But to make the drawing look more beautiful and remain like new for a long time, it is recommended to carry out additional processing. The main steps of the last step are described in the next section.
Additional processing
It is clear what an engraver does - these are all kinds of drawings, patterns, images on the surface of a wooden blank. Next, it is recommended to treat with a felt circle. A special paste is applied to it and the surface is wiped. This allows you to make it perfectly clean.
If the product is made of soft woods, such as aspen, willow or poplar, it is also recommended to apply a clear varnish (a small layer is enough). It reliably protects the product from moisture and increases service life. The engraver's capabilities are limited by the quality of the wood, so it is better to do additional processing.
At the last stage, wait for the varnish to dry, after which they polish the surface again. As soon as it takes on a homogeneous mirror structure, the product can be considered ready. At the same time, parts made of hard wood (for example, oak, cherry, apple tree) do not need varnishing. They allow you to enjoy natural beauty.
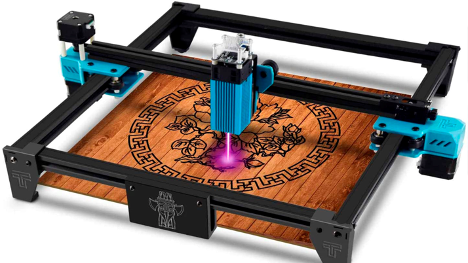
How to work with a laser engraver
For quality work, you need to choose the right tool and also study it. For example, a laser engraver is used for high-precision carving. It burns the surface using a focused laser beam. Thanks to this, it is possible to obtain a very thin, beautiful line with almost perfect edges.
Before starting carving, the necessary settings of the laser engraver are carried out. To do this, you need to read the instructions. In general, the sequence of actions is as follows:
- Free up your workplace.
- Before switching on, check the cable connections and the liquid level.
- Connect the compressor.
- Turn on the laser itself.
- Connect the CNC or the desired program on your computer - it allows you to clearly see how to work on a laser engraver.
- Carry out the correct setup - set the parameters. They depend primarily on the type of wood.
Next, the operator begins processing. If necessary, the part is varnished as described above. The procedure is exactly the same, but the result is noticeably better. This is possible thanks to a laser engraver, the use of which allows you to obtain very precise lines.
Carving Tips
On the one hand, it is not difficult to understand how to work as an engraver correctly. After the first lesson, the operator learns to “feel” the tool and obtain precise lines of the required thickness. It is recommended to study several video tutorials, as well as advice from experienced professionals:
- You can work with different types of wood, but it is worth considering that hard varieties do not reflect the texture of the image as well as soft ones.
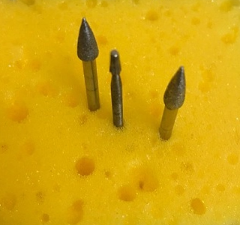
- When transferring the contours of a figure to the surface of the board, you must not forget to shade the background, which should then be removed. It is circled with a small drill, the cross-section of which has the shape of a star. To do this, it is useful to learn how an electric engraver works.
- After this, the entire area with the background is selected. If it is quite large, you can take a larger drill. Then the whole process will go faster.
- The main parameter that needs to be controlled during engraving is the cutting depth. To perform high-quality burning, it is recommended to study lessons on working with an engraver. It is also recommended to practice on a rough workpiece.
- After the background is cut, it should be sanded using sandpaper. Then you can start cutting out the elements of the actual design.
You need to act carefully, observing safety precautions. This is especially important with laser engravers, which can burn your eyes.
Master class on burning
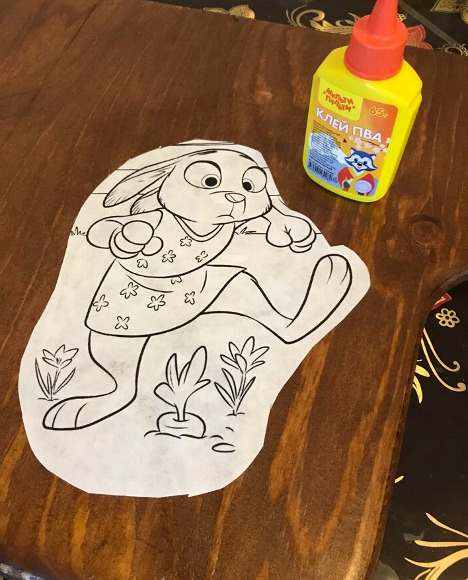
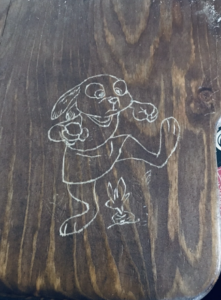
As an example of how to use an engraver, consider a master class on applying a design to a shelf in a child's room. The sequence of actions is as follows:
- Find a drawing and print it on paper, then glue it to a wooden surface.
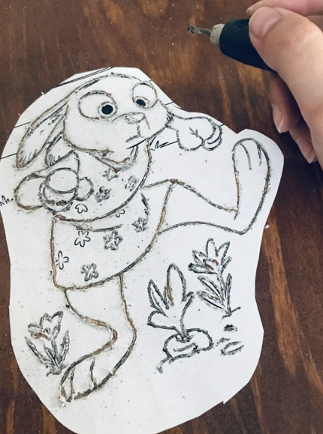
- After the paper has dried, start working. This example makes it easy to see what a wood engraver can do. Using different nozzles, it is possible to draw any lines. At the same time, it is better not to set high speeds on the instrument - within 20,000 is quite enough.
- Carefully trace each contour with the tool, and then remove the stencil. Remove any remaining adhesive with a clean, damp cloth.
- Highlight the texture with stain. Thanks to this, the image will be clearer, which is especially important on a light surface.
Thus, using an engraver in everyday life is not too difficult. Using the tool is quite simple - even a beginner can handle it. But first it is recommended to practice on a rough blank, after which you can proceed to the main stage of work.