How to set up a spray gun for painting? Instrument setup
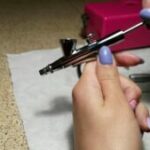
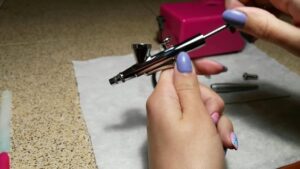
Setting up the spray gun is a mandatory procedure before painting. First of all, you need to check the pressure, which is easy to do with a built-in pressure gauge. Next, adjust the size of the torch and air supply. Then they carry out preliminary testing and begin painting. How to properly complete all the preparatory work is described in detail in this material.
The content of the article
Device and principle of operation
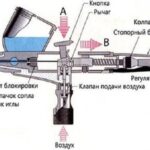
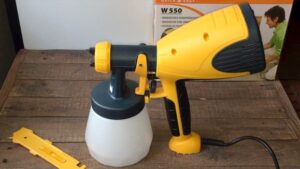
A pneumatic spray gun consists of a mechanism and a paint tank. It has a nozzle, feed channels, a needle, and also a handle with a needle. The device is also equipped with several regulators that control different processes and parameters:
- torch size;
- air supply;
- paint supply.
The spray gun is adjusted using these elements - they are shown in the diagram.

If we describe the principle of operation in more detail, we get the following sequence:
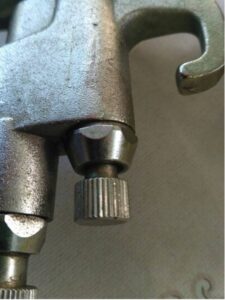
- A regulator that determines the volume of air supply - it allows you to figure out how to set up the spray gun for painting. With it, you can set a certain level of pressure under which the paint will be sprayed.
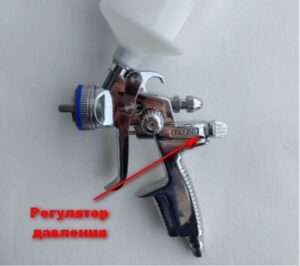
- A regulator that determines the volume of paint supply - it can be found at the end of the device. The mechanism adjusts the volume of paint supplied - if necessary, it can be reduced or increased at any time.
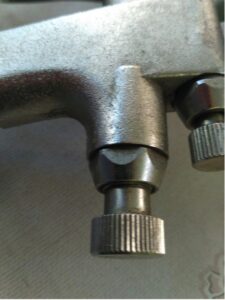
- Another element with which you can understand how to properly configure the spray gun is the torch size regulator. It allows you to set the desired shape and size of the torch, which makes painting better.
Based on this diagram and analysis of individual elements, you can understand how the spray gun works. The principle is related to the supply of compressed air under pressure. It pushes out paint, which is forced through a narrow nozzle.
The coloring material is supplied evenly. Moreover, the greater the air flow pressure, the smaller the droplets of the composition will be. Here's how a pneumatic spray gun works.
Since both the pressure level and the volume of paint can be adjusted, it becomes possible to fine-tune the painting process and achieve the desired result.
Pressure setting
In order not to encounter a problem and not try to figure out how to fix the spray gun, you need to learn how to configure it correctly. Moreover, you should start with pressure, since this is the most important indicator. It is always indicated in the tool description, i.e. in the manufacturer's instructions.
Moreover, in practice, situations may arise when the device does not work correctly. Then you will need to figure out why the spray gun is spitting paint and make your own adjustments. The best way is to use a pressure gauge that is connected to the handle of the gun. Then proceed like this:
- Open the torch size and air supply regulators (the mechanisms must be turned to the maximum).
- The mechanism is activated by pressing the trigger.
- At the same time, rotate the screw to adjust the pressure gauge.
- After the pressure reaches the desired value, completely open the paint supply (make 3-4 circles with the regulator).
- Then you need to test how the spray gun works and start painting.
It also happens that the device is already equipped with a pressure gauge - in such cases, setting the pressure is even easier. If necessary, the procedure can be repeated before each procedure for “fine” adjustments.
Other settings
In order not to encounter a malfunction and not have to repair the spray gun, you need to configure other parameters. Of particular importance among them are:
- Torch size - if it is wide, the paint is evenly distributed over the surface, even if there are few passes. As a rule, the screw is moved to the maximum position and painting begins. But if you need to apply the composition to small parts or hard-to-reach places, you need to adjust the size of the torch.
- To properly understand how an electric spray gun works, you need to correctly configure the paint supply. For normal work, for example, painting an entire part or body, the valve is opened to the maximum. If smaller repairs need to be performed, the hole can be reduced slightly. Moreover, it is worth remembering that it is in the maximum position that the nozzle and needle wear out much less.
- It is also important to understand what a nozzle is in a spray gun. This is what a nozzle or nozzle is called, i.e. element of the spray head. Its diameter is also adjusted, increasing or decreasing depending on the composition. For example, for base enamel 1.3-1.4 mm is enough, for liquid putties – already 2-3 mm. And anti-gravel coatings are sprayed through a nozzle with a diameter of 6 mm.
Preliminary tests of the spray gun
Now it’s clear how to adjust the spray gun. Once you have configured the necessary parameters, you do not need to start working right away.Even if you have a lot of experience, you need to test the tool first. First of all, check how correct the shape of the torch imprint is:
- Open all screws to maximum position.
- Take rough material for the test.
- The axis is directed towards it at a right angle, i.e. perpendicular.
- Spray for a second.
- Study the imprint of the torch.
The sprayer allows you to apply the coloring composition evenly. But for this work to be truly high-quality, additional testing needs to be done:
- Rotate the tool so that the torch imprint is horizontal.
- Press the trigger and spray until the coloring composition begins to flow in a stream.
- If all the settings are correct and the material is of high quality, the composition should drain at approximately the same speed. A slight excess in the middle is allowed.
Another test is related to checking the quality of spraying - it is carried out last, but it is also important. Take a test strip and spray the composition at the same speed. As a result, droplets will appear, which normally should be approximately the same size. It is allowed that they are slightly larger in the center than on the sides.
You can set up the spray gun yourself. This is a fairly simple procedure, however, it is of great importance before each painting. If you correctly adjust the pressure and other parameters, the result will be of consistently high quality, and the device itself will last much longer.